

Contents
On this page
Stripe Terminal - Plugixa POS for WooCommerce
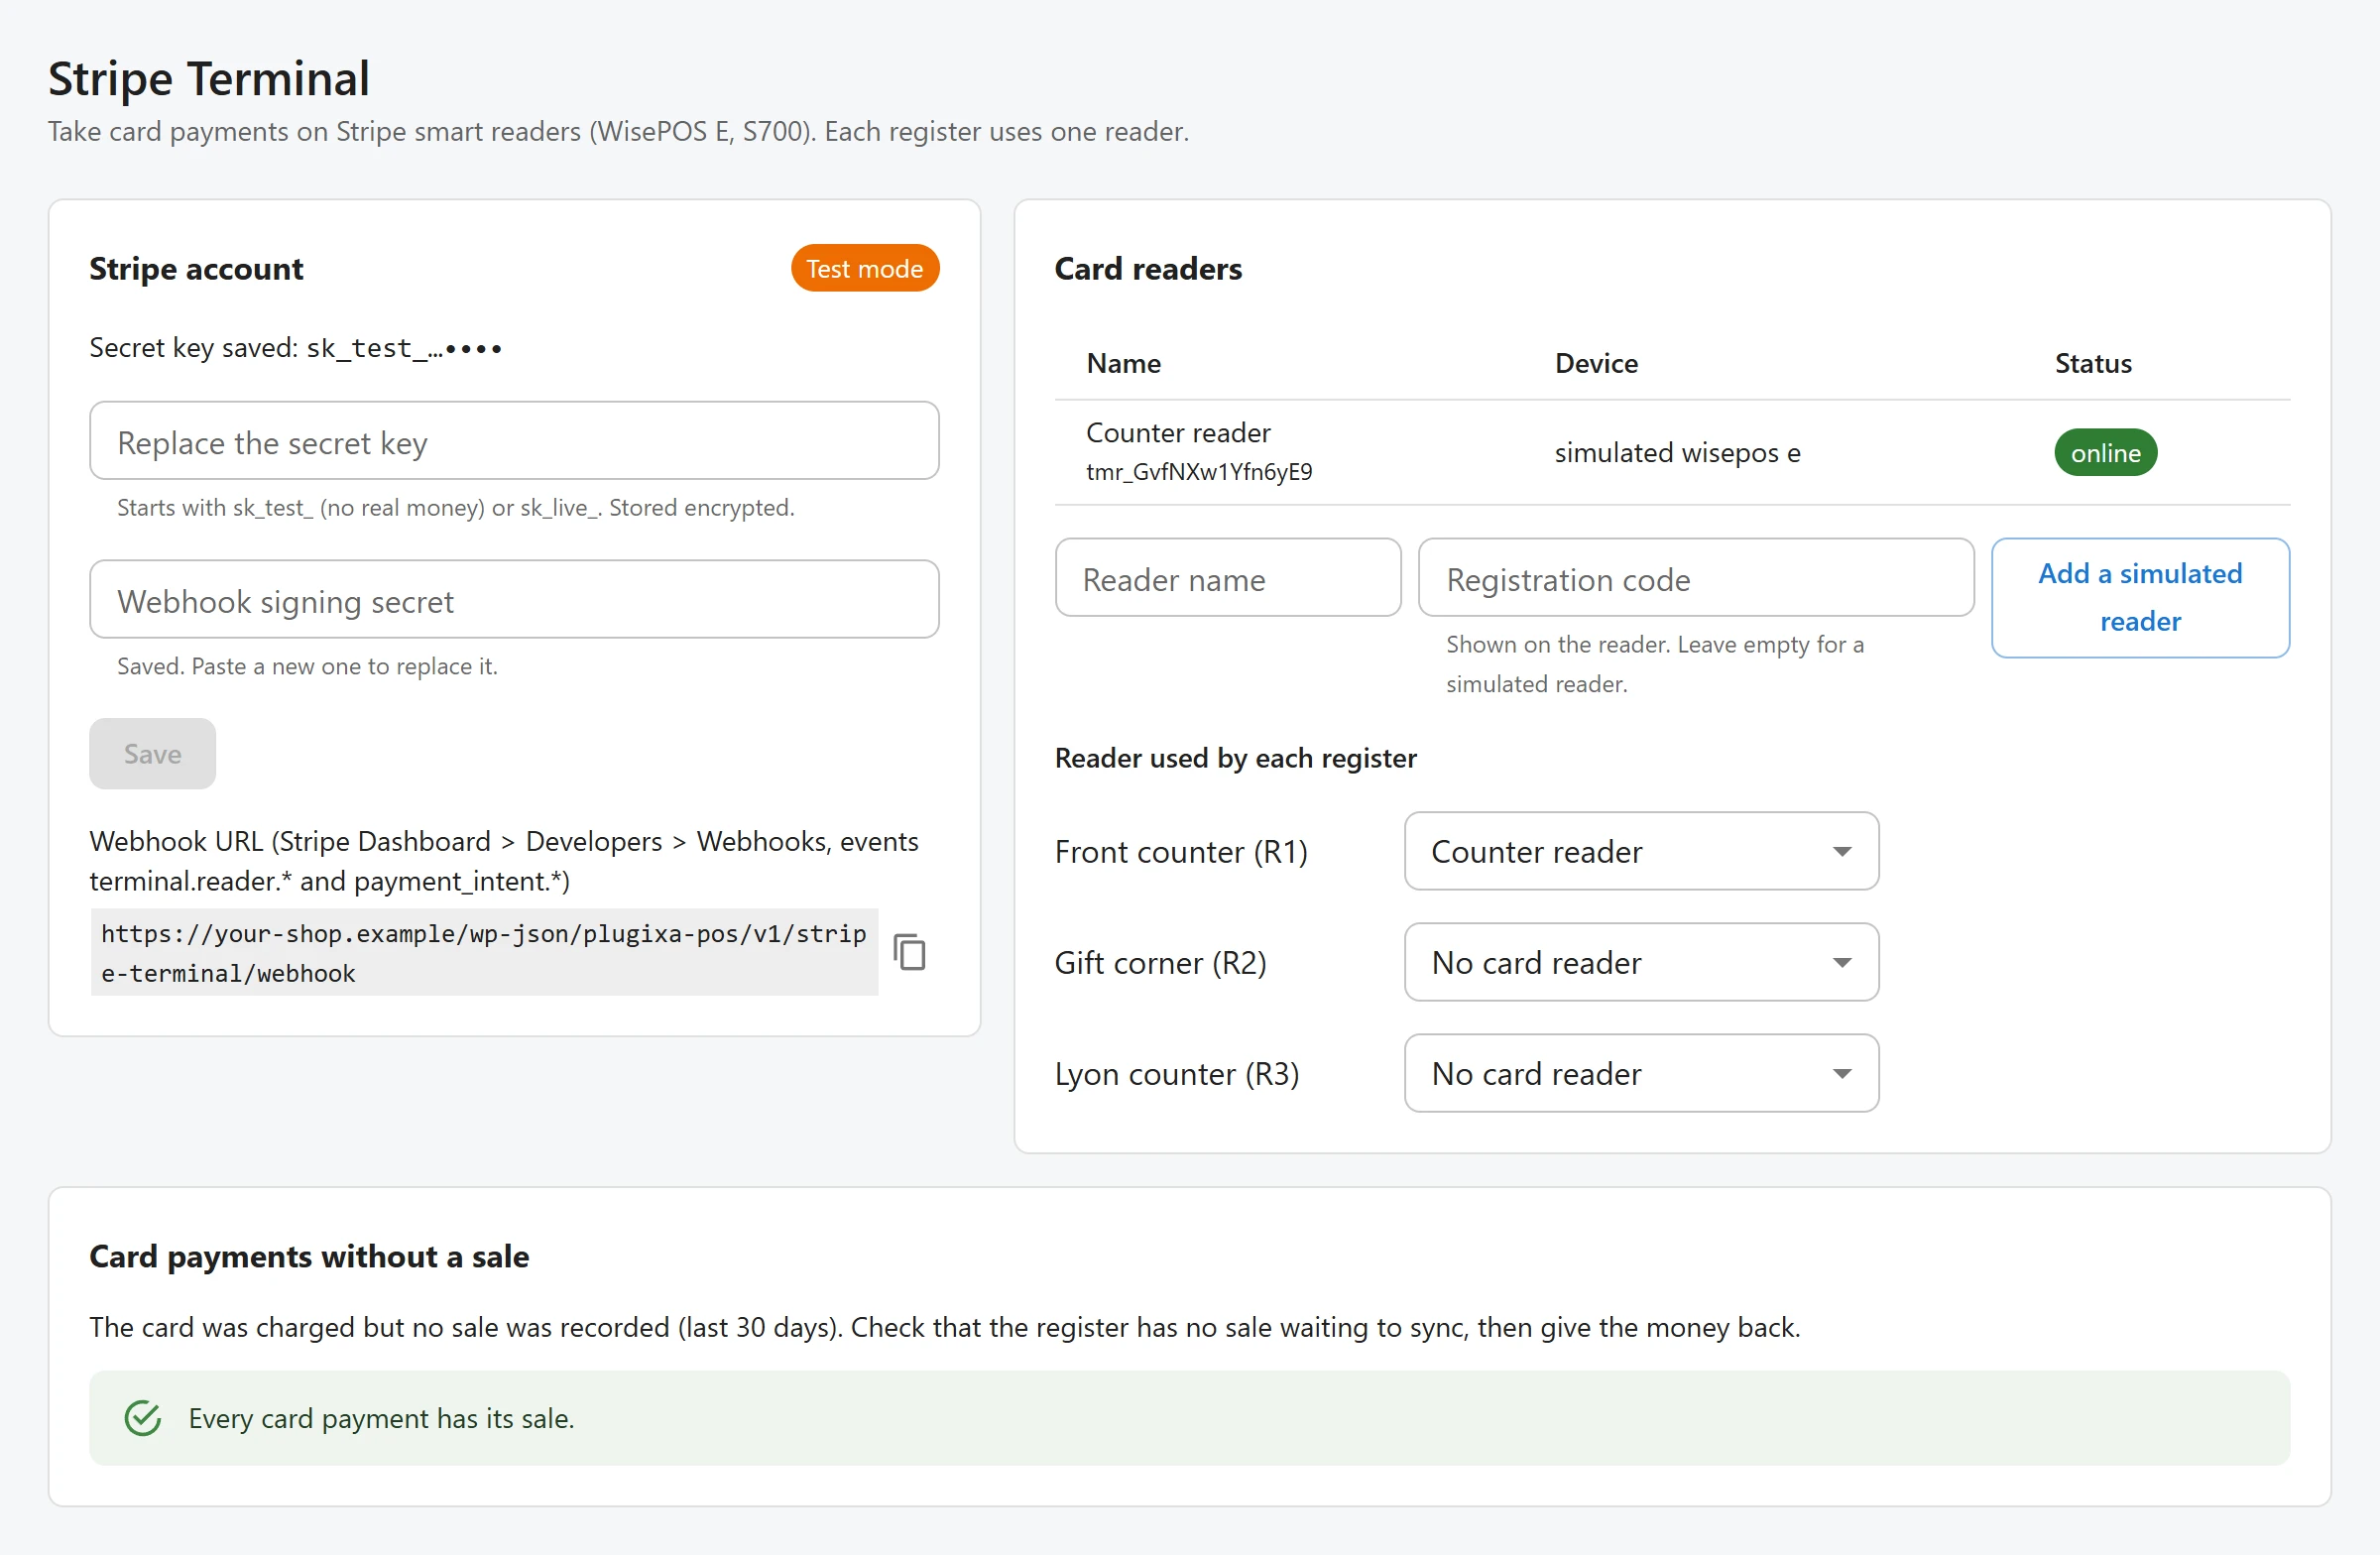
Stripe Terminal lets the register take card payments on a Stripe smart reader. The cashier sends the amount to the reader, the customer taps, inserts or swipes their card, and the payment is added to the sale. Refunds go back to the same card through Stripe, without the card.
The screen’s own words: “Take card payments on Stripe smart readers (WisePOS E, S700). Each register uses one reader.” No Stripe code runs in the browser: your site talks to Stripe, and Stripe drives the reader.
Open Plugixa POS > Stripe Terminal (in the Store group). The screen needs the right to manage the POS settings.
1. Save your Stripe key
In the Stripe account card:
| Field | Notes |
|---|---|
| Secret key | “Starts with sk_test_ (no real money) or sk_live_. Stored encrypted.” Find it in your Stripe Dashboard under Developers > API keys. A restricted key (rk_test_ or rk_live_) is accepted too. |
| Webhook signing secret | “Starts with whsec_. Optional: without webhooks the register asks Stripe directly.” |
Click Save. Before it stores the key, the plugin asks Stripe whether it accepts it. A typo is caught here: “Stripe did not accept this key:” followed by Stripe’s reason.
Keys are stored encrypted with your site’s own salts and are never sent back to the browser. Once a key is saved:
- A badge shows Test mode for a test key or Live for a live one.
- Secret key saved shows the first eight and the last four characters of the key, nothing more.
- The field becomes Replace the secret key. Leave it empty to keep the saved key.
Saving a key of another Stripe account forgets the readers and location of the old one: add the readers again after the change.
Currency and country
A reader charges in the currency of your Stripe account. If your shop sells in another currency, the screen shows a warning such as “Card readers charge in USD, the currency of your Stripe account (US), but the shop sells in EUR.” and the register refuses to send payments until they match.
Readers are registered at a Stripe Terminal location that the plugin creates once, from the shop address in WooCommerce > Settings > General. That address must be in the country of your Stripe account.
2. Add the webhook (optional)
The webhook lets Stripe tell your site at once how a payment on the reader ended. Without it the register asks Stripe directly while it waits, which also works.
-
Copy the address shown under the Webhook URL label. It looks like this:
https://example.com/wp-json/plugixa-pos/v1/stripe-terminal/webhook -
In Stripe, go to Developers > Webhooks and add an endpoint with that address, with the events
terminal.reader.*andpayment_intent.*. -
Paste the endpoint’s signing secret into Webhook signing secret and click Save.
Every event is checked against the signing secret. An event signed more than five minutes ago is refused.
3. Add your readers
Readers are added in the Card readers card once a key is saved.
- Turn the reader on and follow its own steps until it shows a registration code.
- Type a Reader name, for example
Front counter reader. - Type the Registration code shown on the reader.
- Click Add the reader.
The table lists every reader of your Stripe account with its Name, its Stripe id, its
Device type and its Status (online shows in green).
No reader yet? With a test key, leave Registration code empty and click Add a simulated reader. Stripe creates a simulated reader, and the register shows test buttons to approve or decline a card (see below). Simulated readers exist only with a test key.
Give each register its reader
Under Reader used by each register, every register has a list. Pick the reader it uses, or No card reader. The choice is saved at once.
Taking a card payment
Once a key is saved, the register’s payment screen offers Card reader (Stripe).
- Press Pay and choose Card reader (Stripe). The Card payment dialog opens.
- Amount is the amount still due. Lower it to pay part of the sale by card and the rest another way.
- Click Send to the reader. The dialog shows the amount and “Ask the customer to tap, insert or swipe their card on the reader.”
- When Stripe confirms the payment, the dialog closes and the card payment is added to the sale. Finish the sale as usual. See Payments.
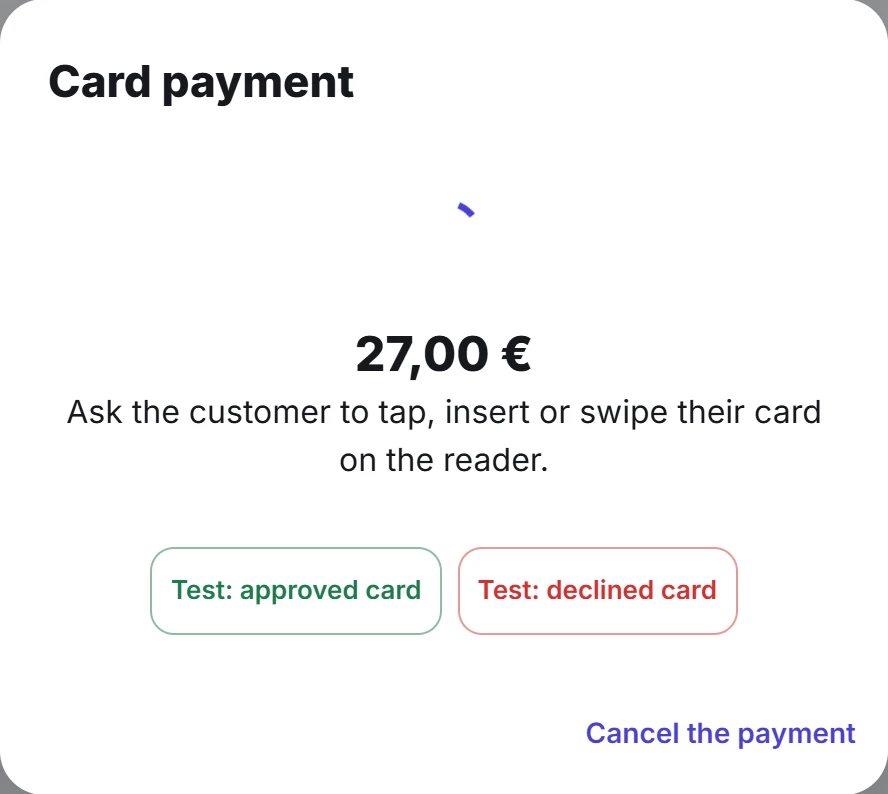
If the card is declined, the dialog shows Stripe’s reason (or “The card was declined.”) and a Try again button. Cancel the payment stops the reader. If the customer paid in that same moment, the payment is kept and added to the sale, never lost.
A register with no reader shows “No card reader is set for this register. Set one in Stripe Terminal settings.”
In test mode, the waiting dialog has two buttons, Test: approved card and Test: declined card, which present a test card on the reader for you.
The card reader works through your site, so it needs a connection. A retried request, such as a double tap, reuses the same Stripe payment instead of charging twice.
What the site checks
The register’s word is not taken for it. When the sale is recorded, the site fetches each card payment from Stripe and refuses the sale unless the payment:
- went through (“The card payment has not gone through.”),
- is for exactly the amount and currency of that payment on the sale (“The card payment does not match the amount of the sale.”),
- was made by this POS at this register,
- does not already pay another sale (“This card payment already pays another sale.”).
Refunds
When you refund a sale that was paid on a reader, choose the card reader as the way to pay back. The money goes back to the card through Stripe, inside the refund itself: if Stripe refuses (“Stripe did not make the refund.”), the refund is not recorded. Refunding a sale that was not paid on a reader this way is refused with “This sale was not paid on a card reader: choose another way to pay back.” See Refunds.
Card payments without a sale
Sometimes the card is charged but no sale is recorded: the register crashed or lost its connection, or the sale was refused after the payment (stock, a closed session). The customer has paid and the shop has no sale.
The Card payments without a sale card lists these payments from the last 30 days, with Date, Register and Amount. Payments from the last ten minutes are left out, because a register may still be recording their sale. “Every card payment has its sale.” means there is nothing to do.
- Check that the register has no sale waiting to sync. With offline selling, see Offline mode.
- Click Refund on the payment, then Refund to the card.
The whole amount still on the card goes back to the customer. Once refunded, a register that sends the sale later is refused, so the customer is never charged and refunded for the same sale. This needs the right to manage the settings and the right to make refunds.
Related
Quick Links
Share