

Contents
Customer display - Plugixa POS for WooCommerce
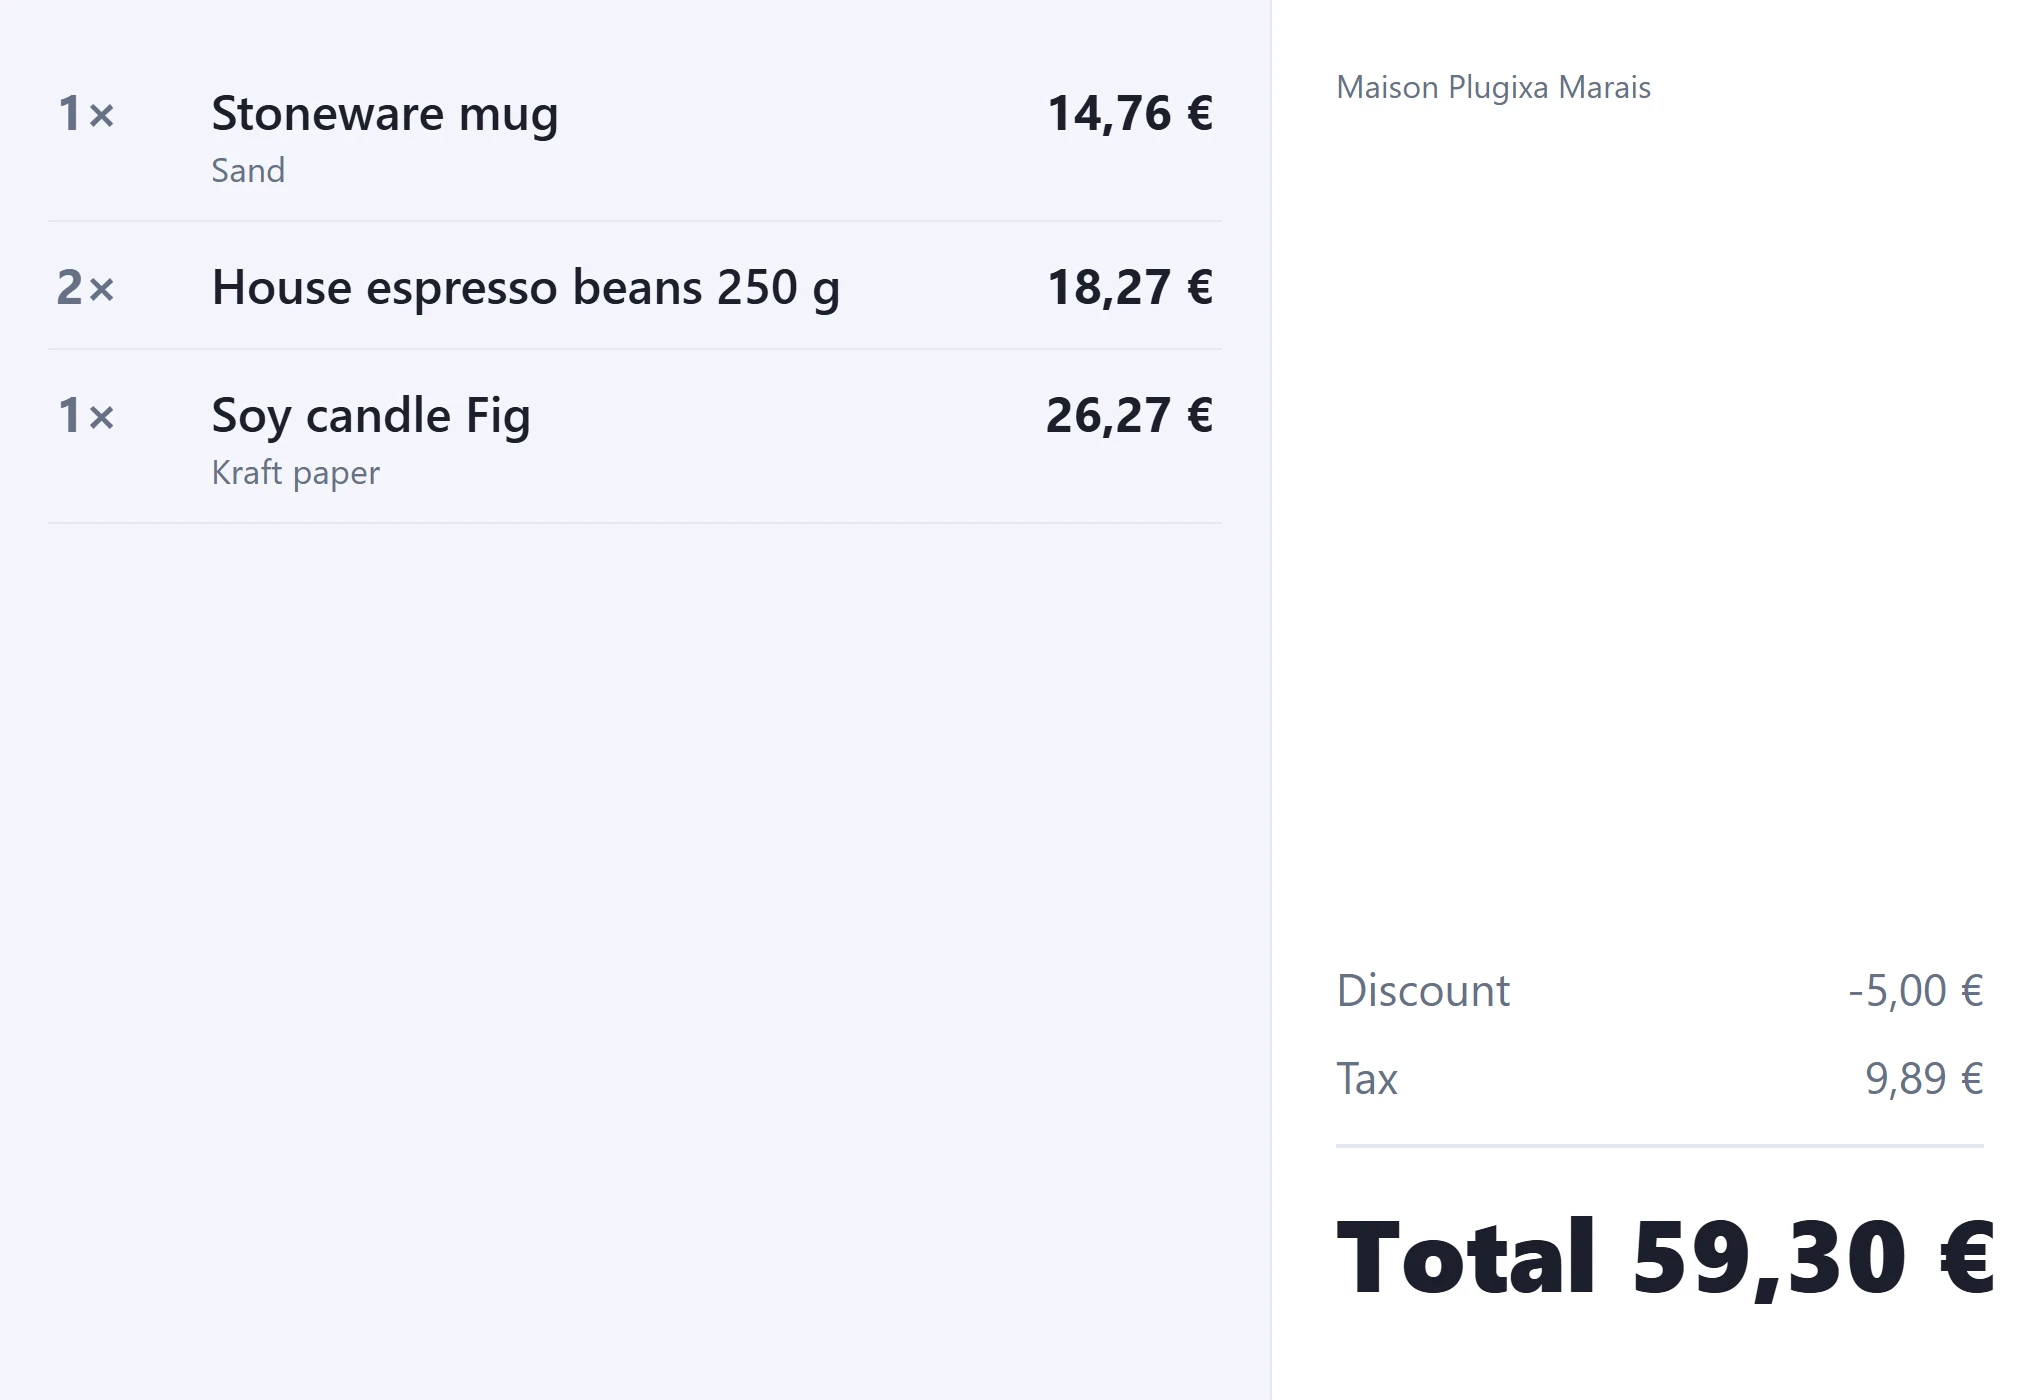
The customer display is a second screen that faces the customer. While the cashier rings up the sale it shows each line and the total, after payment it thanks the customer and shows the change, and when the customer pays by QR code it shows the code to scan.
It can run in two places:
- A monitor on the register’s own computer: a second window you drag onto a screen facing the customer. It updates instantly.
- A tablet or any other device: paired with the register by a code. Nobody has to sign in on the tablet.
There is nothing to set up in the back office. Everything starts from the register.
Open it on a second screen
- In the register’s top bar, click the screen icon (Customer display).
- Choose Open on a second screen (“A window to drag onto a monitor facing the customer”).
- A new window opens. Drag it onto the monitor that faces the customer and make it full screen (F11 in most browsers).
The window follows the register in the same browser on the same computer. If you close it, open it again from the same menu: it picks up the current sale at once.
Pair a tablet
-
In the register’s top bar, click Customer display and choose Pair a tablet.
-
The Pair a tablet dialog shows an address and an eight-character Code: “On the tablet facing the customer, open this address. No login is needed on the tablet.”
-
Open that address in the tablet’s browser. It looks like this:
https://example.com/?plugixa_pos_display=K7MP4XQ2 -
Click Done.
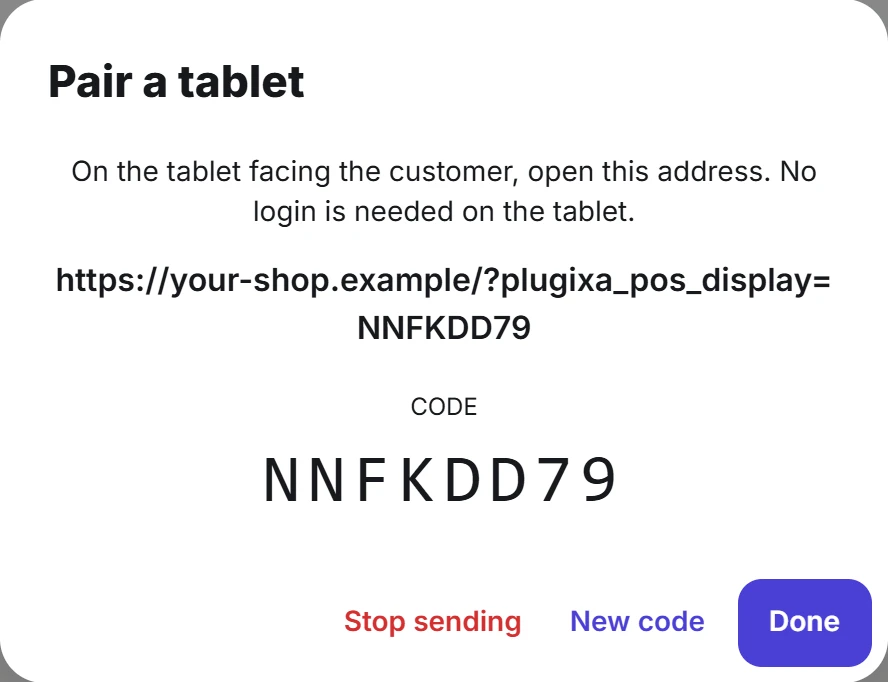
While a tablet is paired, the menu shows Paired under Pair a tablet and the screen icon is highlighted. The tablet checks for changes about once a second.
The code belongs to the register, not to the device. If another device also sells on that
register, choose Pair a tablet on it too: it gets the same code and sends to the same tablet.
Codes use letters and digits that are hard to confuse when read aloud (no 0, O, 1,
I or L).
| Button | What it does |
|---|---|
| Stop sending | This browser stops sending the sale to the tablet. The code stays valid. |
| New code | Makes a new code for the register. The old address stops working: the tablet then shows “This display is not paired. Pair it again from the register.” |
| Done | Closes the dialog. |
If the tablet loses the connection, it shows Reconnecting… and tries again on its own.
What the customer sees
| Moment | On the screen |
|---|---|
| No sale in progress | Welcome and the store name. |
| During the sale | Each line with its quantity, name, variation and options, and its amount. Beside them the store name, Discount and Tax when there are any, and the Total. The newest line stays in view on a long sale. |
| After the sale | Thank you! with the Total, what was Paid and the Change when there is some. It stays for ten seconds, or until the next sale starts. |
| Paying by QR code | “Scan to pay with” and the provider’s name, the QR code and the Total. See Pay links. |
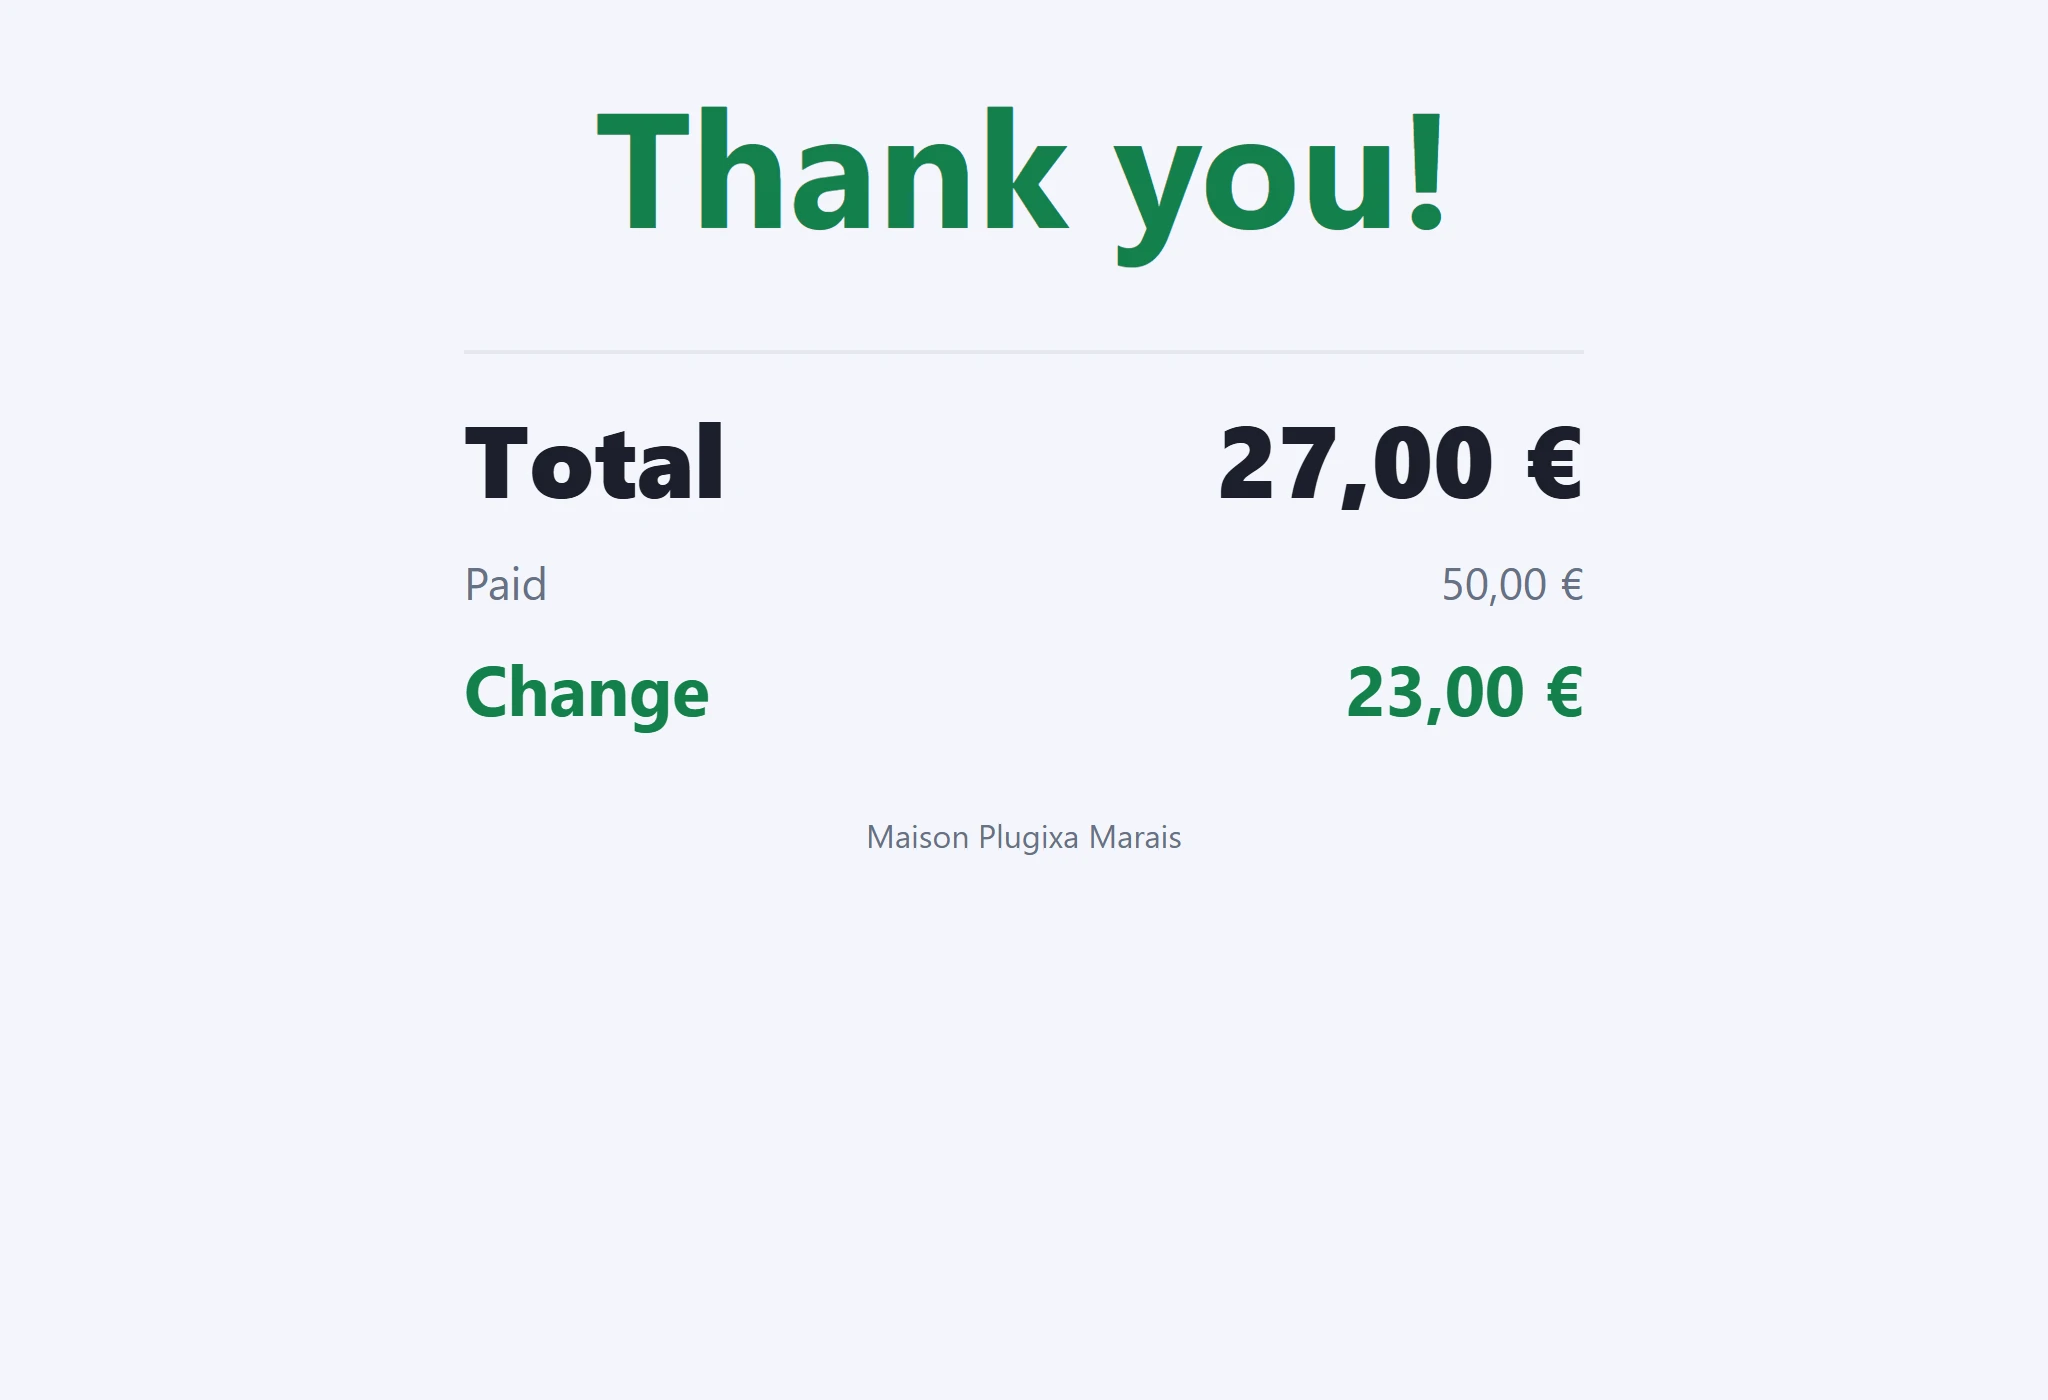
The display page is a plain page of your site, without your theme, and works on modest tablets.
Privacy
The display never receives the customer’s name. The register sends only what the screen shows, as text: the lines, the totals and the store name. The tablet’s address gives access to that one register’s screen and nothing else, and the screen is kept on the site for six hours at most.
Related
Quick Links
Share