

Contents
On this page
The register - Plugixa POS for WooCommerce
The register is where your cashiers sell. It is a full-screen page of your own site at /pos,
made for touch screens, mouse and keyboard alike. It loads only its own code, not your theme,
so it stays fast on a tablet.
Signing in
The register is open to signed-in WordPress users who have access to the POS.
- A visitor who is not signed in is sent to the WordPress login page, then back to
/pos. - A signed-in user without access sees You do not have access to the register. Ask a store manager to give you access.
Who may sell, refund, give discounts or open and close sessions is set per user. See Staff access. With Pro, cashiers can also switch the till to a colleague with a PIN and lock it between sales PRO: see Staff.
Before the first sale, a device picks its register and a manager opens the cash session. Both steps are described in Getting started.
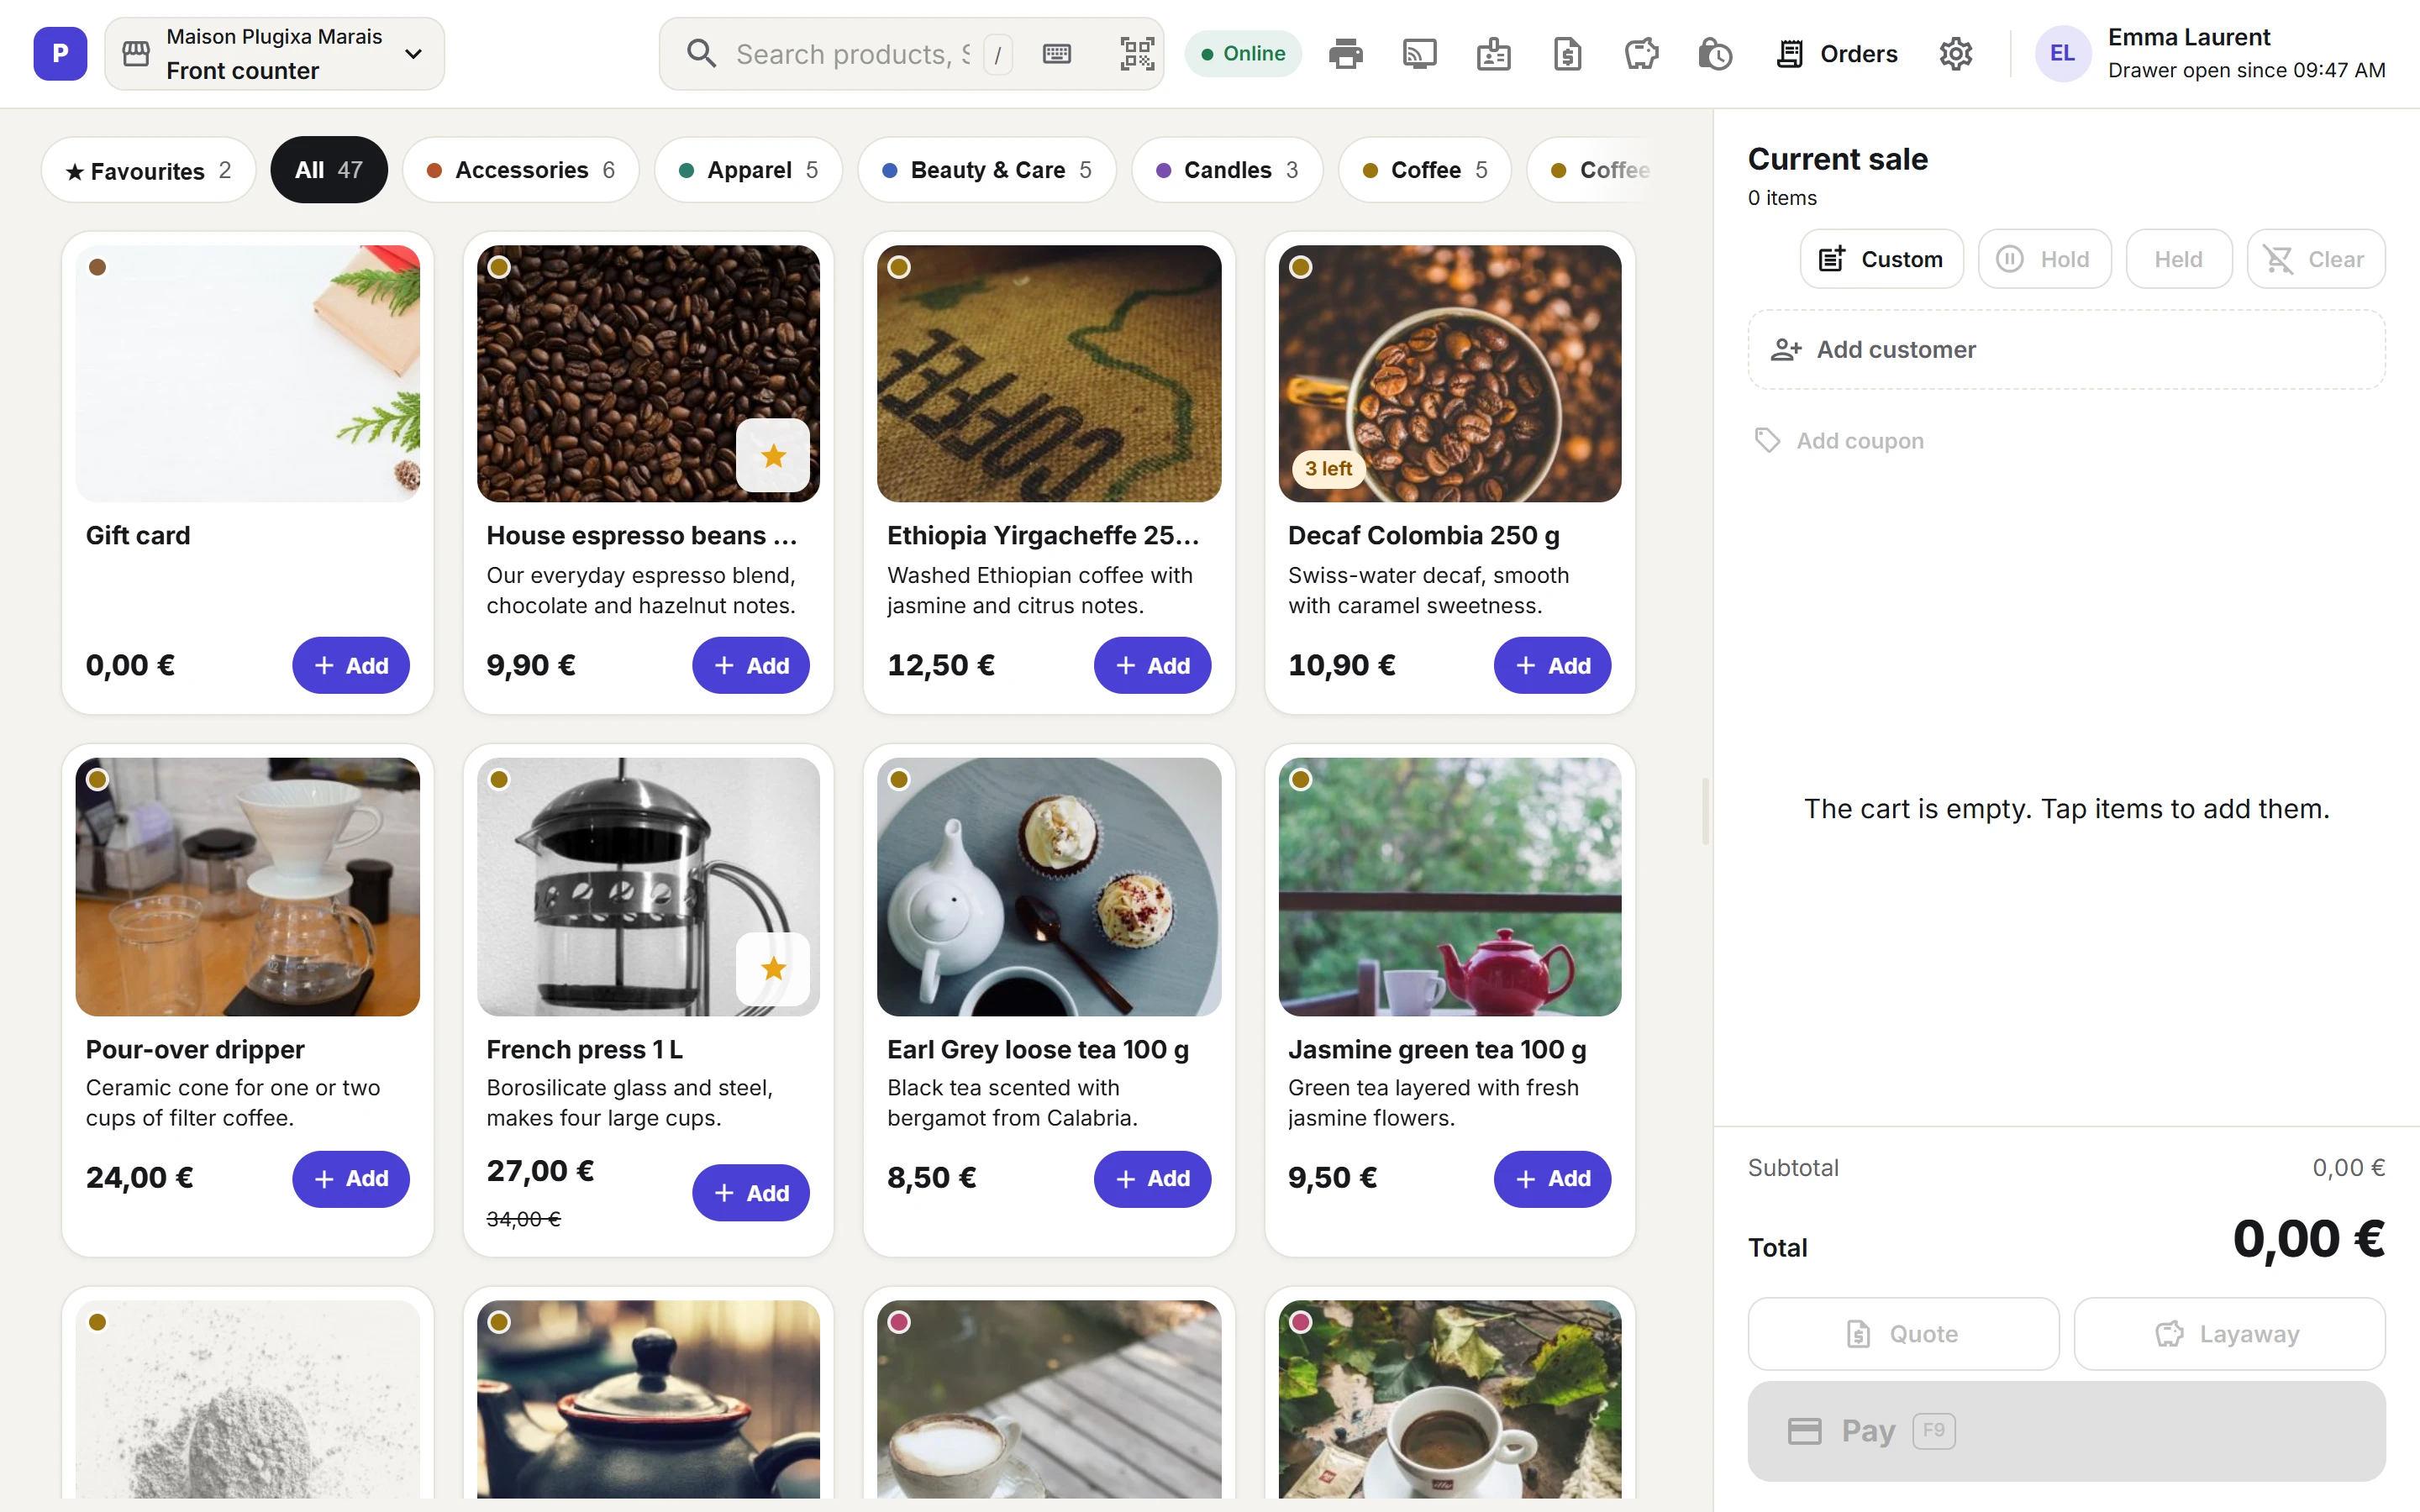
The top bar

From left to right:
| Item | What it does |
|---|---|
| Store and till | Shows the store name above the register name, for example Maison Plugixa Marais and Front counter. With several registers, click it and choose Switch register. |
| Search box | Search products, SKU or scan a barcode. Press / to jump to it. See Products and search. |
| Online / Offline | Whether the device has a connection, as the browser reports it. |
| Register menu | The lock-and-clock icon: X-report, Cash in / out and Close register (Z). See Cash sessions. |
| Orders | The sales of the current session, with reprint and refund. On that screen the button becomes Sell, the way back. See Refunds. |
| Settings | Opens the Plugixa POS back office in wp-admin. |
| Cashier | The signed-in user’s name and initials, with Drawer open since and the time the session was opened. |
With Pro, more buttons can appear in the top bar, such as the receipt printer, the customer display or the quotes and layaways screens PRO.
Switching till
When the device belongs to more than one register:
- Click the store and till button at the top left.
- Choose Switch register.
- Pick the other register.
Switching empties the current cart, because its prices belong to the other till. Each device remembers its own register, so two tablets at two tills never mix up their sales.
The product side
The left side holds the category buttons and the product cards. Tap a card, or its Add button, to put it in the cart. A product already in the cart shows a coloured border and a - / + stepper in place of Add. See Products and search.
The cart
The right side is the Current sale, with the number of items under its title. From top to bottom:
- Custom, Hold, Held and Clear buttons. Custom is only shown to a user who may give discounts. Clear asks twice: the first tap turns it into a red Clear?, a second tap within 3 seconds empties the cart.
- Add customer and Add coupon. See Customers and discounts.
- The lines. Tap a line’s name to add a note or a discount. Use - and + to change the quantity; at one unit, - becomes a bin icon that removes the line.
- Subtotal, Discount when there is one, + Discount on the sale, Tax and the Total in large print.
- Pay, with the total and its key hint F9. See Payments.
The cart is kept in the browser. If the page is reloaded or the tablet restarts, the sale in progress is still there.
Making the cart wider or narrower
On a screen at least 900 pixels wide, a thin handle sits between the products and the cart.
- Drag it to the left to widen the cart, to the right to narrow it. The width goes from 320 to 640 pixels.
- Double-click it to go back to the default width of 420 pixels.
- With the handle focused, the arrow keys, Home and End also resize it. See Keyboard shortcuts.
Each device remembers its own width.
Live sync
The register loads the whole catalogue when it opens, then asks the server every 30 seconds which products changed: a sale at another register, a stock change in WooCommerce, an online order or a new price. Only the changed products are fetched again, so the grid stays current without reloading the page. A product that is unpublished or deleted leaves the grid. The register also checks right after each of its own sales, and whenever the tab comes back into view.
No extra server is needed: this works on any WordPress hosting.
Phones and small screens
The register adapts to the width of the screen:
- Below 900 pixels, the products sit above the cart instead of beside it, the resize handle is hidden, and the cashier’s name is left out of the top bar.
- Below 1200 pixels, Orders and Sell show only their icons.
With Pro, a phone gets its own layout PRO: the products fill the screen, a View cart bar at the bottom shows the item count and total, and the cart slides up from the bottom. Pro also lets you scan barcodes with the phone’s camera.
Quick Links
Share