

Contents
On this page
Receipt templates - Plugixa POS for WooCommerce
Pro lets you design the receipt the register prints: which blocks it has and in what order, your own texts, a logo, a barcode or QR code. You make one or more designs and choose which store prints which. Pro also lets each till print straight to a thermal receipt printer and open the cash drawer.
Without a design, a store prints the default receipt described in Receipts.
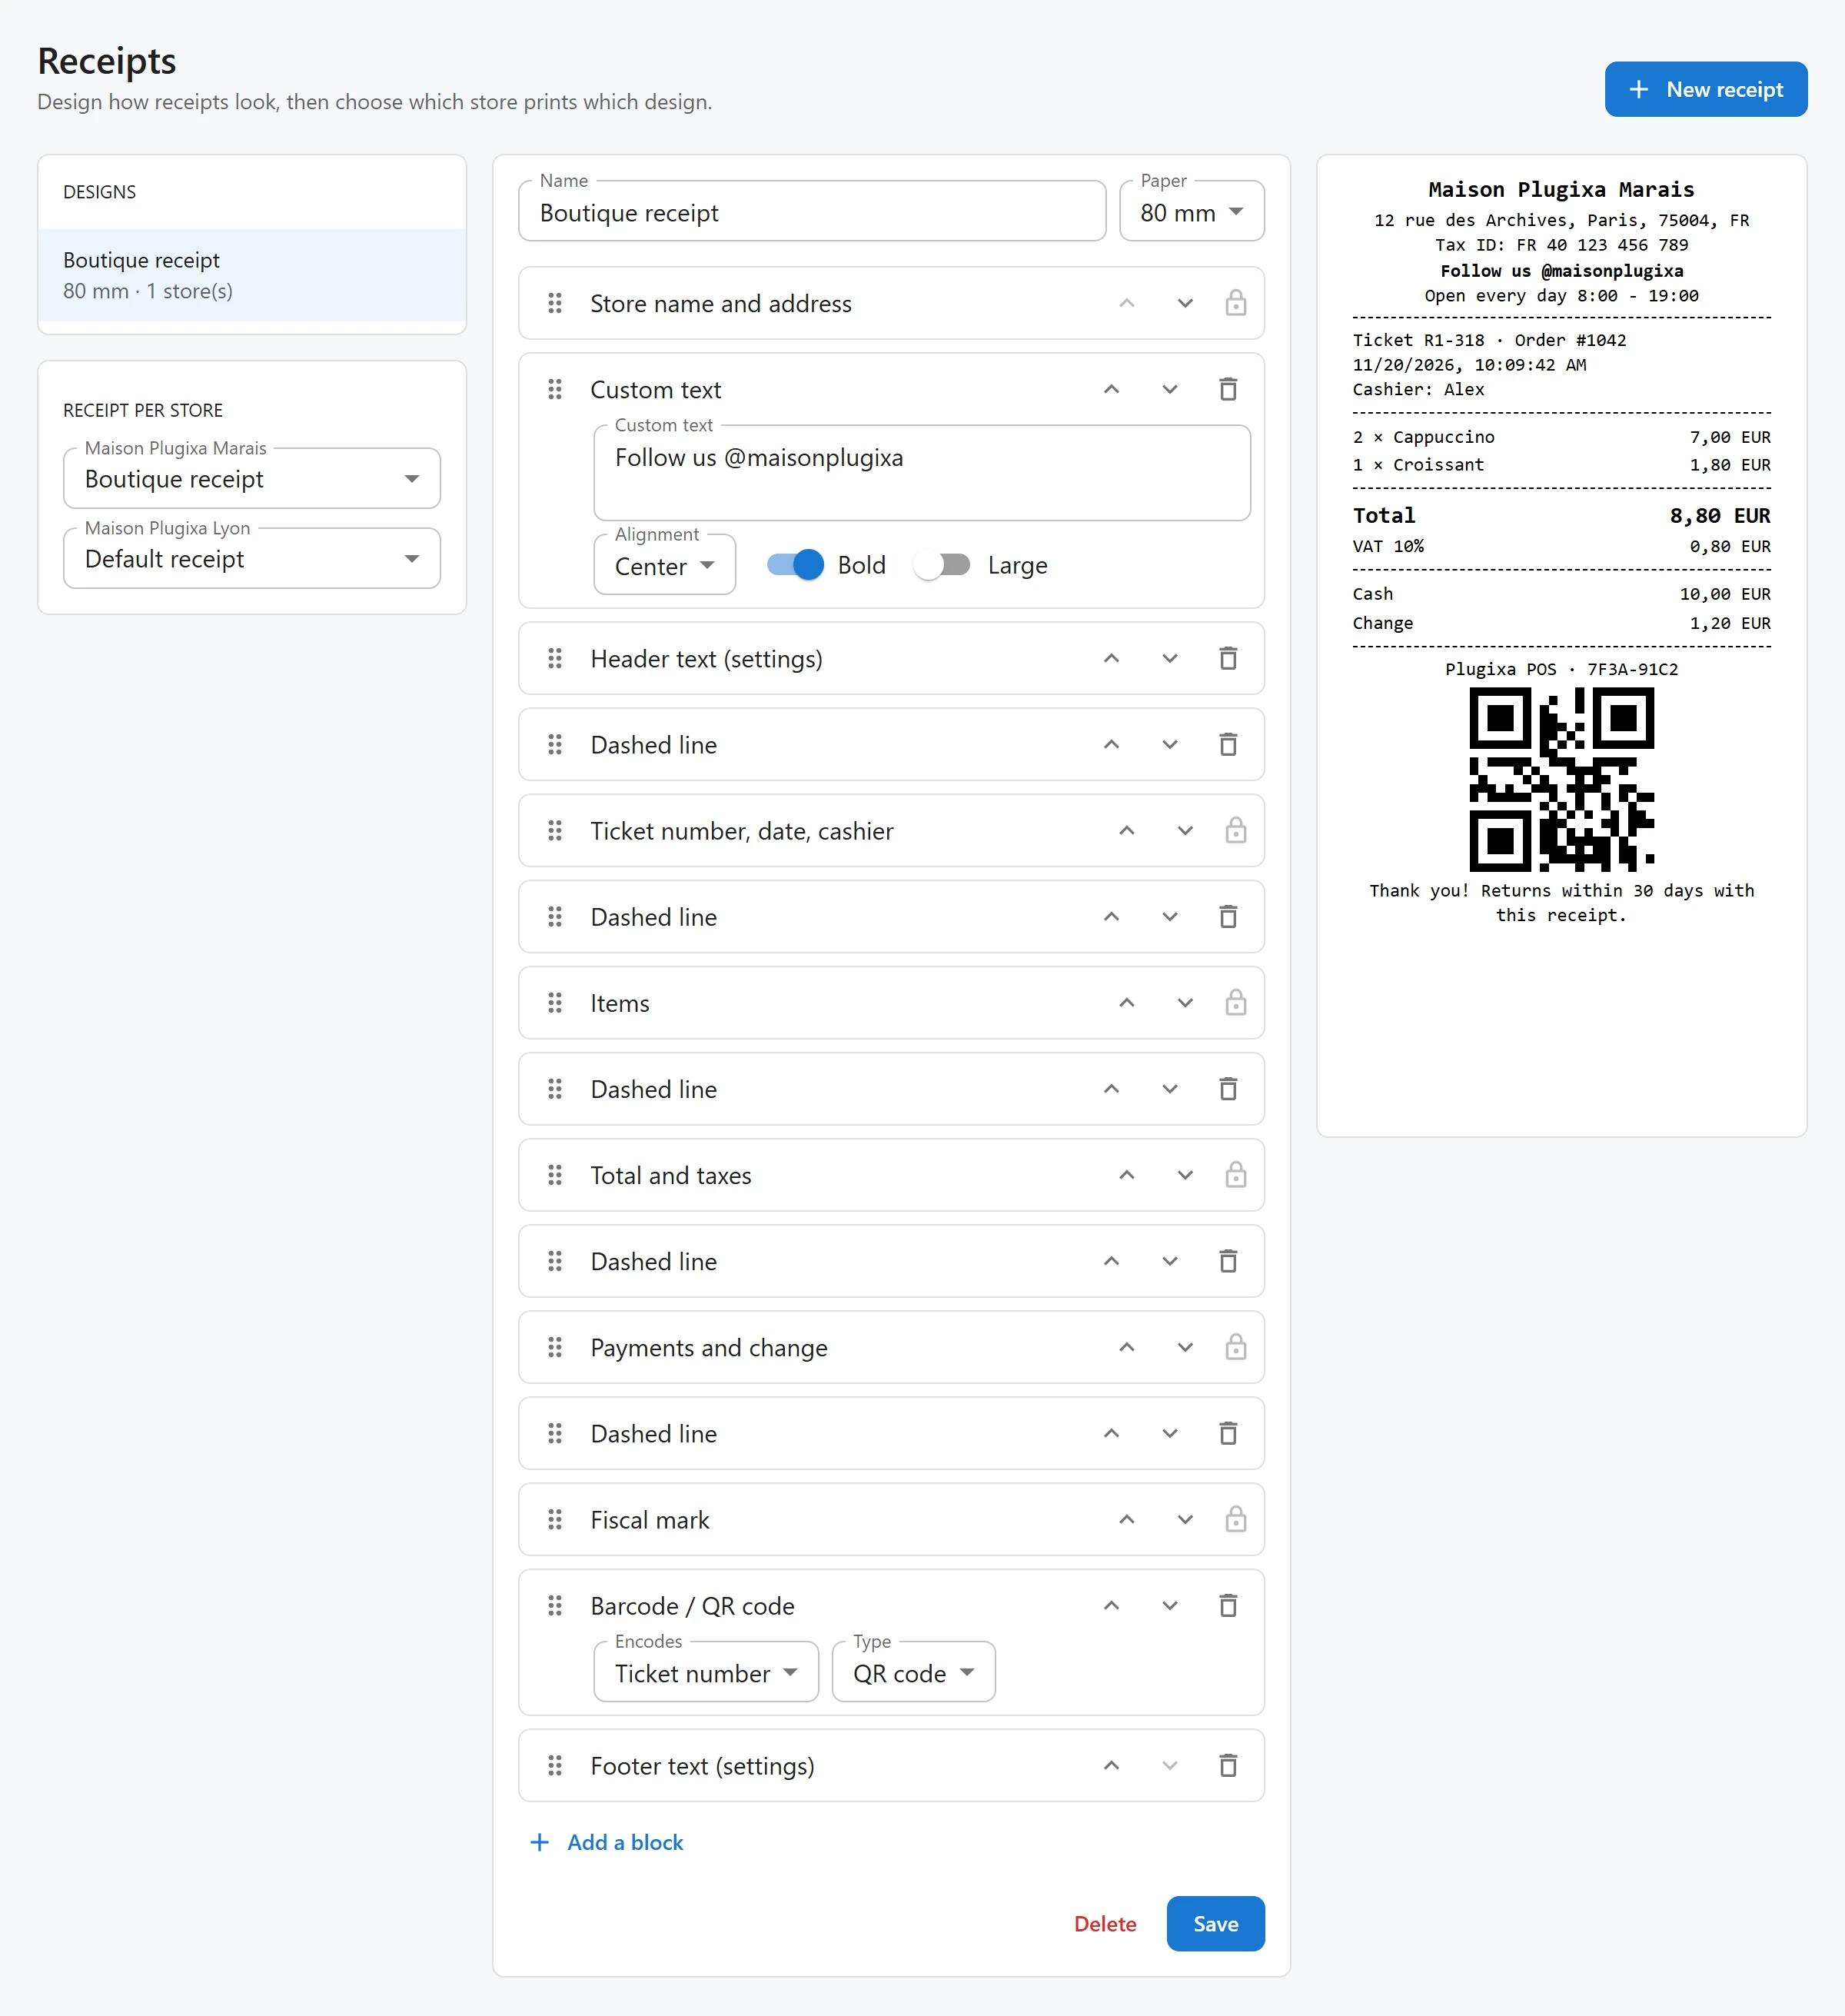
Create a design
- Open Plugixa POS > Receipts (in the Store group) and click New receipt.
- Give it a Name and choose the Paper width: 80 mm or 58 mm.
- Arrange the blocks: drag them by the handle, or use Move up and Move down. Remove an optional block with Remove; add one with Add a block.
- Check the Receipt preview, which shows the design with sample content.
- Click Save.
A new design starts from the default receipt’s blocks. A design holds up to 40 blocks.
The blocks
| Block | Required | Options |
|---|---|---|
| Store name and address | Yes | |
| Ticket number, date, cashier | Yes | |
| Items | Yes | |
| Total and taxes | Yes | |
| Payments and change | Yes | |
| Fiscal mark | Yes | |
| Logo | No | Image URL (from your Media Library), Width % (10 to 100) |
| Header text (settings) | No | Prints the Header text from Settings |
| Footer text (settings) | No | Prints the Footer text from Settings |
| Custom text | No | The text (up to 500 characters), Alignment, Bold, Large |
| Barcode / QR code | No | Encodes: Ticket number or Order number. Type: Barcode (Code 128) or QR code |
| Dashed line | No |
The required blocks are the legal mentions of a receipt. They carry a lock: “Required on every receipt by law: it can be moved, not removed.” If one is missing from a saved design, it comes back at its usual place.
The logo must be an image on your own site (your Media Library): a receipt never loads anything from another site. The logo is not printed on thermal printers.
The header and footer texts are set once for all designs, in Settings.
Choose the design of each store
Under Receipt per store, pick a design for each store, or Default receipt. The choice is saved at once. Registers receive their store’s design when they load: reload the register page to see a change straight away.
Deleting a design sends the stores that used it back to the default receipt. The list of designs shows the paper width and how many stores use each.
Print to a thermal printer
Each till sets up its own receipt printer. The settings are saved in that device’s browser only.
-
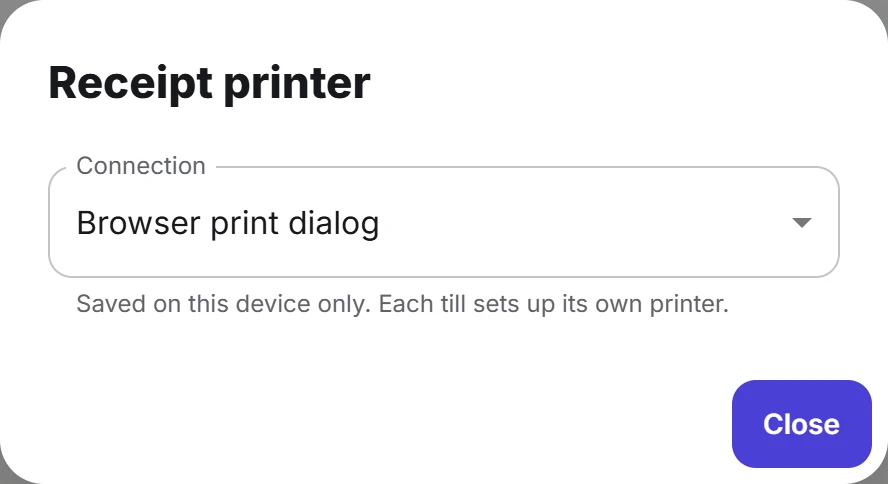
On the register, tap the printer icon (Receipt printer) in the top bar.
-
Choose the Connection:
Connection Notes Browser print dialog The default. Prints through the browser, to any printer. USB thermal printer Chrome or Edge on a computer Serial / Bluetooth (COM port) Chrome or Edge on a computer. Set the Speed (baud). Epson network printer (ePOS-Print) Type the Printer address (IP or name). Works on tablets too. Star network printer (WebPRNT, beta) Type the Printer address. Works on tablets too. -
For USB and serial, tap Connect and pick the printer. The browser remembers it for the next visit.
-
Set the Paper width: 80 mm (48 or 42 characters) or 58 mm (32 characters), and the Printer language if needed (ESC/POS, StarPRNT or Star Line Mode).
-
Tap Test print.
Two switches, both on by default:
- Cut the paper after each receipt.
- Open the cash drawer on cash sales: the drawer connected to the printer opens once when a sale paid in cash is completed, not on reprints.
Open drawer opens the drawer by hand, for staff allowed to manage cash sessions.
When the register page is on https, a network printer must be reached over https too: open the printer’s page once on that device (Open the printer page) and accept its certificate.
If the thermal printer cannot be reached, the receipt goes to the browser print dialog instead, so no receipt is lost.
Who can do what
The Receipts screen needs the permission to manage settings. Any cashier can set up the printer of their till.
Quick Links
Share