

Contents
On this page
Staff, PINs and commission - Plugixa POS for WooCommerce
When several people work on one register, nobody wants to type a WordPress password at every change of shift. With Pro, each cashier has a short PIN: they switch the till to their name, lock it when they step away, and a manager’s PIN approves what a cashier may not do alone. A staff report then shows what each person sold and the commission they earned.
Who may sell, refund or give discounts at all is set by capabilities: see Staff access. This page covers what Pro adds on top.
Staff & PINs
Open Plugixa POS > Staff & PINs. The header says: “Cashiers switch with a PIN on a shared register; a manager PIN approves what a cashier may not do alone.”
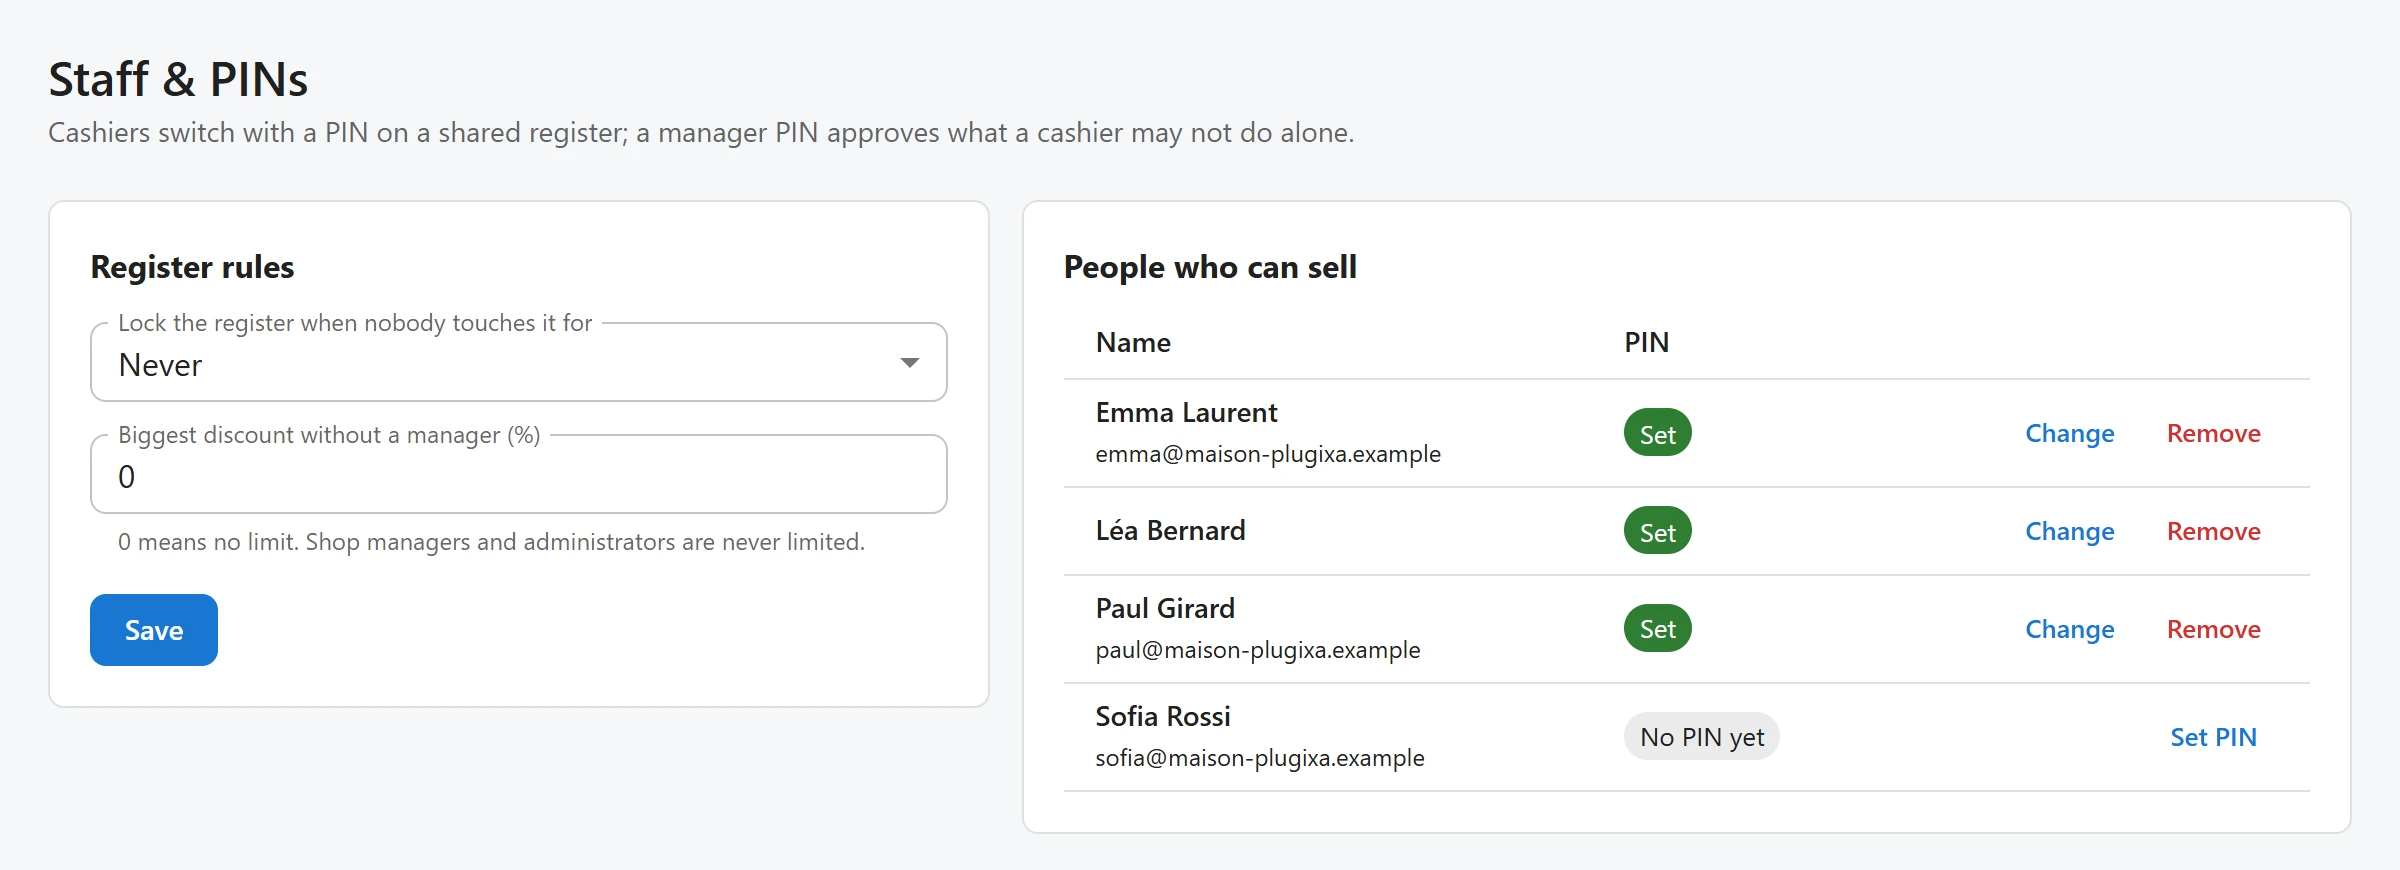
Register rules
| Setting | Default | What it does |
|---|---|---|
| Lock the register when nobody touches it for | Never | Locks the till after 1, 2, 5, 10, 15, 30 or 60 minutes without a tap or a key press. |
| Biggest discount without a manager (%) | 0 | The largest discount, as a percent of the sale, a cashier may give alone. “0 means no limit. Shop managers and administrators are never limited.” |
Click Save to store them.
Set a cashier’s PIN
The People who can sell table lists everyone who may sell, with their PIN status: Set or No PIN yet.
- Click Set PIN (or Change) on the person’s row.
- Type the PIN (4 to 6 digits).
- Click Save.
As the dialog says: “Give it to them in person. They can change it at the register (Cashier > Set my PIN).” Remove deletes a PIN.
A PIN must be 4 to 6 digits, not all the same and not in a row (1111, 1234 and 9876 are
refused). PINs are stored hashed, like passwords, and are never shown again.
Accounts that manage the site (administrators, and anyone who can change site settings, manage plugins, promote users or edit other users) show Password sign-in only: “Accounts that manage the site sign in with their password, never by PIN.” A plain WooCommerce shop manager can still use a PIN. You set someone else’s PIN only if WordPress lets you edit that user.
At the register
Pro adds a Cashier button to the register’s top bar, with three choices.
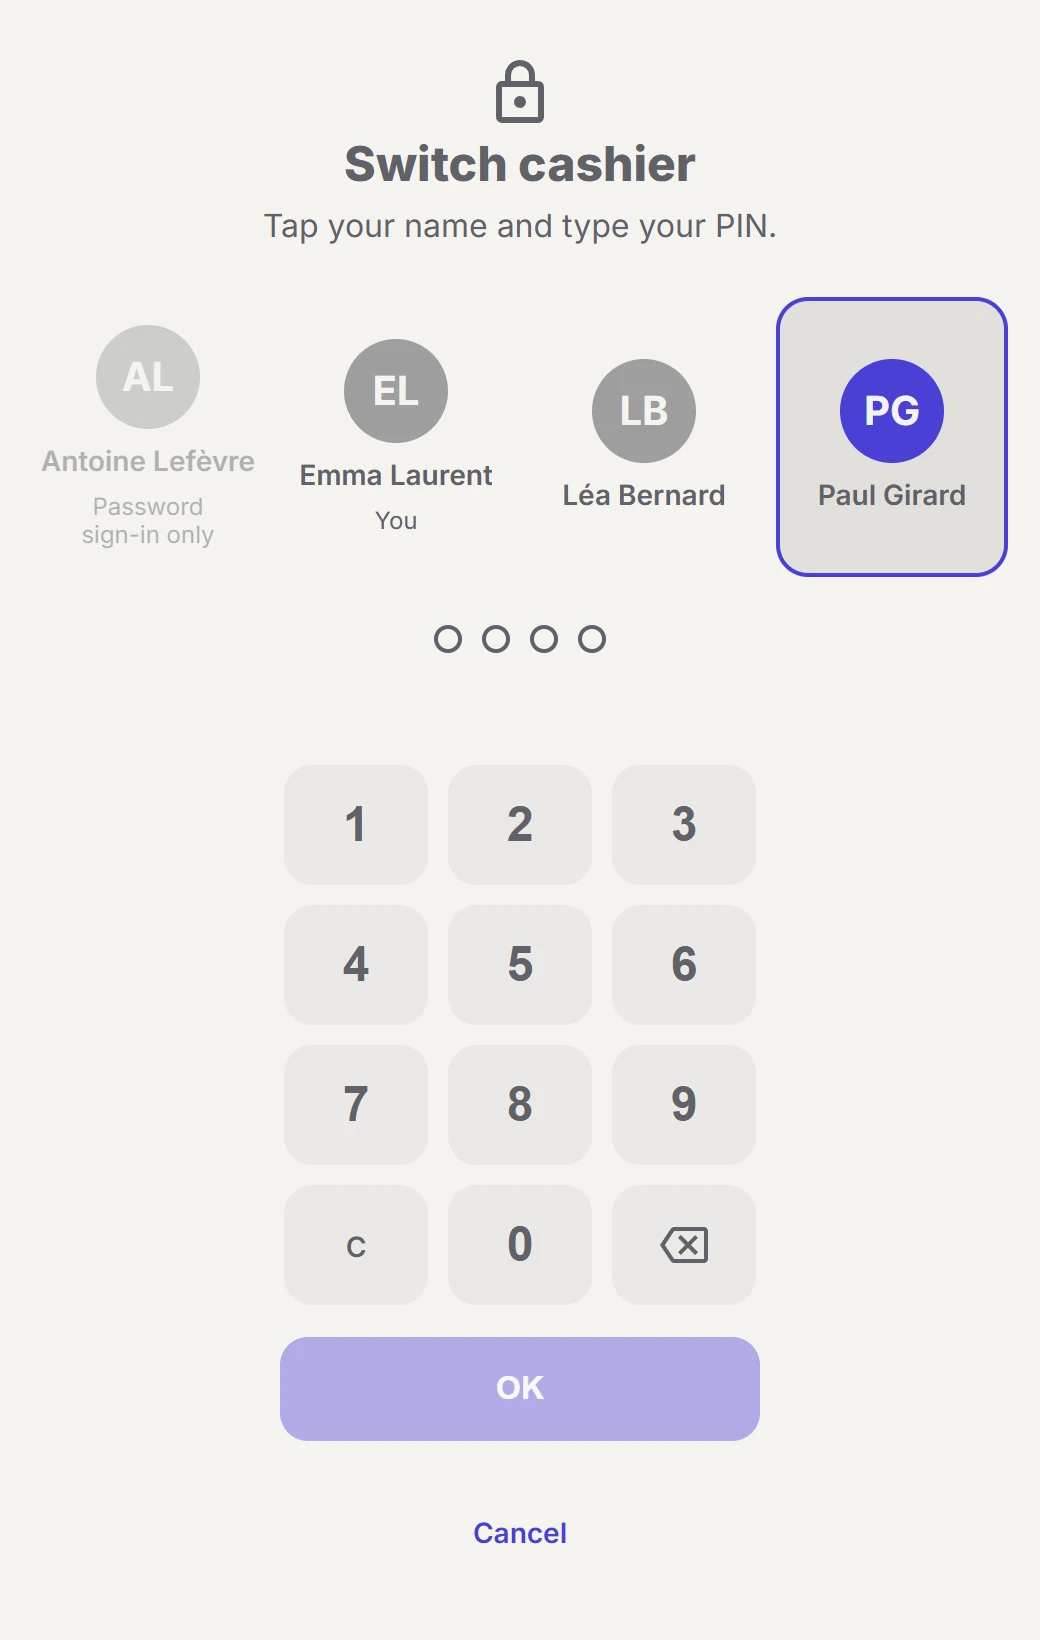
Switch cashier
- Click Cashier > Switch cashier.
- “Tap your name and type your PIN.”
- The register reloads in the new cashier’s name.
The device’s login becomes the new cashier’s, and the previous login session ends. Only people who may use this register appear (see Multi-store for staff assigned to stores). Each switch is logged.
Lock register
Cashier > Lock register locks the till at once. With Lock the register when nobody touches it for set, it also locks by itself. The lock is enforced by the server, not only on the screen: while locked, the register can do nothing until its cashier types their PIN, or another cashier switches in with theirs. Anything the register was doing when it locked carries on after the unlock.
Set my PIN
Cashier > Set my PIN lets cashiers choose their own PIN: they type it twice. A cashier without a PIN sees: “You have no PIN yet. Ask a manager, or sign in again with your password.”
Wrong PINs
After 5 wrong PINs for one person, or from one device’s address, PIN entry is blocked for 15 minutes: “Too many wrong PINs. Try again in 15 minutes, or sign in with the password.”
Manager approval
Some actions need a manager. When a cashier tries one, the register opens Manager approval: “A manager can approve” the action. The manager taps their name and types their PIN on the cashier’s till, and the action goes through.
| Action | When it is asked |
|---|---|
| A discount | The cashier may not give discounts, or may not sell custom items. |
| A discount over the limit | The sale’s discount is above Biggest discount without a manager (%). |
| A refund | The cashier may not refund (refunds, returns and exchanges). |
The approval is valid for that one action, on that till, for that cashier, for 5 minutes. Only people who may do the action themselves, who may use this register, and who have a PIN are offered. If nobody qualifies: “Nobody who may approve this has a PIN on this register.” Each approval is logged with who asked and who approved.
The discount limit counts the discounts given at the register. The shop’s own coupons do not count against it.
Staff performance and commission
Open Plugixa POS > Staff performance. It needs the right to view reports. Pick All stores or one store, and Today, 7 days, 30 days or This month.
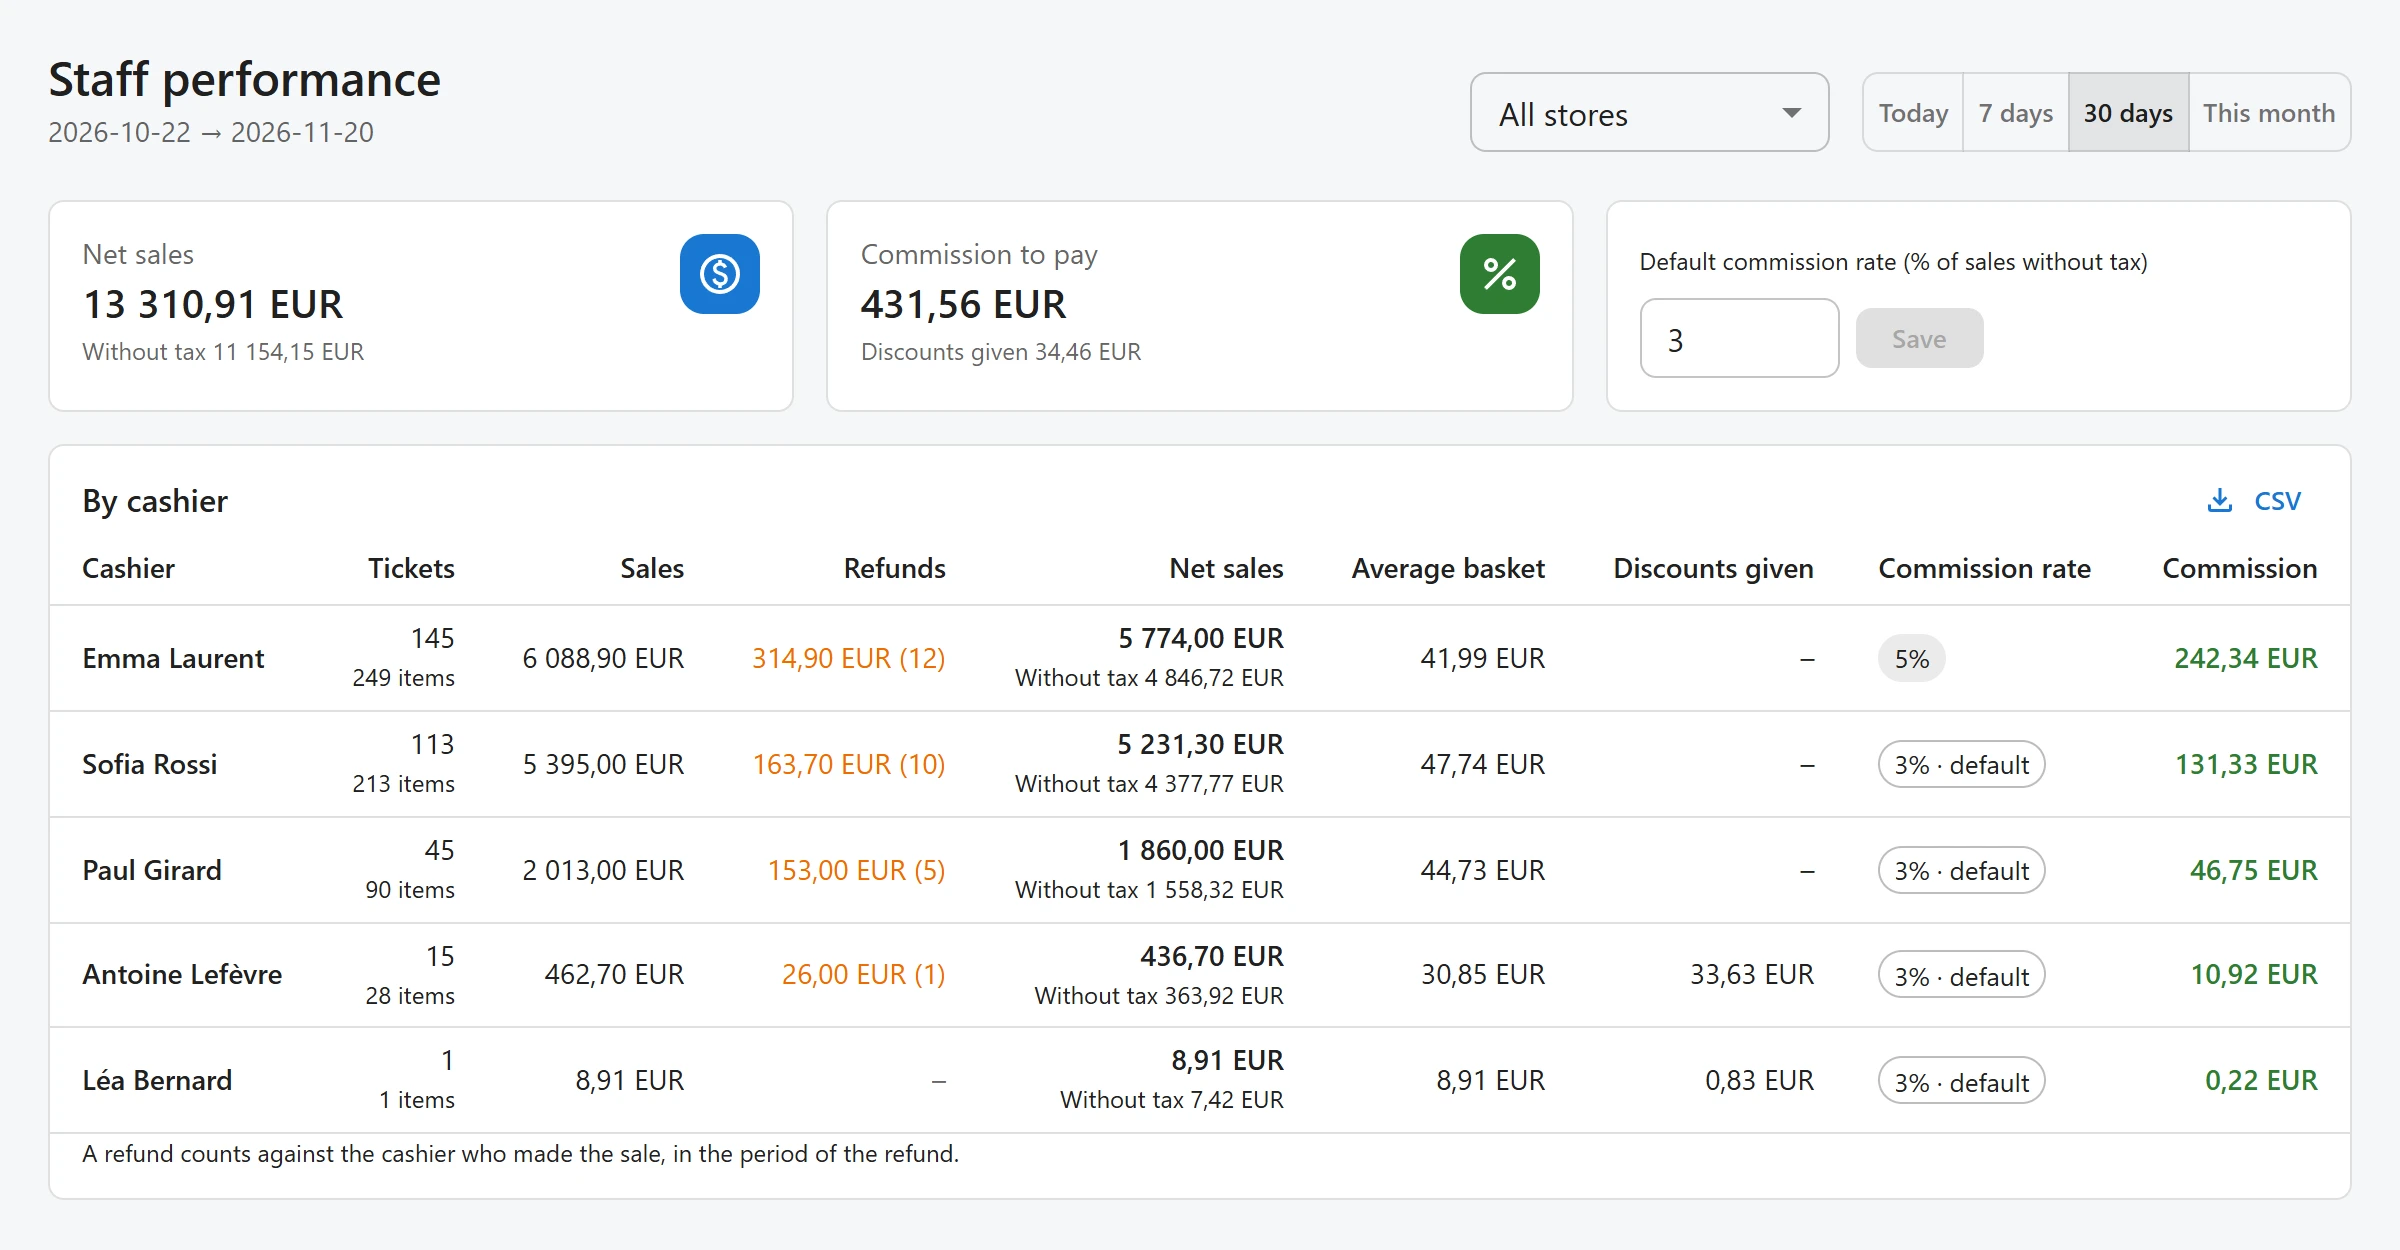
The By cashier table shows, per person: Tickets, Sales, Refunds, Net sales (with the amount Without tax underneath), Average basket, Discounts given, Commission rate and Commission.
How it is counted:
- Figures come from the fiscal journal, so they match your Z reports.
- Commission = rate x net sales without tax.
- “A refund counts against the cashier who made the sale, in the period of the refund.” A sale refunded next month lowers next month’s commission.
Commission rates
Set Default commission rate (% of sales without tax) and click Save. To give one person their own rate, type it in their Commission rate cell; leave it empty to use the default (the cell then reads default). Rates are percents from 0 to 100, with up to two decimals. Changing rates needs the right to manage the POS settings.
The full sales report is on Reports.
Quick Links
Share