

Contents
On this page
Pay by QR code - Plugixa POS for WooCommerce
Pay by QR code lets a customer pay at the counter with their own phone. The register shows a QR code; the customer scans it, pays on the provider’s payment page, and the register sees the payment by itself. Five providers are supported: Stripe, PayPal, Mollie, Adyen and Klarna. Each one you switch on becomes a payment method at the register, named after it: Stripe (QR), PayPal (QR) and so on.
The payment counts only once your server has asked the provider and the provider says it is paid, for exactly the sale’s amount and currency. A payment can pay one sale only.
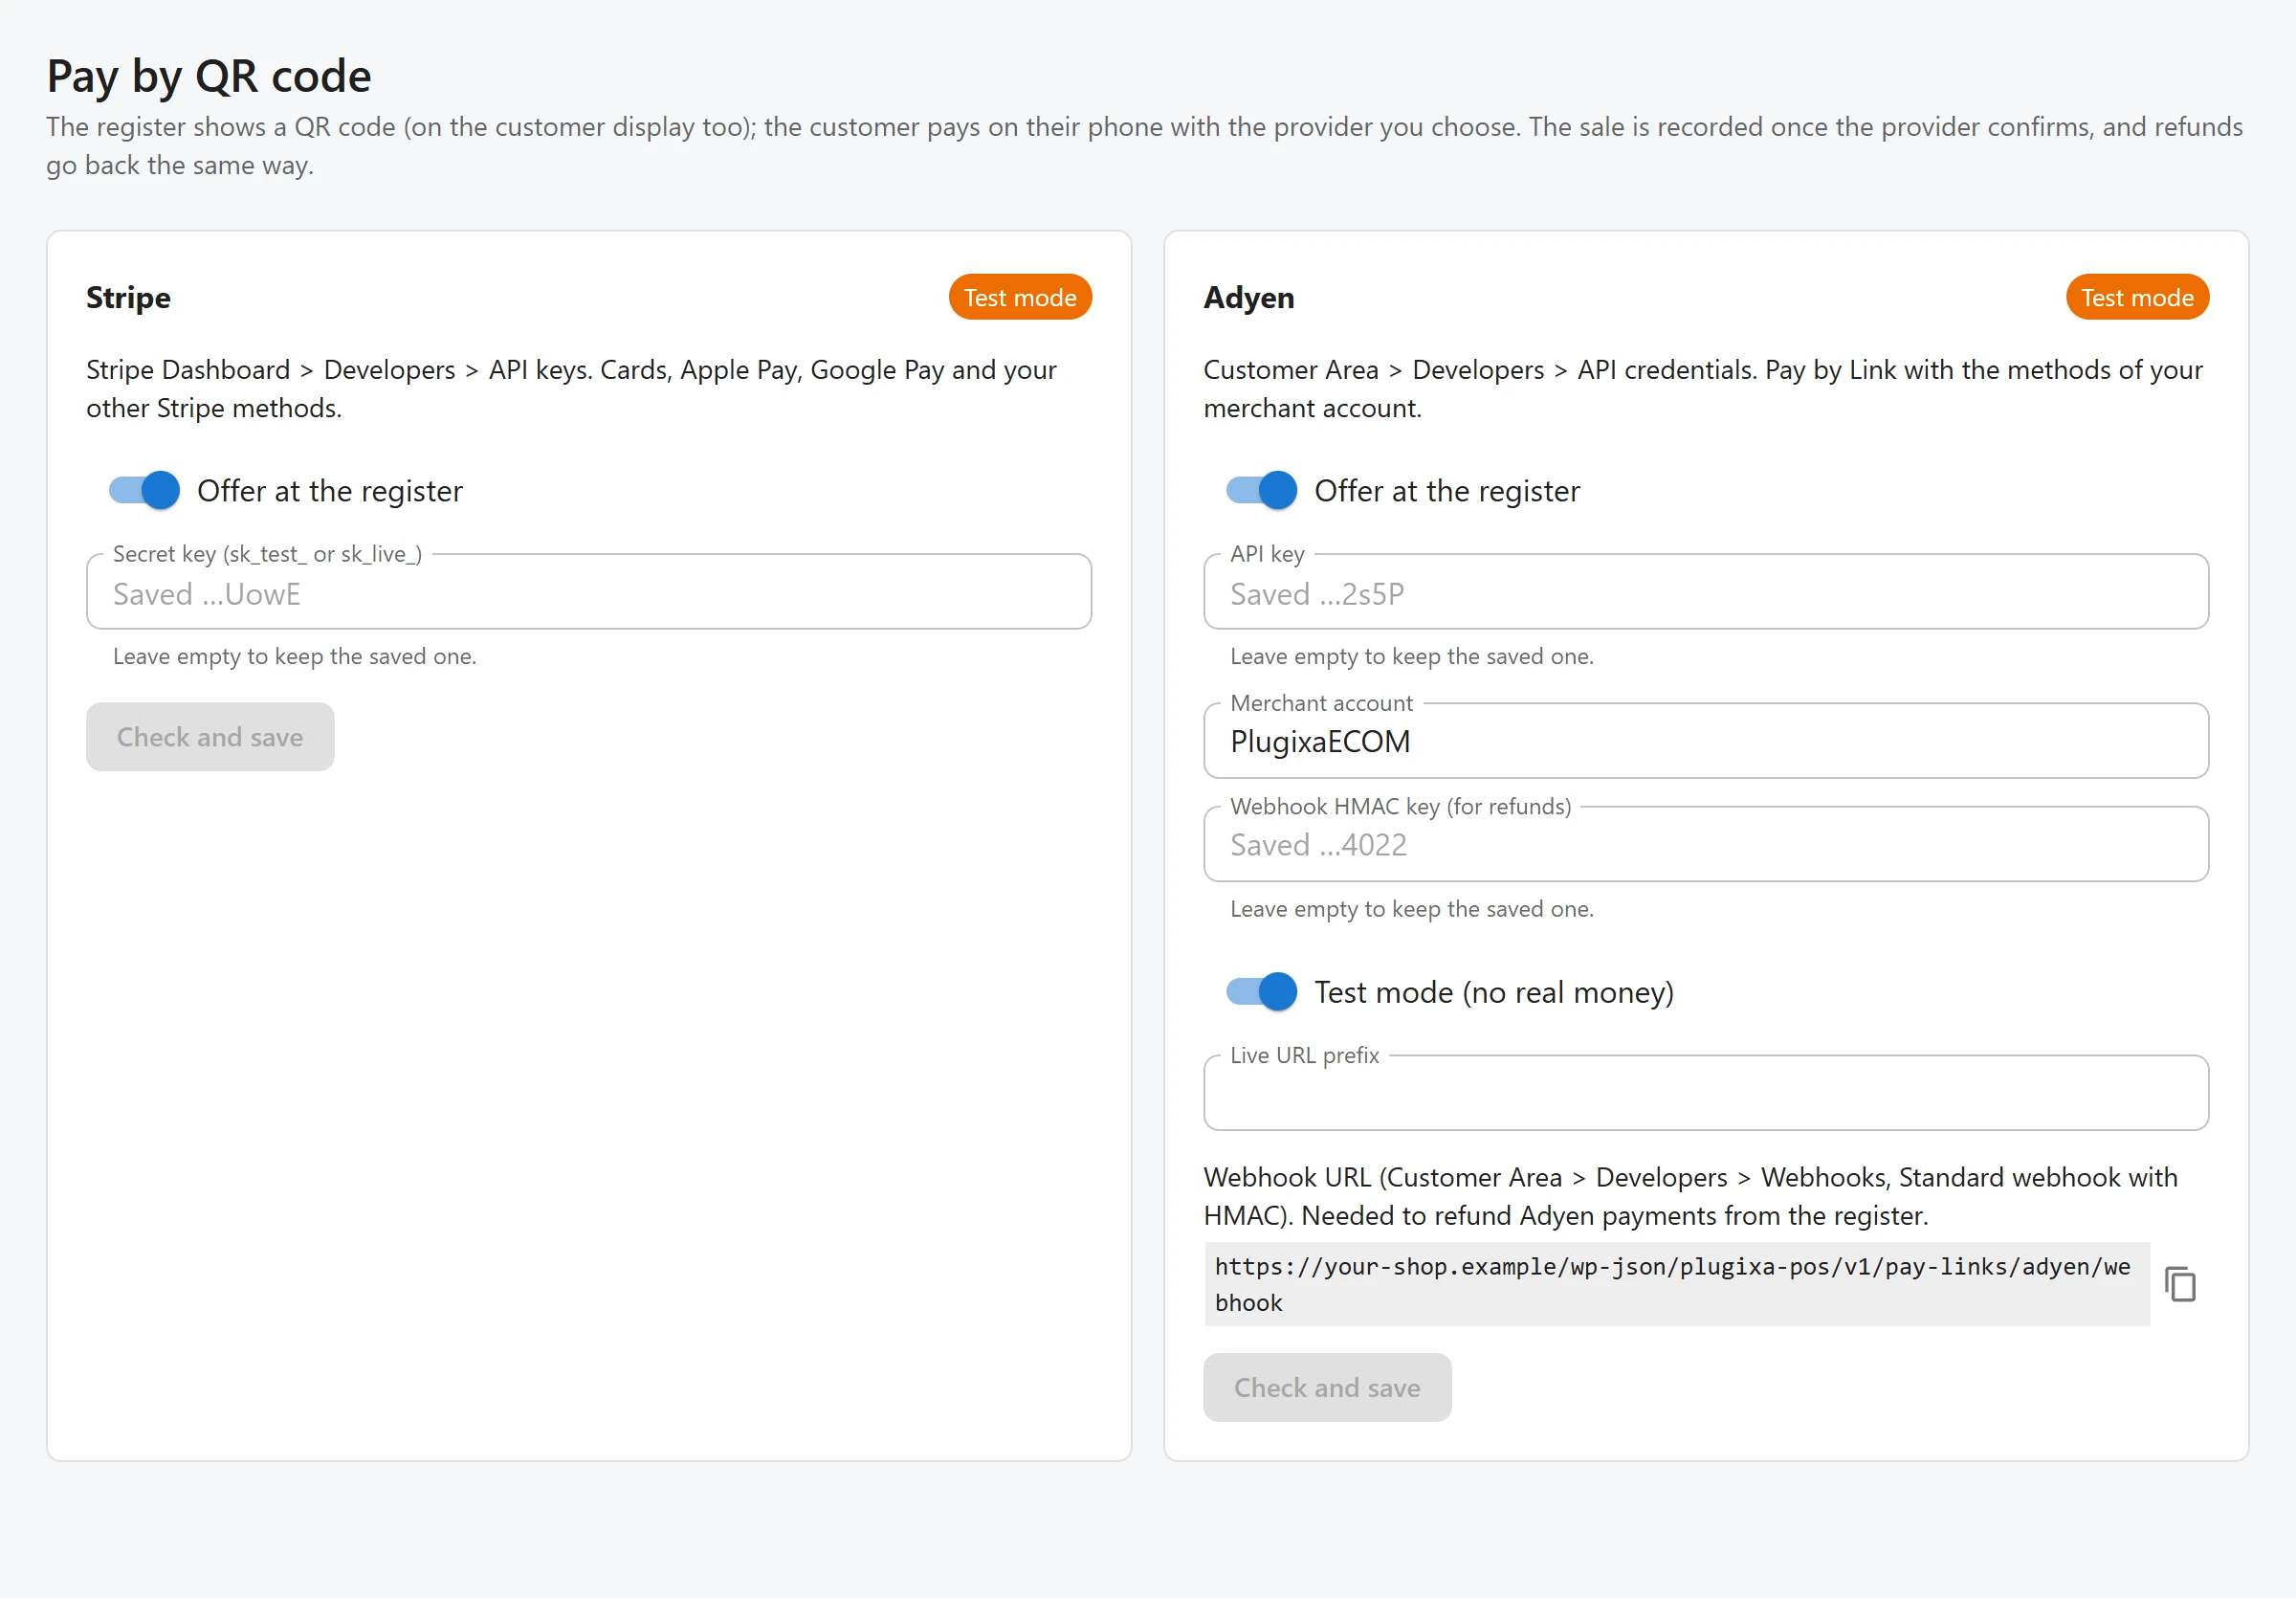
Set up a provider
- Open Plugixa POS > Pay by QR code (in the Store group).
- On the provider’s card, switch on Offer at the register.
- Fill in its fields (see the table). The hint on the card says where to find them.
- Click Check and save. The keys are checked with the provider before they are kept.
| Provider | Fields | Where to find them |
|---|---|---|
| Stripe | Secret key (sk_test_ or sk_live_) | Stripe Dashboard > Developers > API keys |
| PayPal | Client ID, Secret, Sandbox (no real money) | developer.paypal.com > Apps & Credentials (REST app) |
| Mollie | API key (test_ or live_) | Mollie Dashboard > Developers > API keys |
| Adyen | API key, Merchant account, Webhook HMAC key (for refunds), Test mode (no real money), Live URL prefix | Customer Area > Developers > API credentials |
| Klarna | API username (UID), API password, Playground (no real money), Region (eu, na, oc), Purchase country (2 letters) | Klarna Merchant Portal > Settings > Klarna API credentials |
A chip on each card shows Test mode or Live, or Off. A Stripe or Mollie key decides
the mode by itself (sk_test_, test_); the other providers have a switch, on by default.
Secrets are never sent back to the screen. A saved one shows “Saved” with a hint: “Leave empty to keep the saved one.”
Adyen: the webhook
To refund Adyen payments from the register, Adyen must send the payment’s reference to your site. The Adyen card shows a Webhook URL with a copy button: add it in Adyen’s Customer Area under Developers > Webhooks as a Standard webhook with HMAC, and paste the HMAC key into Webhook HMAC key (for refunds).
Without the webhook, a paid Adyen link can still be sold, but must be refunded another way.
Take a payment at the register
- On the payment screen, choose the provider, for example Stripe (QR).
- The Amount is filled in with what is due. Lower it to pay only part this way.
- Tap Show the QR code.
- Ask the customer to scan the code with their phone camera and pay. The dialog checks the payment every 2 seconds and shows “Waiting for the payment…”.
- Once paid, the payment is added to the sale.
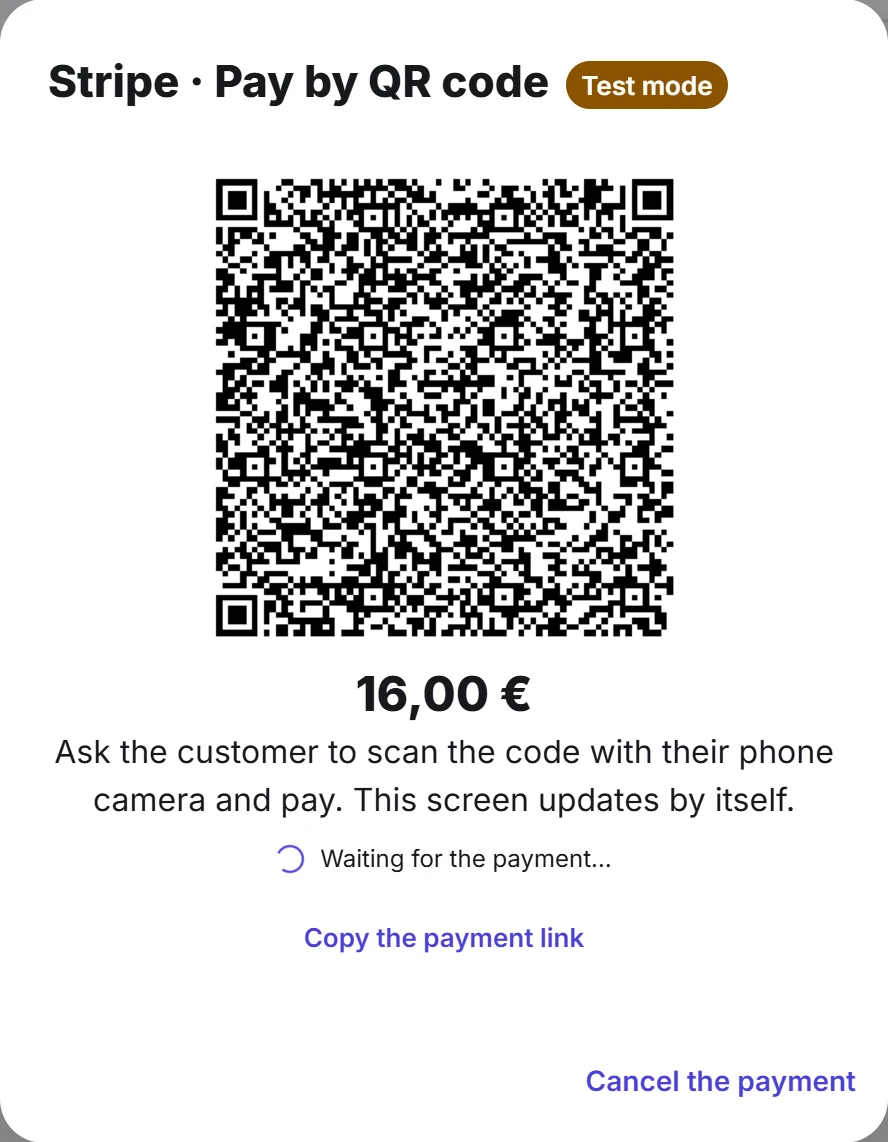
With the Pro customer display, the QR code shows on the customer’s screen too. Copy the payment link copies the page address, to send it another way.
After paying, the customer’s phone shows a short page: “Thank you! You can show this screen at the counter. The cashier sees your payment on the register.” Nothing about the payment is shown on it.
If the payment fails, expires or is cancelled, the dialog says so and offers Try again. Cancel the payment stops the payment page; a payment made in the meantime stays paid. If the customer paid a different amount, the register warns you to check the payment with the provider.
Refunds
When you refund a sale paid this way, the money goes back through the same provider, as part of the refund. If the provider refuses, the whole refund is undone and nothing changes.
The provider must be the one the sale was paid with; otherwise choose another way to pay back. For Adyen, the refund needs the webhook above: without it the register says to refund in Adyen’s dashboard or choose another way.
See Refunds and Returns and exchanges.
Who can do what
Setting up providers needs the permission to manage settings. Taking a payment is part of selling. A payment started at one register can only be used by that register.
Quick Links
Share