

Contents
On this page
Customers and discounts - Plugixa POS for WooCommerce
Everything on this page happens in the cart, on the right of the register, before you press Pay. None of it is required: a sale with no customer and no discount is a normal walk-in sale.
Customers
Add a customer to the sale
- In the cart, click Add customer, or press F3.
- Type at least 2 letters of the customer’s name, email or phone.
- Pick the customer from the list.
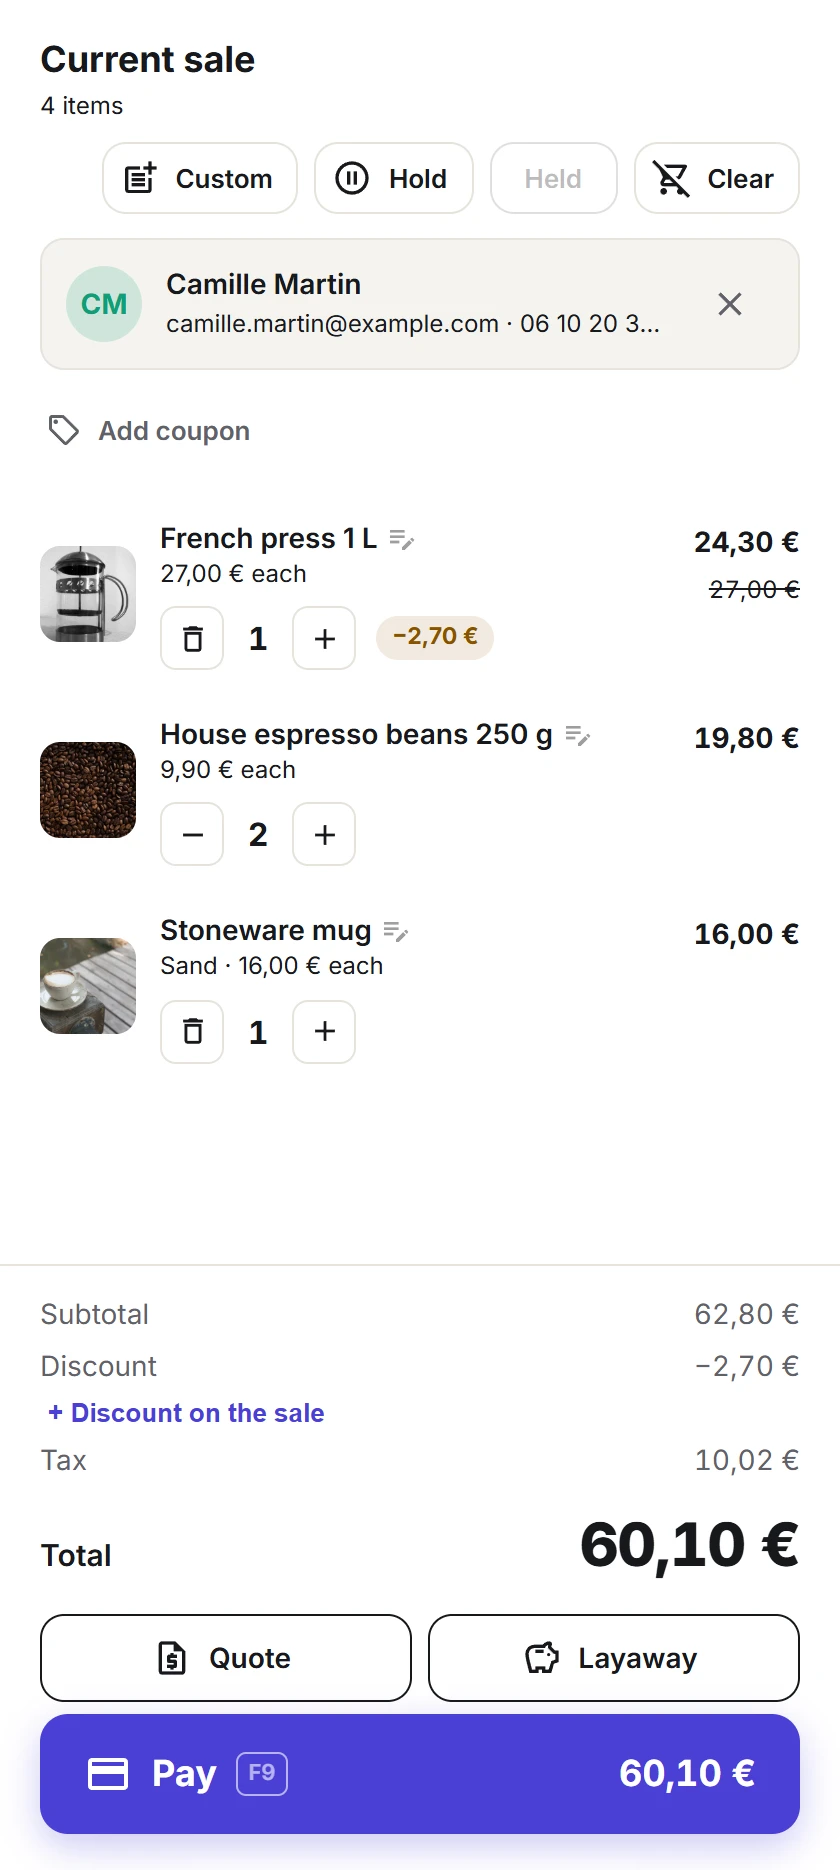
The customer’s name, email and phone now show at the top of the cart. Click the cross next to them to remove the customer again.
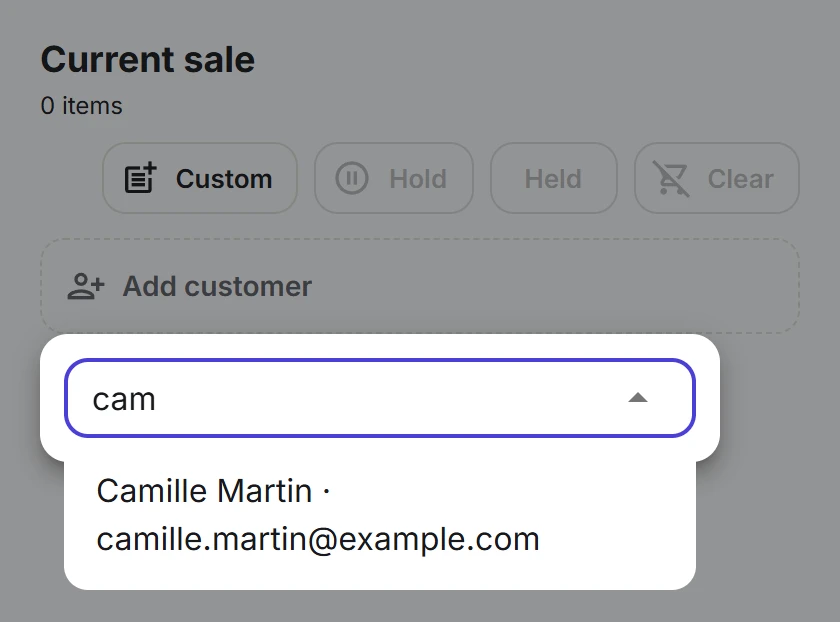
The register searches your existing WooCommerce customers. It does not create new customer accounts: add a new customer in WooCommerce first, then find them at the register.
A sale with a customer becomes a WooCommerce order for that customer, so it shows in their order history. A sale without one is shown as Walk-in on the payment screen.
Require a customer on every sale
In Plugixa POS > Settings, turn on Require a customer on every sale. Pressing Pay without a customer then shows Choose a customer before paying. See Settings.
With Pro, the customer also unlocks loyalty points and store credit PRO. See Loyalty and Store credit.
WooCommerce coupons
The register accepts the coupon codes you create in Marketing > Coupons in WooCommerce.
- Add the products to the cart.
- Click Add coupon.
- Type the code and click Apply.
The server prices the coupon with WooCommerce’s own rules, so a minimum spend, an expiry date, a usage limit or a product restriction works exactly as it does online. While it checks, a small spinner turns next to the code.
- An accepted coupon shows as a green chip with its code and the amount it takes off. The Discount row of the totals names the codes.
- A refused code is taken off again and WooCommerce’s reason is shown, for example that the minimum spend is not reached.
- A coupon that stops applying because the cart changed stays on the sale in red, with the reason. Remove it with its cross, or change the cart back.
You can add several codes. Coupons need a connection to the shop: offline, the register shows Coupons need a connection to the shop.
Coupons and register discounts never combine. A sale has either coupons or discounts given by the cashier, not both. With a register discount on the sale, applying a coupon shows A coupon cannot be combined with a register discount. Remove one of them., and with a coupon on the sale the discount buttons are hidden.
Discounts
Giving a discount needs the discount right. A cashier without it does not see the discount fields or the + Discount on the sale link, and the server refuses a discount sent without it. See Staff access. With Pro, a cashier without the right can ask a manager to approve the discount with their PIN PRO: see Staff.
Each discount is either a percentage or an amount. Click % or the currency symbol to choose.
| Type | What you can type |
|---|---|
| % | A whole number from 0 to 100. |
| Amount | Not more than the amount the discount applies to. |
On one line
- Tap the line’s name in the cart.
- Under Discount, choose % or the amount, and type the value.
- Click Save.
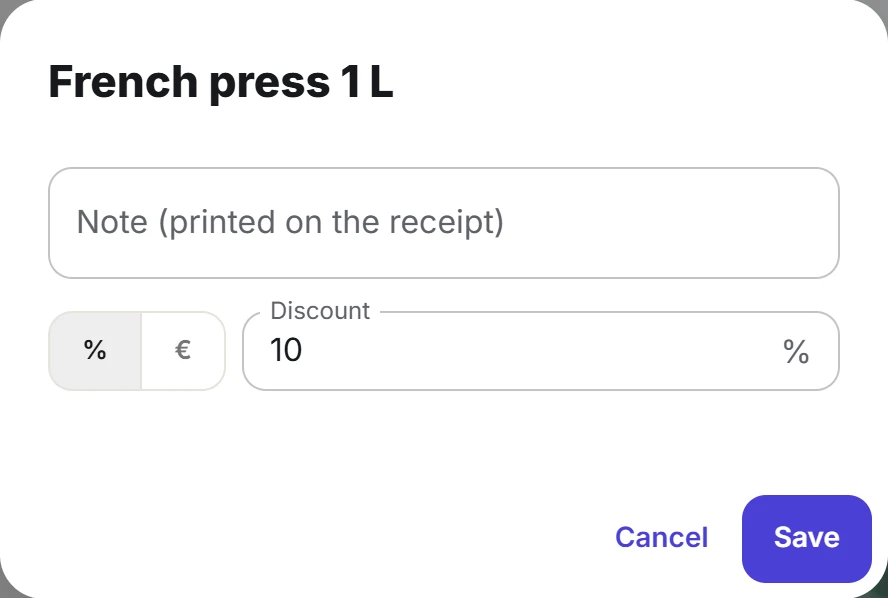
The line shows the amount taken off next to its quantity, and its price before the discount struck through.
On the whole sale
- Click + Discount on the sale under the subtotal, or press F7.
- Choose % or the amount and type the value.
- Click Apply.
The sale discount applies to the lines after their own discounts. To change it, click Change the discount on the sale; to take it off, open it and click Remove.
With Pro, automatic promotions show under the lines they apply to PRO: see Promotions.
Notes on lines
Tap a line’s name and type in Note (printed on the receipt), up to 200 characters, then click Save. The note shows in italics under the line in the cart, prints under the line on the receipt, and is saved on the WooCommerce order item.
Any cashier can add a note, with or without the discount right.
Custom items
A custom item is something that is not in your catalogue: a repair, a deposit, a one-off piece. It needs the discount right, like a discount.
- Click Custom at the top of the cart, or press F4.
- Type its Name, up to 120 characters.
- Type its Price. When your WooCommerce prices are entered without tax, the field reads Price (excl. tax).
- Change the Quantity if needed.
- When taxes are on and your shop has more than one tax class, pick the Tax class.
- Click Add to cart.
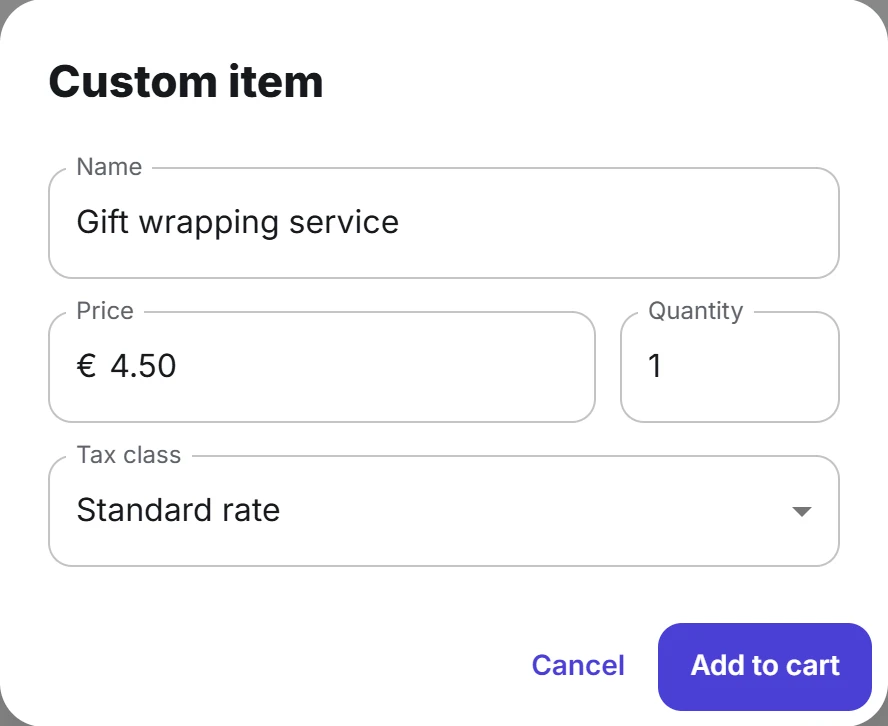
A custom item is taxed like any product of its tax class and appears on the order and the receipt under the name you typed. It is not a WooCommerce product, so it has no stock.
Quick Links
Share