

Contents
On this page
Products and search - Plugixa POS for WooCommerce
The left side of the register shows your WooCommerce products as cards. This page explains what the cards show and every way to find a product: tapping, searching, categories, favourites and barcode scanners.
Which products appear
The register sells your published WooCommerce simple and variable products, with the prices, tax settings, SKUs, barcodes and stock you set in WooCommerce. Drafts and private products do not appear. Variations are sold through their parent product.
The whole catalogue is loaded when the register opens and kept current by live sync, so a price or stock change made in WooCommerce reaches the register within about 30 seconds. See The register.
Product cards
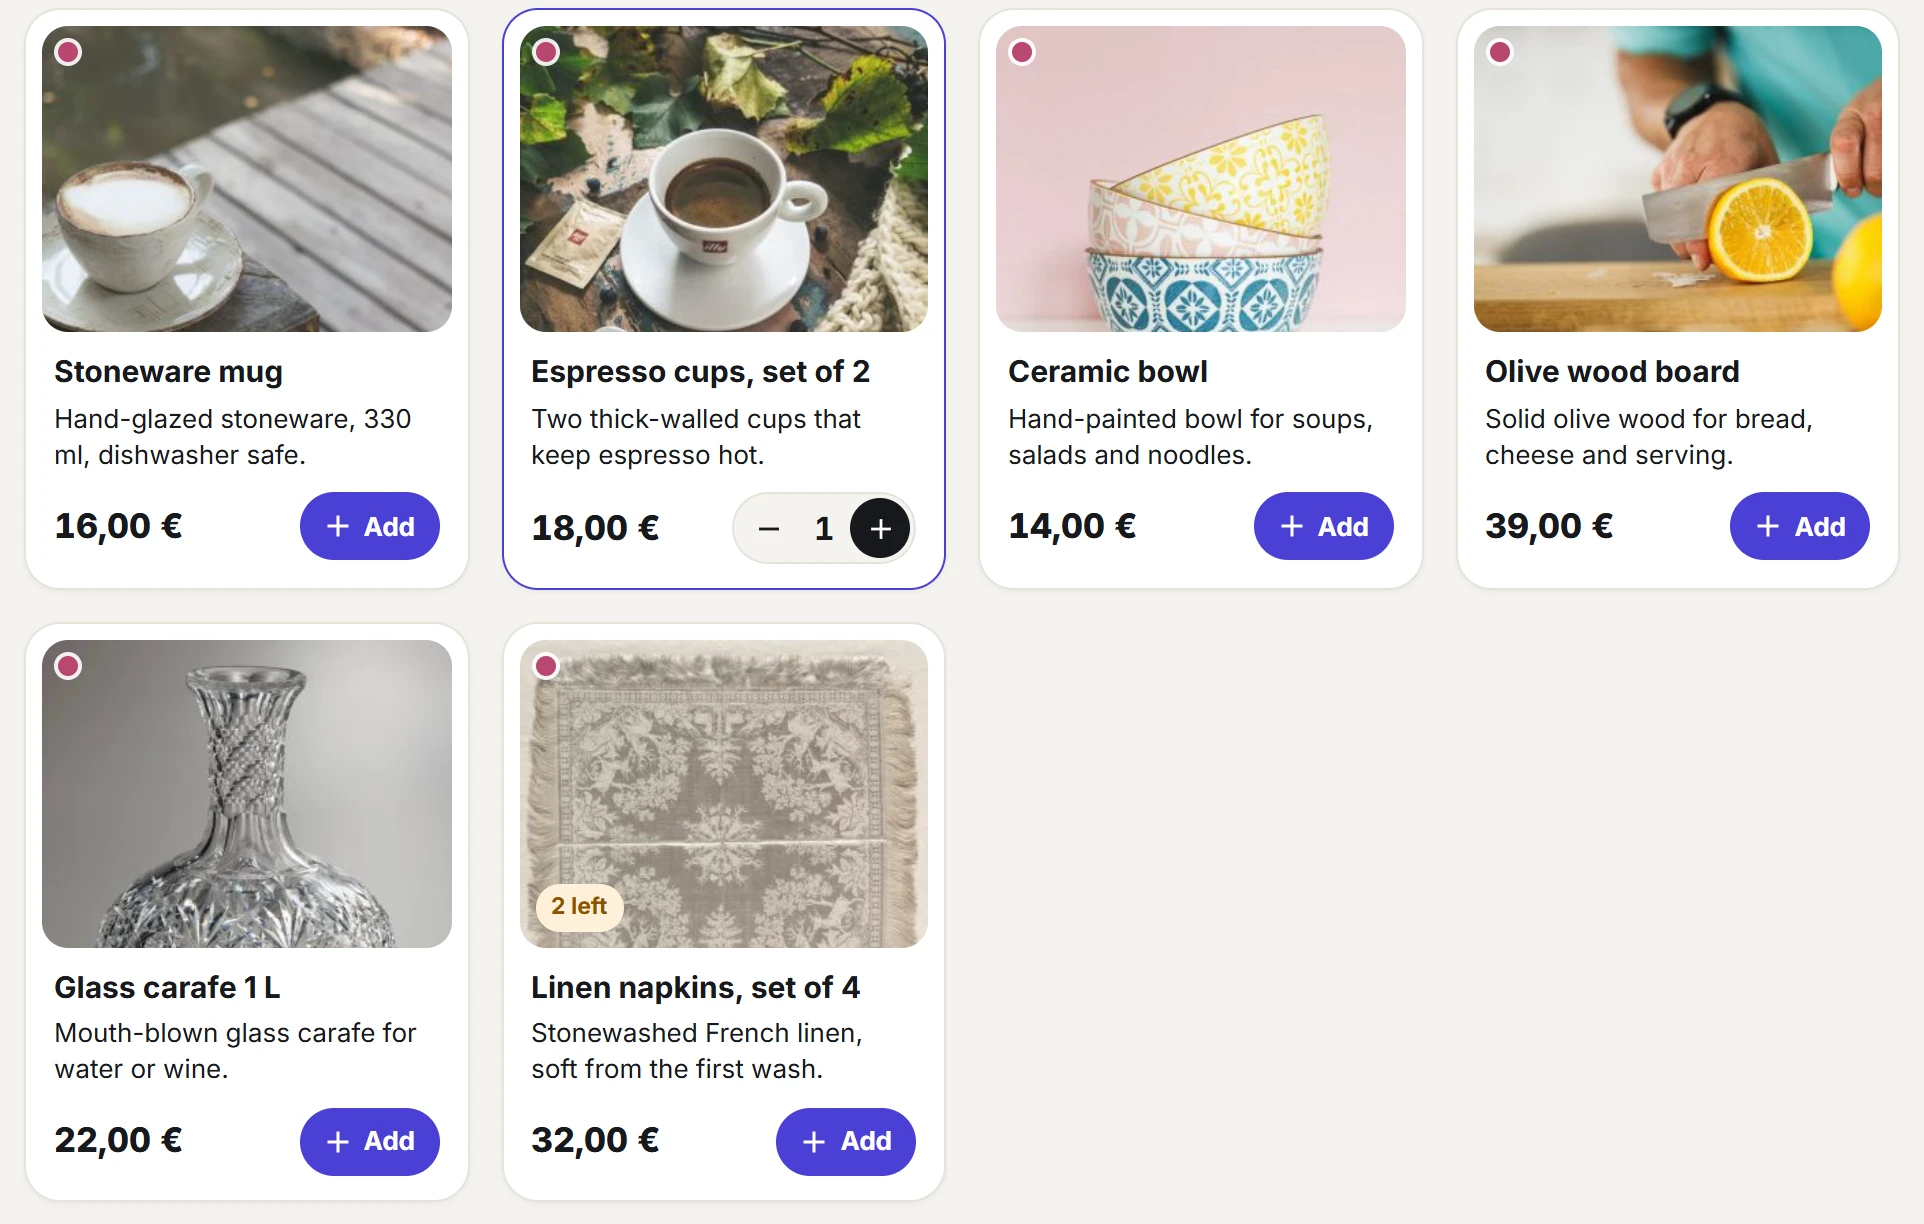
Each card shows:
- The product photo, or a placeholder tinted with the category colour when it has none.
- The name, and under it the short description (or the start of the long one) on up to two lines. A variable product without a description shows how many options it has, such as 4 options.
- The price. A product on sale shows its regular price struck through next to it. A variable product whose variations cost different amounts shows from and the lowest price.
- An Add button. Once a simple product is in the cart, it becomes a - / + stepper with the quantity, and the card gets a coloured border.
Tap anywhere on a card to add one unit. The Add button and the stepper are what a keyboard reaches with the Tab key.
Stock on the cards
Stock is only shown when it matters:
| Badge | When |
|---|---|
| Sold out | The product is out of stock. Its name is greyed and the card cannot be added. |
| 3 left | WooCommerce manages the product’s stock and 5 or fewer are left. |
The server checks stock again when the sale is paid. If a product whose stock WooCommerce manages, and which does not allow backorders, no longer has enough units, the sale is refused with Not enough stock for and the product name.
Search
Type in the search box at the top: Search products, SKU or scan a barcode. Press / or
F2 to jump to it from anywhere on the selling screen.
- Every word you type must match the product’s name, its SKU or its barcode.
linenfinds Linen shirt, Linen napkins, set of 4 and Linen cushion cover;linen shirtfinds only Linen shirt. - Accents and capitals do not matter:
comtefinds Comté (per kg). - The SKU or barcode of a variation finds its parent product.
- Search stays inside the selected category. Click All to search the whole catalogue.
The barcode is WooCommerce’s own GTIN, UPC, EAN, or ISBN field on the product or variation.
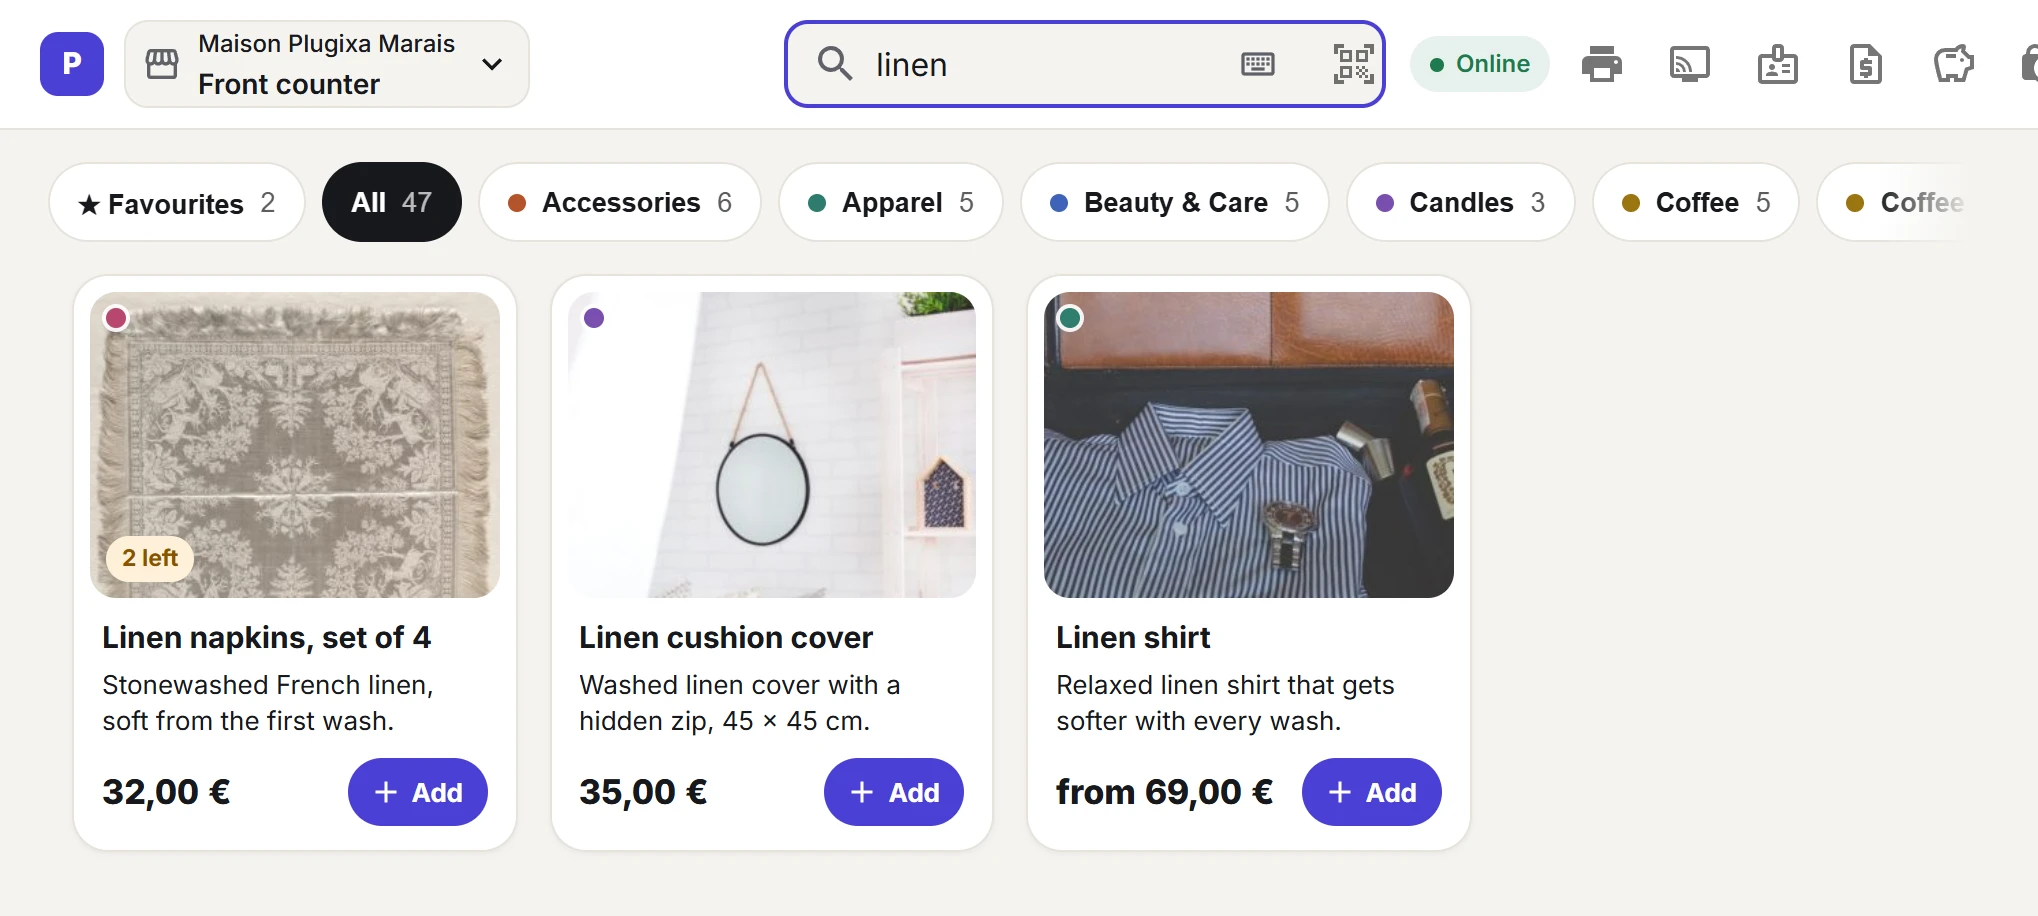
Categories
The row of buttons above the cards filters the grid by WooCommerce product category.
- All shows every product, with the number of products in the catalogue.
- Each category shows its name, a coloured dot and how many products it holds. Categories without products are not shown.
- On a touch screen, swipe the row sideways. With a mouse, drag it or use the wheel.
Category colours
Each top-level category gets its own colour, in the order of the list, from a set of ten muted colours. A sub-category takes the colour of its parent, so Candles and Textiles share the colour of Home & Decor. The same colour appears on the category button and on the product cards of that category, so a cashier recognises a product’s family at a glance.
The colours are chosen by the register: there is no setting for them. A parent category with no products of its own is not shown, and its sub-categories then get colours of their own.
Favourites
Favourites are a register’s quick keys: the products a till sells most, one tap away.
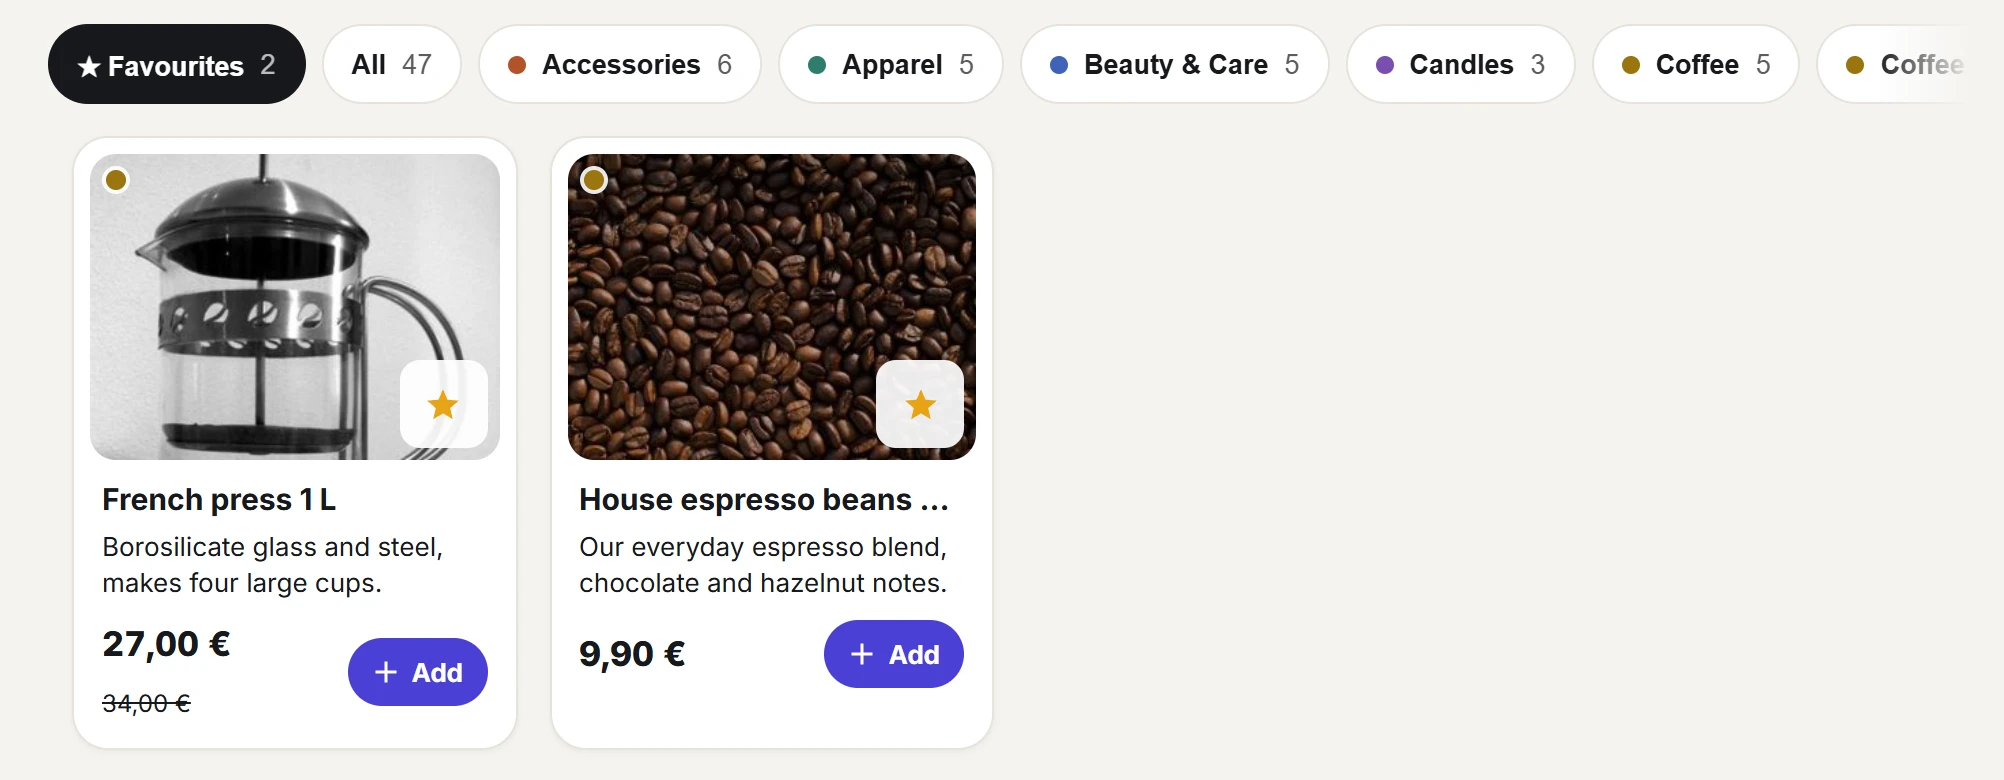
- Hover over a product card (on a touch screen the star is always visible).
- Click the star at the bottom right of the photo. It turns yellow.
- The product is now on the Favourites tab, the first button of the category row.
Click the yellow star again to remove it. Favourites are kept per register, on the server: every device used as that till sees the same list, and another till has its own. A register can hold up to 48 favourites, in the order you pinned them.
When a register has favourites, it opens on the Favourites tab. A register without any opens on All, and its empty Favourites tab says how to pin one.
Variations
Tapping a variable product, such as Linen shirt, opens a window with its attributes.
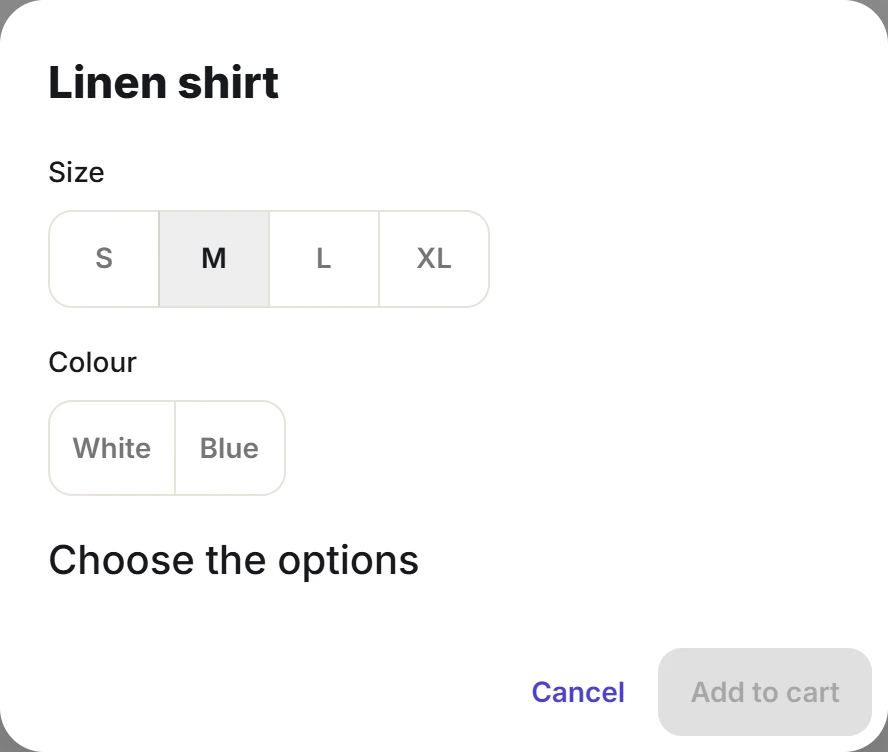
- Pick a value for each attribute, for example the size.
- The price of the matching variation appears. Until every attribute is chosen it reads Choose the options.
- Click Add to cart.
A variation that is out of stock cannot be added. In the cart, each variation is its own line, with its attributes shown under the product name.
With Pro, products can also ask for options such as extras when they are added PRO: see Modifiers.
Barcode scanners
Plugixa POS works with USB and Bluetooth barcode scanners that type into the computer, often sold as “keyboard” or “HID” scanners. There is nothing to install or set up in the plugin.
- Plug in the scanner, or pair it with the device over Bluetooth.
- Open the register and scan a product.
The register recognises a scan by its speed: the characters arrive within 50 milliseconds of each other and end with Enter, which no person types. A scan works anywhere on the selling screen, including while the search box has focus. It is ignored while the cursor is in another text field, such as a note or the customer search, so a stray scan never ends up in a note.
What happens next:
- The code is matched exactly against barcodes first, then SKUs, across products and variations. A scanned variation goes straight into the cart, without the options window.
- A match is added to the cart and a short confirmation shows the product name.
- No match shows No product has this barcode: followed by the code.
Most scanners send Enter after each code by default. If yours does not, turn that option on with the setup barcodes in its manual.
With Pro, the register also reads price and weight labels from a scale PRO (see Scale), and serial-tracked products ask for their serial number when they are added (see Serial numbers).
Quick Links
Share