

Contents
On this page
Transfers - Plugixa POS for WooCommerce
A transfer moves stock from one of your stores to another: the weekly restock of a second shop, or a product one store has too much of. The goods leave the sending store when you send the transfer, and enter the receiving store when someone counts them in.
Open Plugixa POS > Transfers. You need at least two active stores: with one, the screen says “Add a second store to move stock between stores.” The screen needs the right to manage the POS settings.
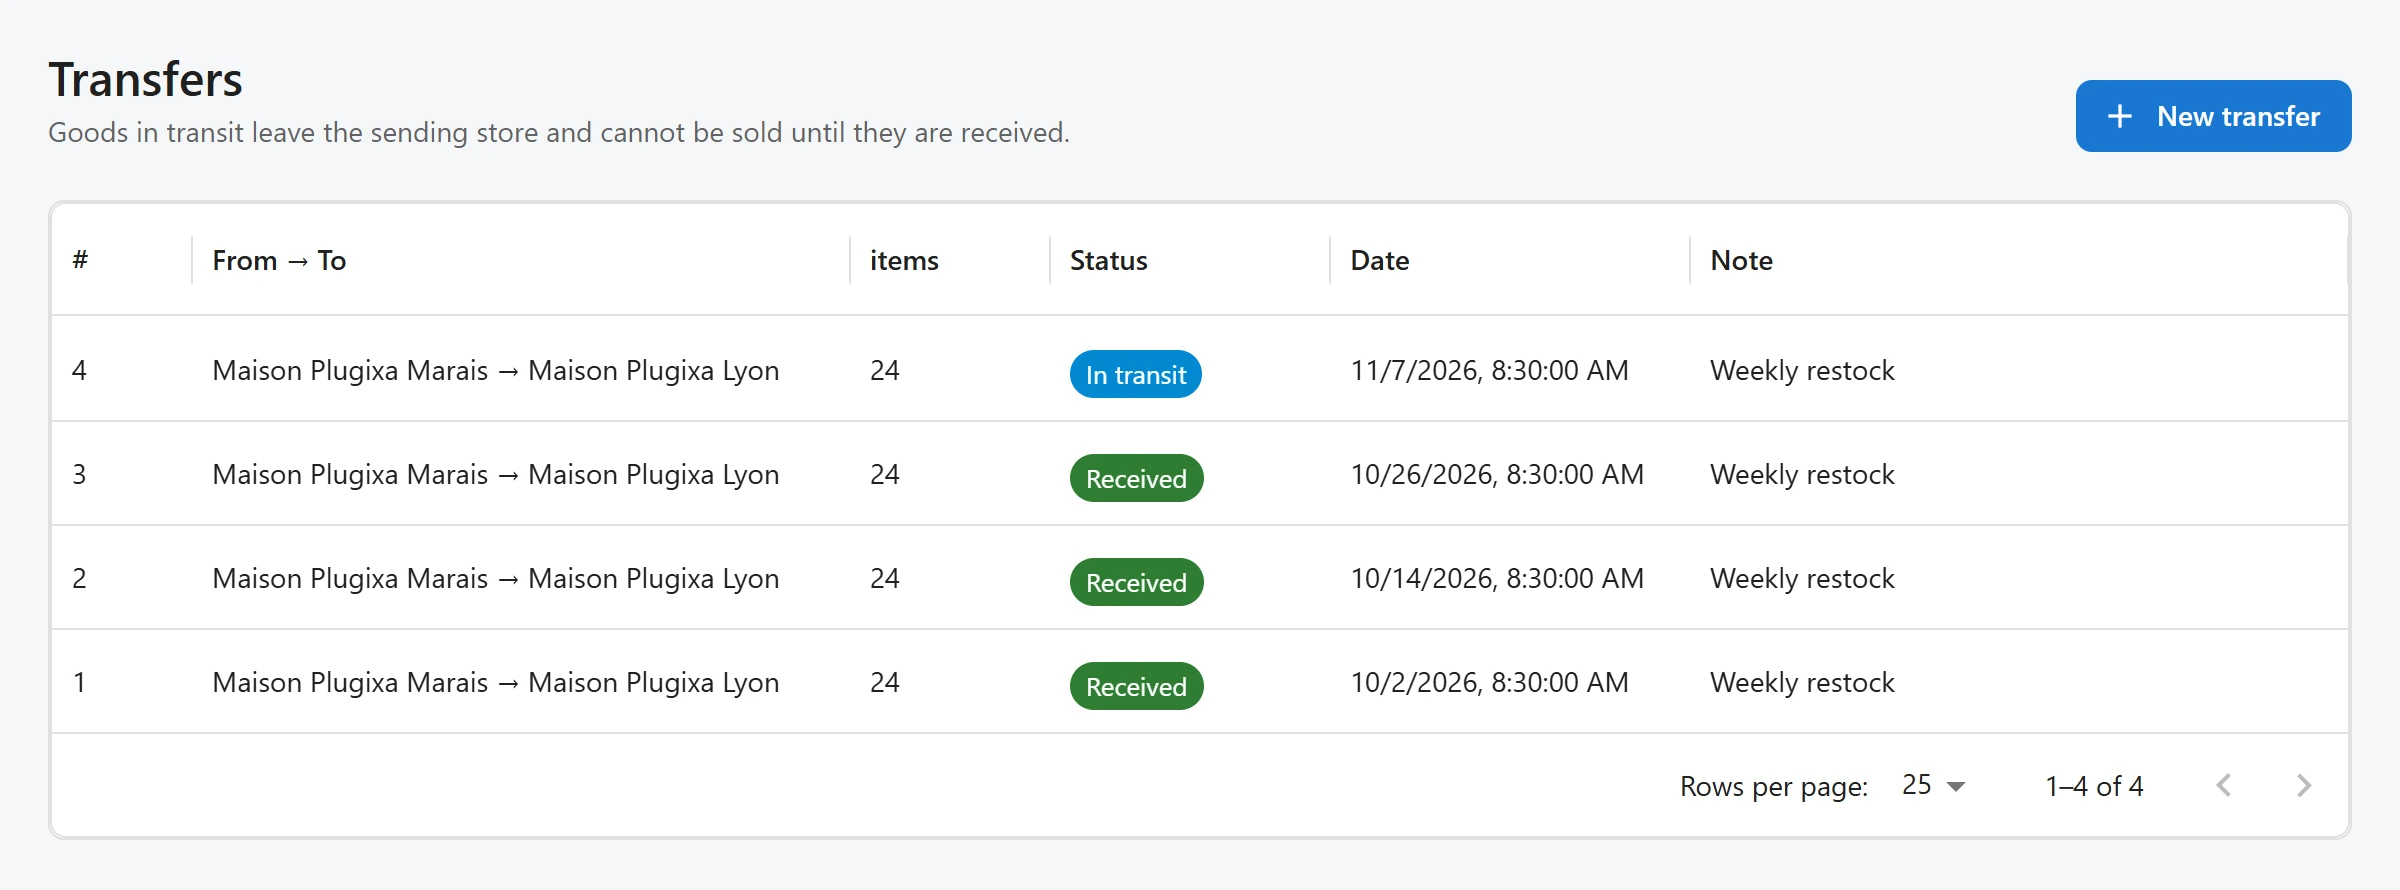
The life of a transfer
| Status | What it means | Stock |
|---|---|---|
| Draft | Being prepared. Nothing has moved. | No change. |
| In transit | The goods left the sending store. | The sending store goes down, and so does WooCommerce’s total. Goods in a van cannot be sold, online either. |
| Received | Someone counted the goods in. | The receiving store and WooCommerce’s total go up by the units counted. |
| Cancelled | The transfer was dropped. | A cancelled draft changes nothing. A transfer cancelled while in transit puts everything back in the sending store. |
The header sums it up: “Goods in transit leave the sending store and cannot be sold until they are received.”
Create a transfer
- Click New transfer.
- Choose the From store and the To store. They must be different.
- In Add a product, search and pick each product. The list shows how many units are available in the sending store.
- Type the Quantity of each line. Remove a line with its Remove button.
- Add a Note if you like, for example
Weekly restock. - Click Save draft to send it later, or Send now to create and send it in one go.
Each line needs a quantity above zero. The products must track stock in WooCommerce: sending refuses a transfer with a product that does not.
Send a draft
Click the transfer in the list, then Send. Before anything moves, the plugin checks that the sending store has every line in stock. If one is short, nothing moves and the message names the product: “Not enough stock of … in the sending store.”
Receive a transfer
- At the receiving store, open the transfer (status In transit).
- The Received column starts at the quantity sent. Change it for any line where fewer units arrived. You cannot enter more than was sent.
- Click Receive.
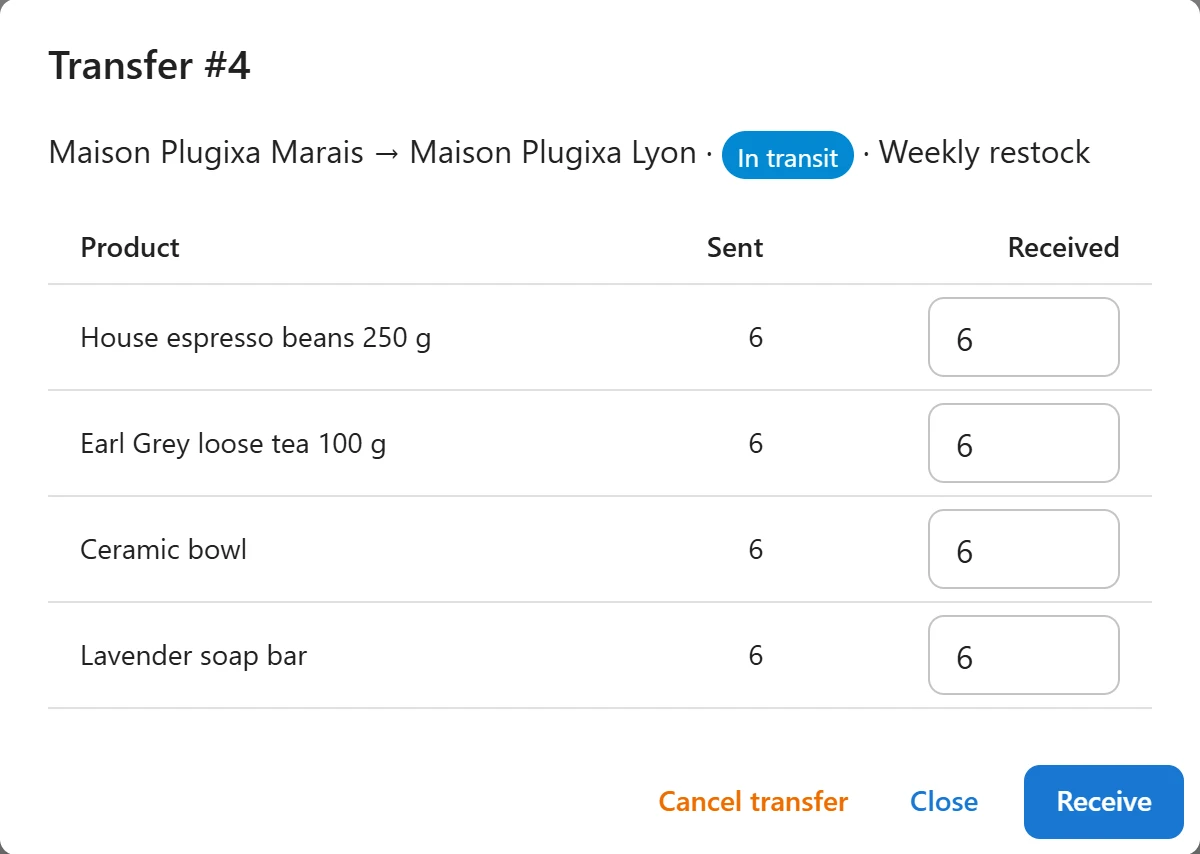
The units you counted enter the receiving store. When fewer units arrive than were sent, the missing ones are not put back anywhere: the transfer keeps showing the Sent and Received quantities side by side, so the shortfall stays visible as lost stock.
Cancel a transfer
Open the transfer and click Cancel transfer. This works for a Draft and for a transfer In transit. A received transfer cannot be cancelled: to move goods back, make a transfer the other way.
Find a transfer
The list shows the newest first, 25 per page:
| Column | What it shows |
|---|---|
| From → To | The two stores. |
| items | The total units sent. |
| Status | Draft, In transit, Received or Cancelled. |
| Date | When the transfer was created. |
| Note | The note typed when creating it. |
Related pages
- Stock by store: see the result in each store.
- Stock adjustments: stock that is lost or found without a transfer.
Quick Links
Share