

Contents
On this page
Stores and registers - Plugixa POS for WooCommerce
A store is your shop: its name, tax ID and address, printed at the top of every receipt. A register is one till. Each register has its own cash session and its own fiscal journal with its own ticket numbers, so every computer, tablet or phone that sells at the same time needs its own register.
The free plugin has one store and one register. Adding more registers, and running several shops, each with its own registers, staff and stock, is Multi-store PRO.
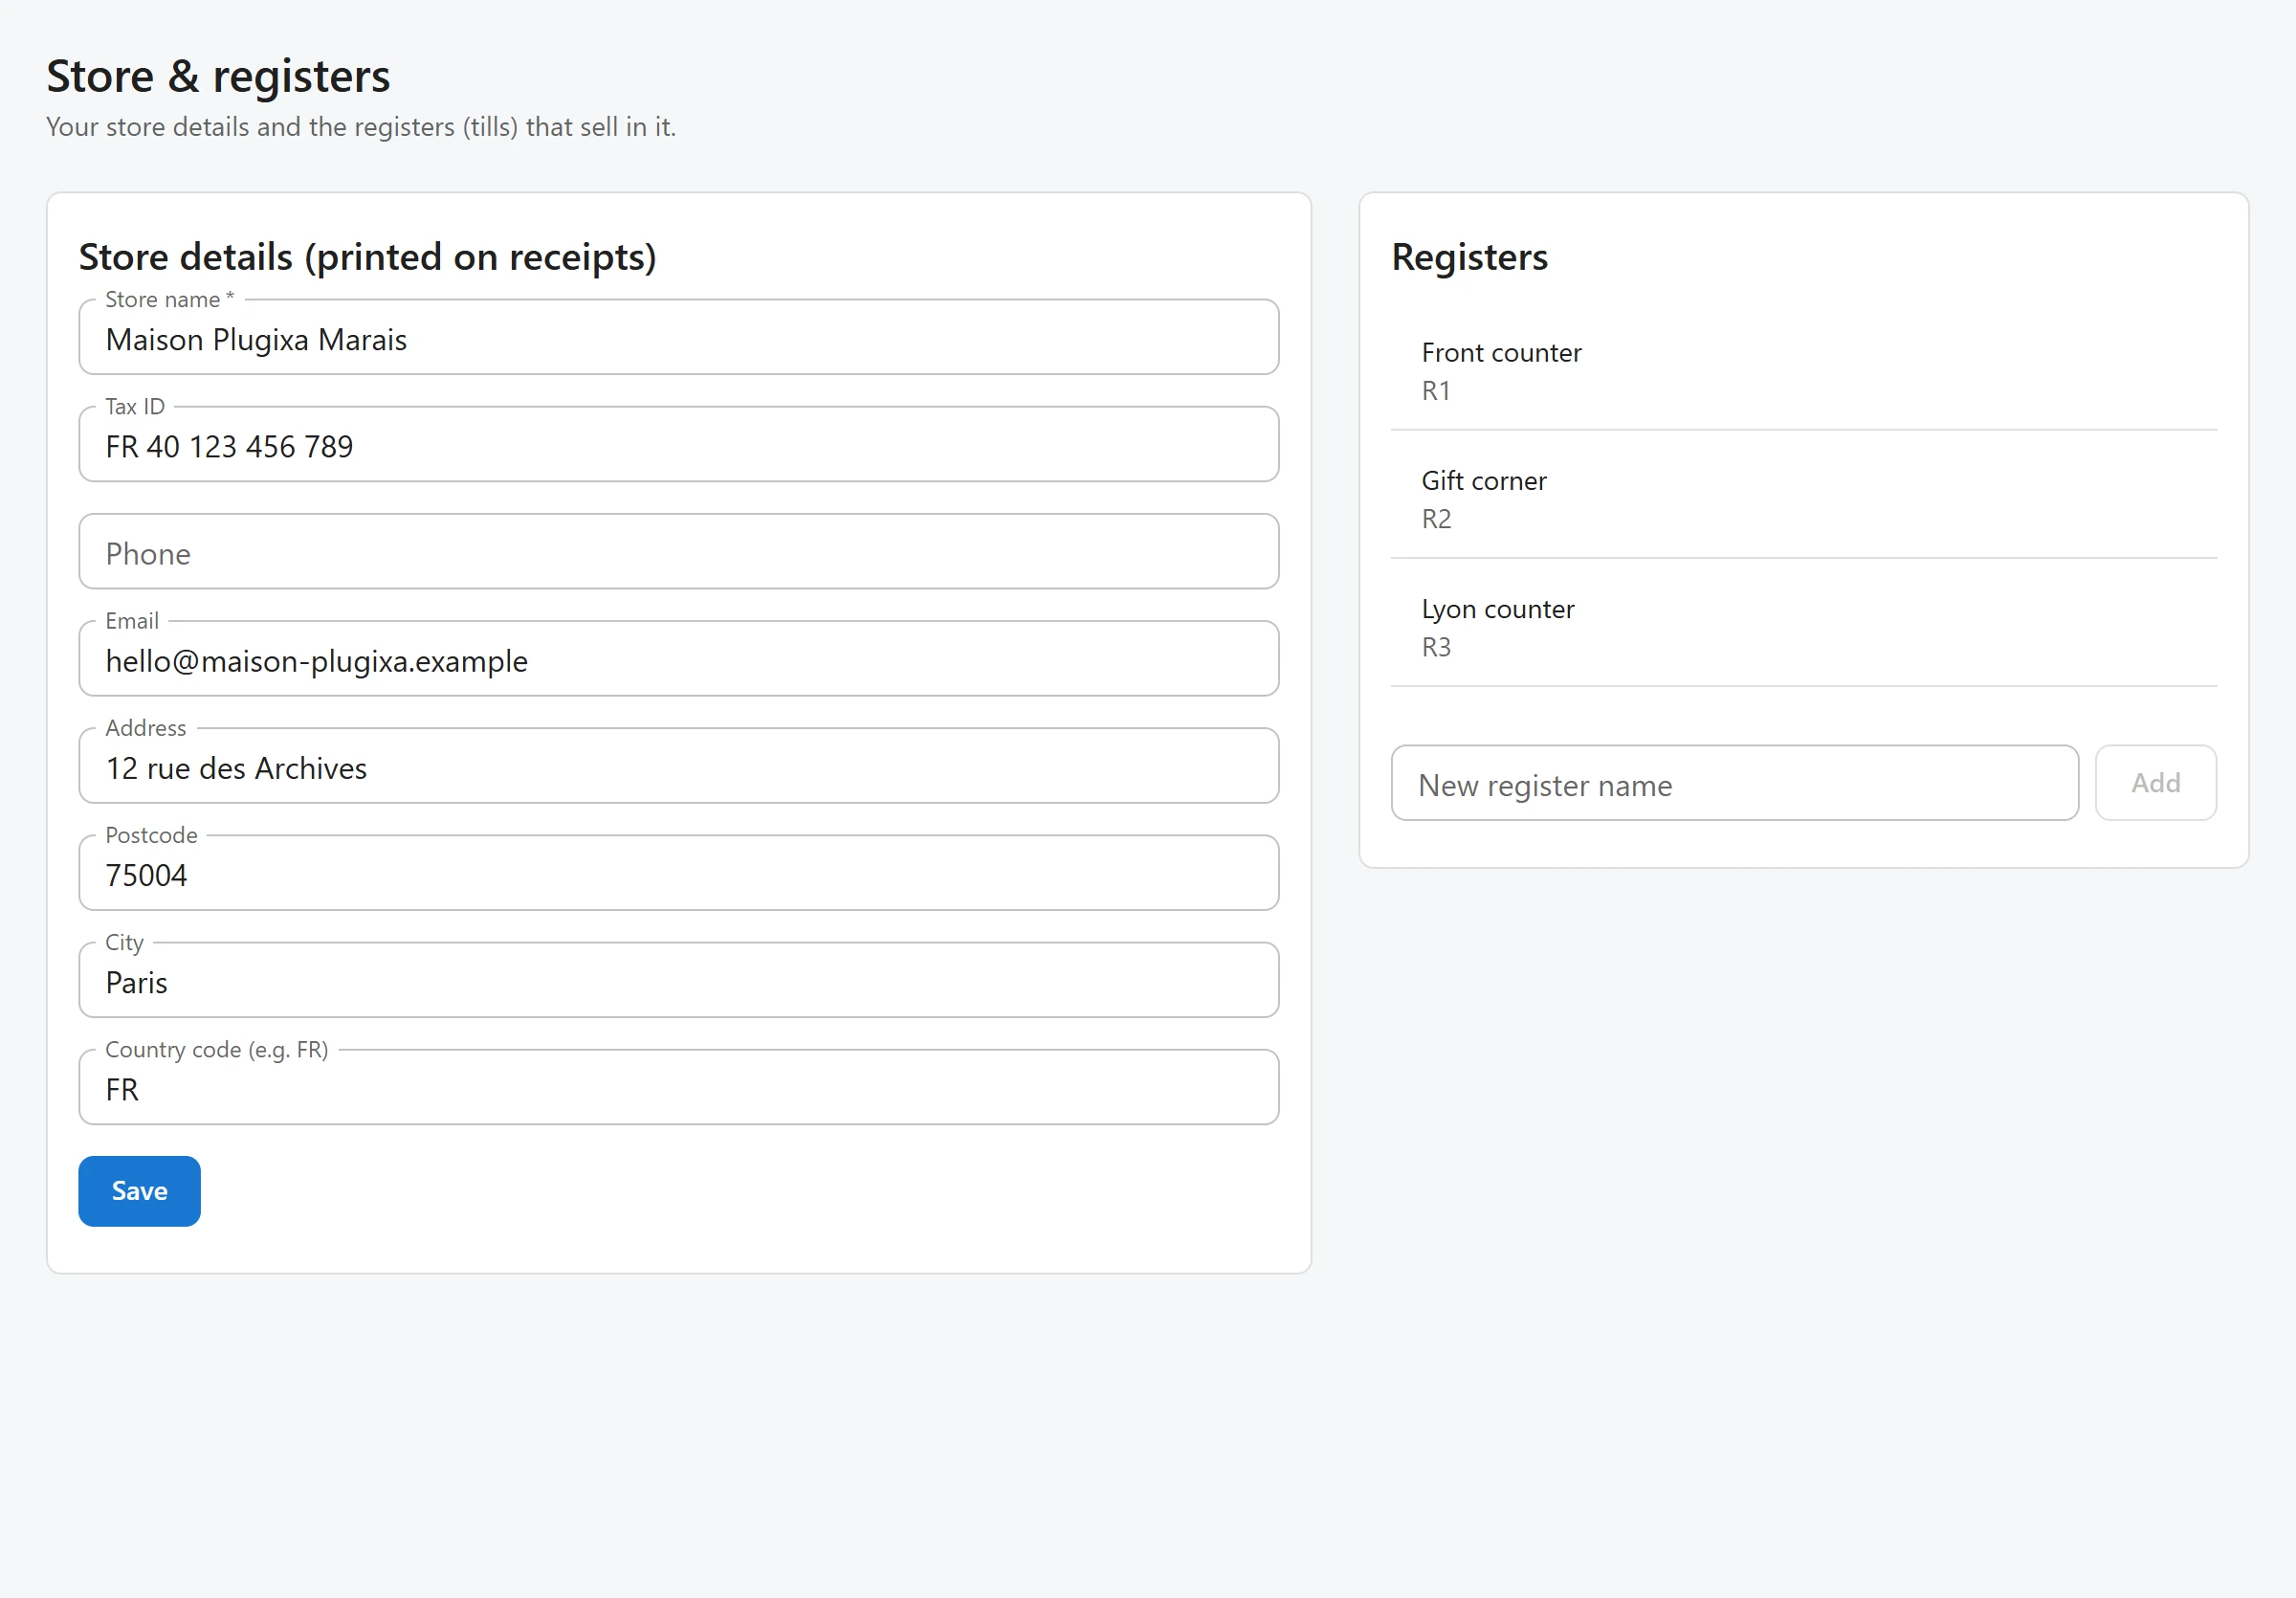
Open Plugixa POS > Store & registers. The screen needs the manage settings permission
(plugixa_pos_manage_settings); administrators have it.
What activation creates
On a new install the plugin creates one store and one register, so the register works at once:
- The store takes your site title as its name (Main store if the title is empty), your WooCommerce store address (WooCommerce > Settings > General) and your WordPress administration email.
- The register is called Register 1, with the code
R1.
Nothing is created again when the plugin is updated or reactivated.
Store details
The left card, Store details (printed on receipts), holds:
| Field | What it is for |
|---|---|
| Store name | Printed at the top of the receipt. Required. |
| Tax ID | Your VAT or tax number, printed on the receipt. |
| Phone | Printed on the receipt. |
| The store’s email address. | |
| Address | Street and number. |
| Postcode | |
| City | |
| Country code (e.g. FR) | Two-letter country code. |
Click Save. The register reads the store’s address to find the WooCommerce tax rates that apply at the counter, so keep it the address where you sell. When the country is empty, the WooCommerce base country is used.
With Pro, A4 invoices use these details too, unless you fill in the invoice fields in Settings. See Invoices PRO.
Adding a register
Adding registers is a Pro feature. In the free plugin the Registers card lists the register made on activation and shows Need more tills? See Pro instead of an add form.
With Pro, you add registers from the Stores screen, on the card of each store. See Add a register to a store.
Every register has a code. Codes follow on: R1, R2, R3 and so on. The code identifies the
register in its fiscal journal and on its receipts, so it is set by the plugin and never changes
or comes back, even for a register you stop using.
Choosing the register at the start of a shift
Each device remembers which register it is. The first time someone opens the register at
/pos on a device, it asks Which register is this? and lists the registers they may use,
grouped by store, each with its code and name. A click selects it. When there is only one
register, it is selected without asking.
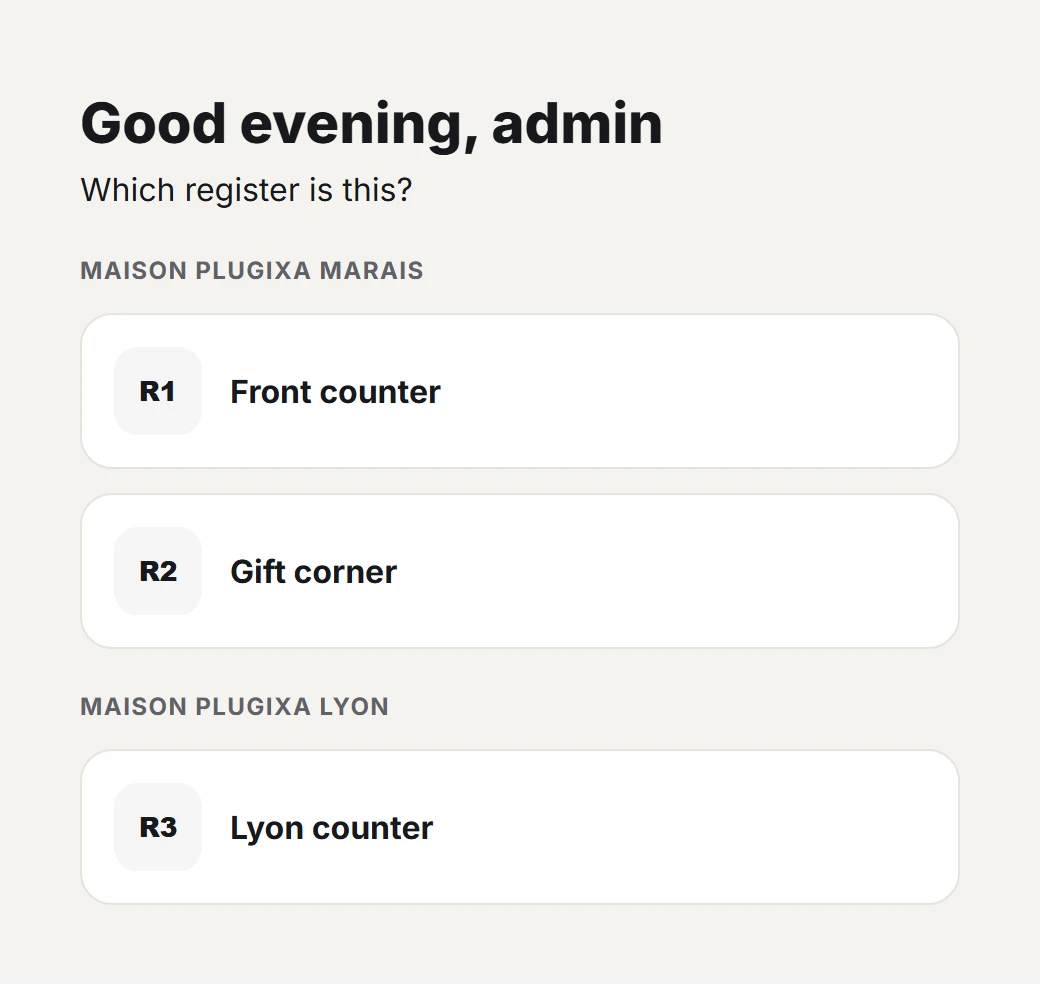
Once a register is chosen, the cashier opens its cash session and starts selling. See Cash sessions and Register.
Who can use which register
In the free plugin every user with the sell permission may use the register. With Multi-store PRO, staff can be limited to the stores they are assigned to. See Staff access.
Renaming or retiring a register
The Store & registers screen does not rename or archive registers. Both can be done
through the REST API: PUT /wp-json/plugixa-pos/v1/registers/<id>
with a new name, or with status set to archived. An archived register is no longer offered
at /pos, and its journal and sessions are kept.
With Pro
With Pro, Store & registers is replaced by a Stores screen that manages several stores and their registers. See Multi-store.
Quick Links
Share