

Contents
On this page
Invoice designer - Plugixa POS for WooCommerce
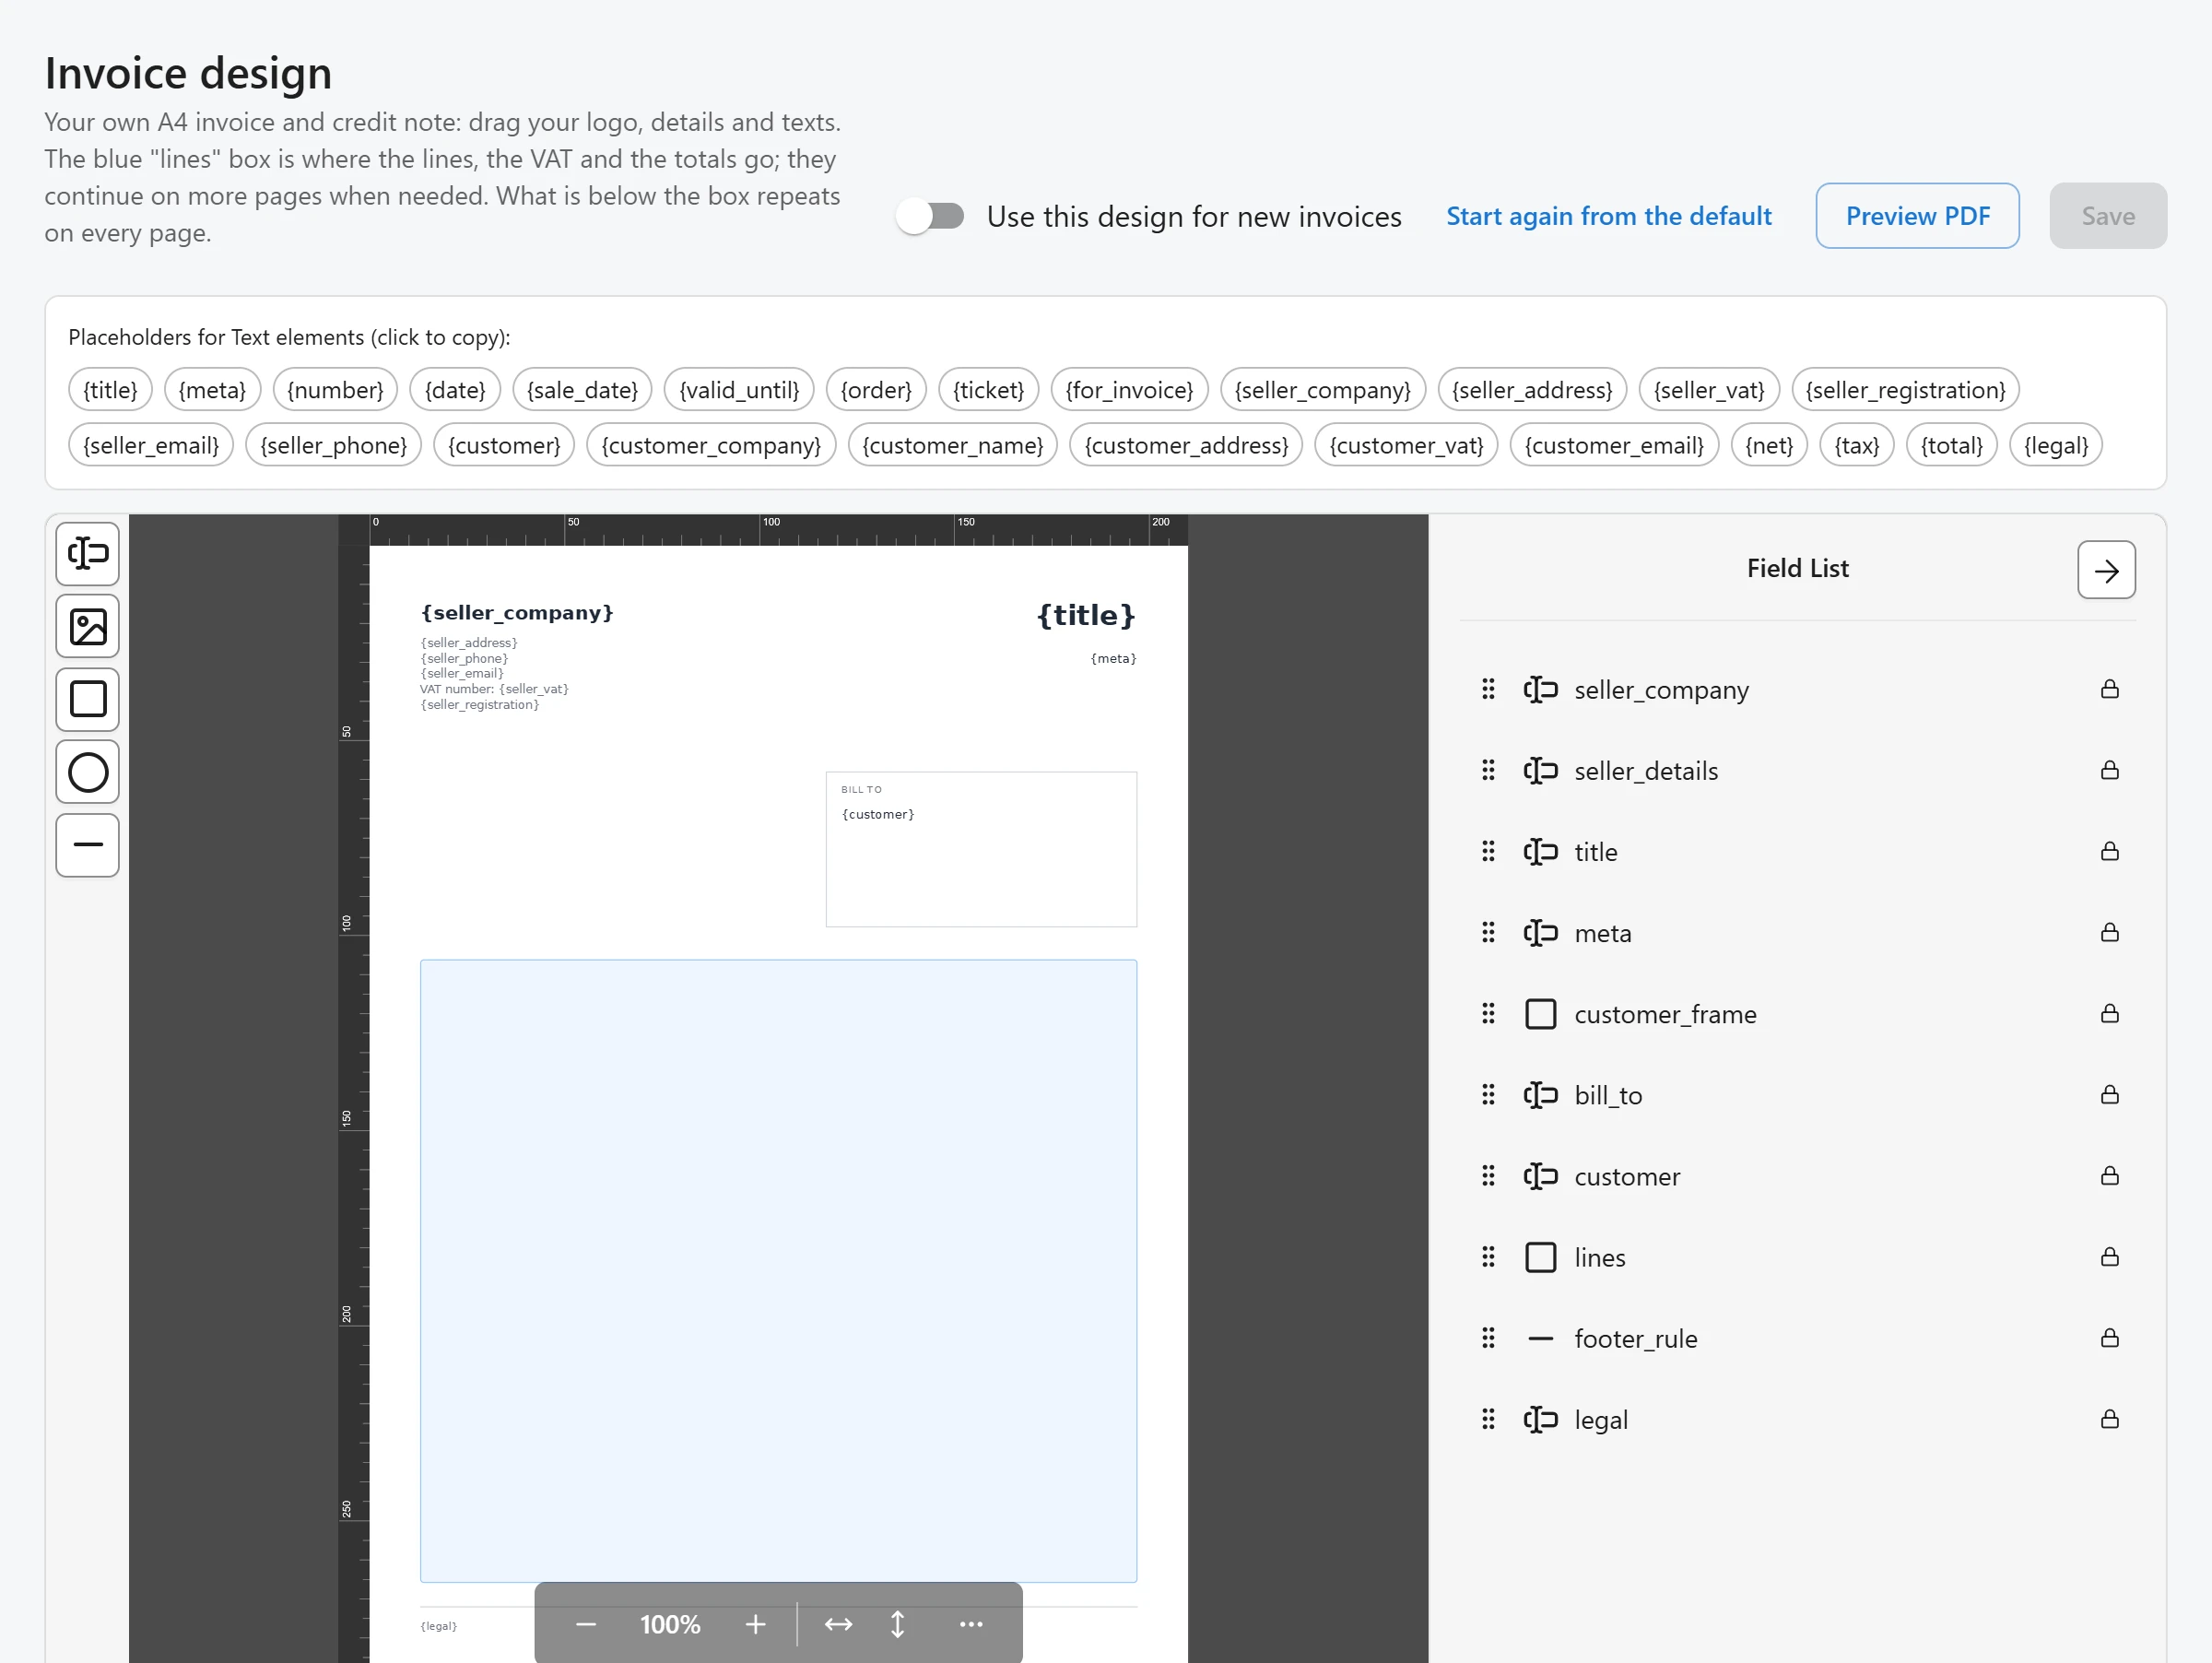
The invoice designer lets you draw your own A4 layout for the invoices and credit notes the plugin issues: place your logo, your details and your texts where you want them. The same layout is used for quotes. Until you switch your design on, documents use the built-in layout.
Open the designer
Open Plugixa POS > Invoice design (in the Store group). The first time, the page shows the built-in invoice redrawn as a design, in your shop’s language, so you never start from a blank page. From then on its words are your design’s own text.
Edit the page
The page is A4 (210 x 297 mm). Add and move elements on it:
- Text: fixed words, or placeholders filled from each document (see below). Two fonts are available, regular and bold.
- Image: your logo or a signature, PNG or JPEG, up to 1.5 MB each.
- Rectangle, Ellipse and Line: frames, rules and shapes.
A design holds up to 150 elements.
The lines box
One element is reserved: the blue rectangle named lines. It is where the document’s lines, the
VAT summary and the totals go. An invoice can have any number of lines, so this box decides how
the pages flow:
- Elements that start above the bottom edge of the box are the header, printed on page 1.
- Elements that start at or below it are the footer, printed on every page.
- The lines fill the box’s width. On page 1 they start at the top of the box; on later pages they start 12 mm from the top. On every page they stop above the footer.
The box must be at least 90 mm wide and 40 mm high, and a design needs exactly one. If you delete it, the screen warns: “The “lines” box is missing: add a Rectangle named lines, or start again from the default.” The design cannot be saved or previewed until it is back.
Placeholders
Above the page, the screen lists the placeholders, under “Placeholders for Text elements (click to copy)”. Click one to copy it, then paste it into a Text element. When a document is made, each placeholder is replaced with its value.
| Placeholders | What they hold |
|---|---|
{title} |
“Invoice”, “Credit note” or “Quote” |
{meta} |
The block of number, dates and order |
{number}, {date}, {sale_date}, {valid_until}, {order}, {ticket}, {for_invoice} |
One value each. {valid_until} is for quotes, {for_invoice} is the invoice a credit note corrects. |
{seller_company}, {seller_address}, {seller_vat}, {seller_registration}, {seller_email}, {seller_phone} |
Your company details, from Settings |
{customer} |
The customer block, or “Walk-in customer” |
{customer_company}, {customer_name}, {customer_address}, {customer_vat}, {customer_email} |
One customer detail each |
{net}, {tax}, {total} |
The totals |
{legal} |
The legal mentions of the document |
Preview, save and switch on
- Click Preview PDF. A new tab opens with your design filled in from the latest sale made at a register, marked “PREVIEW”. Without any register sale yet, the preview asks you to make one first.
- Click Save.
- Switch on Use this design for new invoices and click Save again.
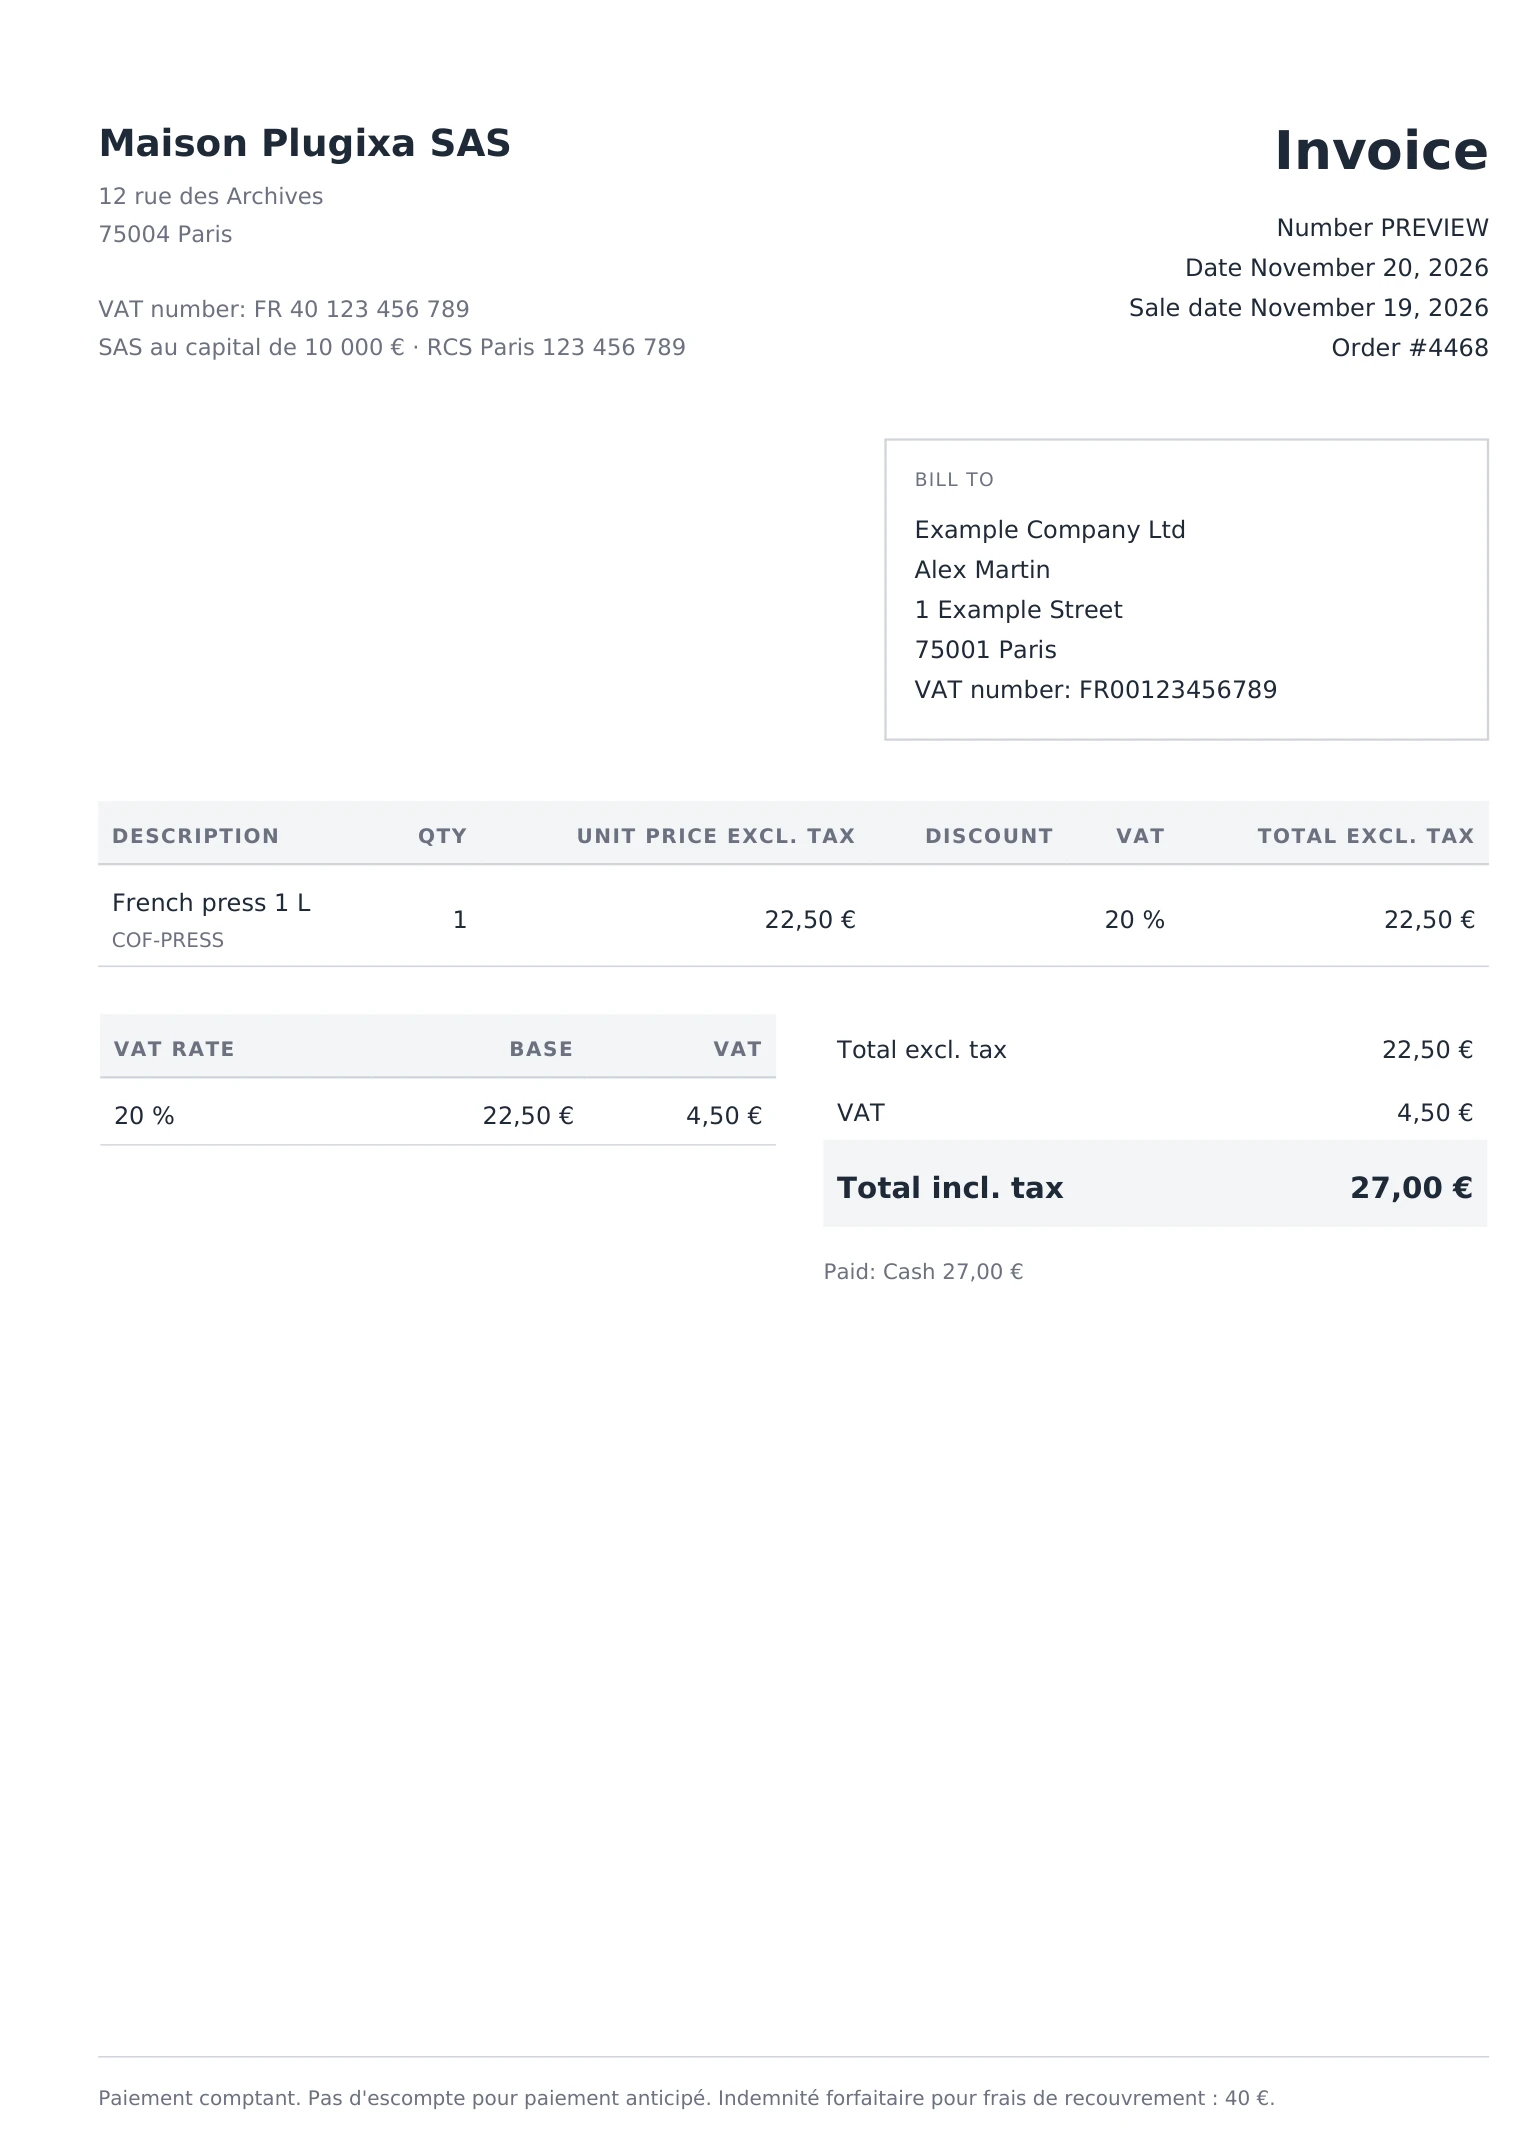
Once switched on: “Saved. New invoices and credit notes use this design; issued ones keep theirs.” Invoices already issued are not redrawn. With the switch off, your design is kept but documents use the built-in layout: “Saved. Invoices keep the built-in layout until you switch the design on.”
Start again from the default replaces your design on the screen with the built-in one. Nothing changes until you click Save.
Each save is written to the audit log.
Who can do what
The Invoice design screen needs the permission to manage settings.
Quick Links
Share