

Contents
On this page
Getting started - Plugixa POS for WooCommerce
This page takes you from a fresh install to your first completed sale. It takes a few minutes on a WooCommerce shop that already has products.
Requirements
| What | Version |
|---|---|
| WordPress | 6.6 or higher, tested up to 7.1 |
| PHP | 8.2 or higher |
| WooCommerce | 9.6 or higher, tested up to 11.3 |
WooCommerce must be installed and active: WordPress does not let you activate Plugixa POS without it. If WooCommerce is older than 9.6, an administrator sees the notice Plugixa POS needs WooCommerce 9.6 or newer and the register does not work until WooCommerce is updated.
The plugin works with WooCommerce High-Performance Order Storage (HPOS) switched on or off.
The register sells the products WooCommerce already has: published simple and variable products, with their prices, taxes, SKUs and stock. You do not add products in Plugixa POS.
1. Install and activate
- In WordPress, open Plugins > Add New Plugin and click Upload Plugin.
- Choose the plugin ZIP file and click Install Now.
- Click Activate.
A Plugixa POS menu appears in the WordPress sidebar. It opens the back office on its Dashboard. On activation you may also see an opt-in screen from Freemius, the service behind the plugin’s account page. You can skip it: no identifiable data is then sent.
If you bought Pro, download it from your Plugixa account and install it the same way. It takes over from the free plugin and keeps all your data. When both copies are active, only one runs and WordPress shows the notice Two copies of Plugixa POS are active, asking you to deactivate the one you no longer need.
What activation sets up
Running activation again never duplicates any of this.
| What | Details |
|---|---|
| Database tables | Tables for stores, registers, cash sessions, cash movements, held sales, the fiscal journal and closings and the audit log, named with your table prefix and plugixapos_. Orders themselves are WooCommerce orders. |
| Your store | One store, named after your site title (or Main store when the site has no title), with the WooCommerce store address and the site’s admin email. |
| A first register | Register 1, with the code R1, in that store. |
| Capabilities | The administrator role gets every Plugixa POS capability. No new role is created. |
| The register page | The address /pos starts working at once. It is not a WordPress page: you will not find it under Pages. |
| Settings | The default settings, for example the receipt footer Thank you for your visit!. |
No sample products or orders are created.
To rename the store or add its tax ID and phone (they print on receipts), open Plugixa POS > Store & registers. Adding more registers is a Pro feature. See Stores and registers.
Only administrators can use the POS after activation. To let a cashier or a manager in, give them access as described in Staff access.
2. Open the register
Open /pos on your site, for example https://example.com/pos, or click Open register at
the top of the Dashboard. A visitor who is not signed in is sent to the WordPress login page
first, then back to the register.
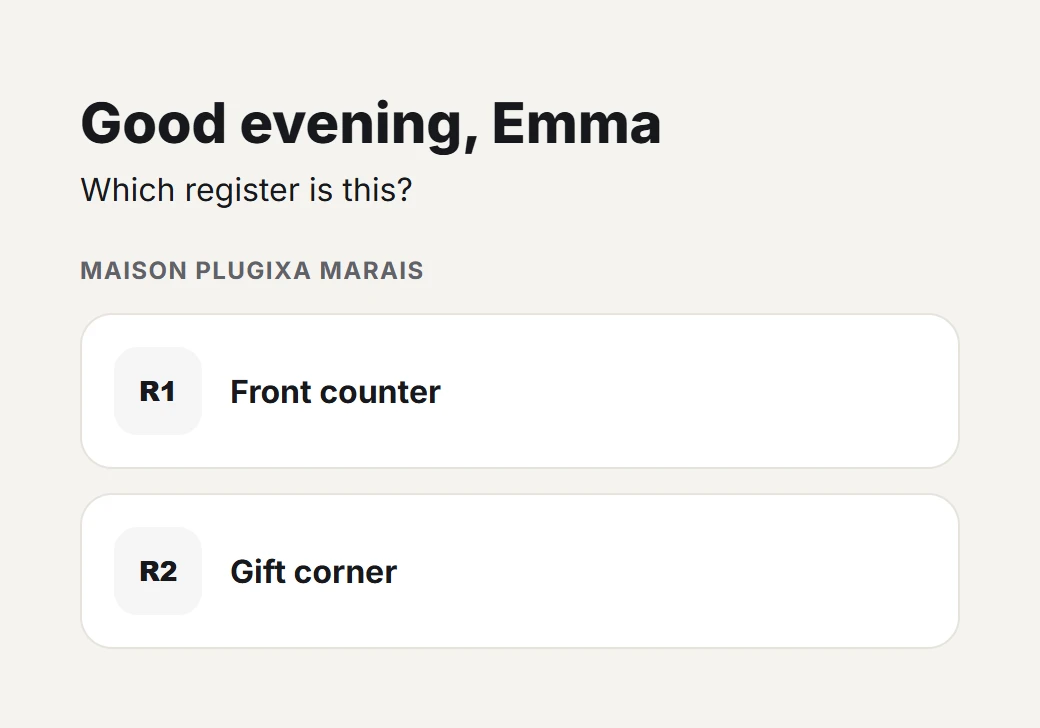
- If your site has more than one register (Pro), the device asks Which register is this?. Click the till this device stands at. The browser remembers the choice, so you only answer once per device. With a single register, this step is skipped.
- The register has no open cash session yet, so it shows Open the register. Count the notes and coins in the drawer: type how many of each you have, and the Opening float is filled in from the count. You can also type the float directly.
- Click Open register.
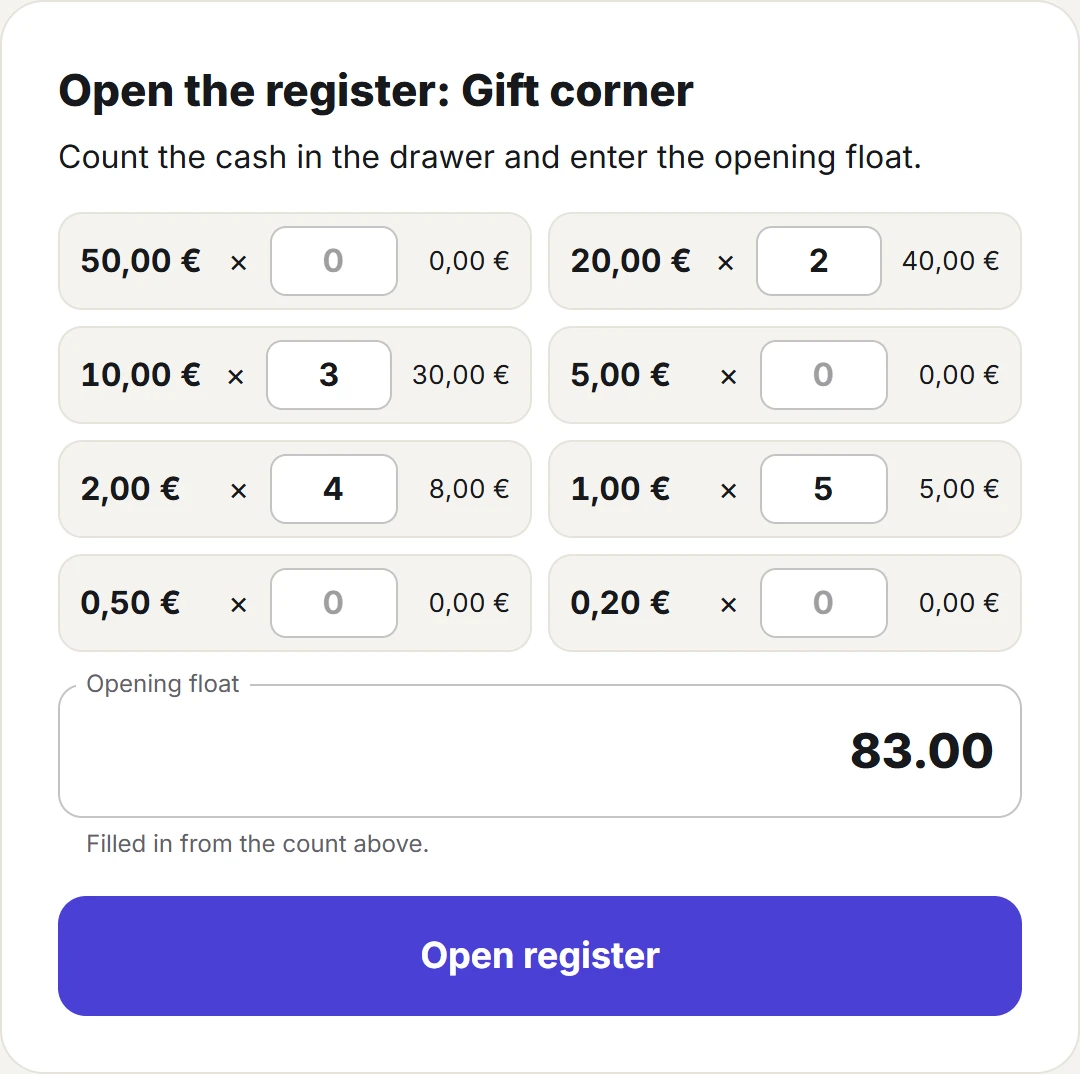
The note and coin rows are shown for currencies with two decimals, such as the euro, dollar or pound. Opening a session needs the right to manage sessions: a cashier without it sees Ask a manager to open the register. Everything about sessions, including the X and Z reports, is in Cash sessions.
3. Make a first sale
- Tap a product card, or click its Add button. It appears under Current sale on the right. Tap + to sell more than one.
- Press Pay. The payment screen opens with Cash selected.
- Type the amount the customer hands you, or click one of the quick amounts. Leave the field empty when the customer pays the exact amount. The change to give back is shown in large print.
- Click Complete sale.
The Sale complete window shows the ticket number, the WooCommerce order number and the change. Click Print receipt to print it, then New sale to start the next one.
The sale is now a completed WooCommerce order, with the note Paid at the register., and the stock of what you sold has gone down. Open WooCommerce > Orders to see it, or Plugixa POS > Orders.
What to do next
- Learn the screen in The register.
- Pin your best sellers and set up a barcode scanner in Products and search.
- Take card and split payments in Payments.
- Set the receipt header and footer in Settings.
- Close the day with a Z report in Cash sessions.
- See what Pro adds: Free vs Pro.
Quick Links
Share