

Contents
On this page
Stripe - Plugixa Stream
Stripe takes card payments on Stripe Checkout, the payment page hosted by Stripe. The viewer leaves your site to pay and comes back to the wallet once done. Card details are typed on Stripe’s page and never reach your site. In the Watch app, Stripe is the Card method.
Stripe sells both coin packs (a one-time payment) and VIP plans (a Stripe subscription). Set it up under Settings > Payments, in the Stripe part of the tab.
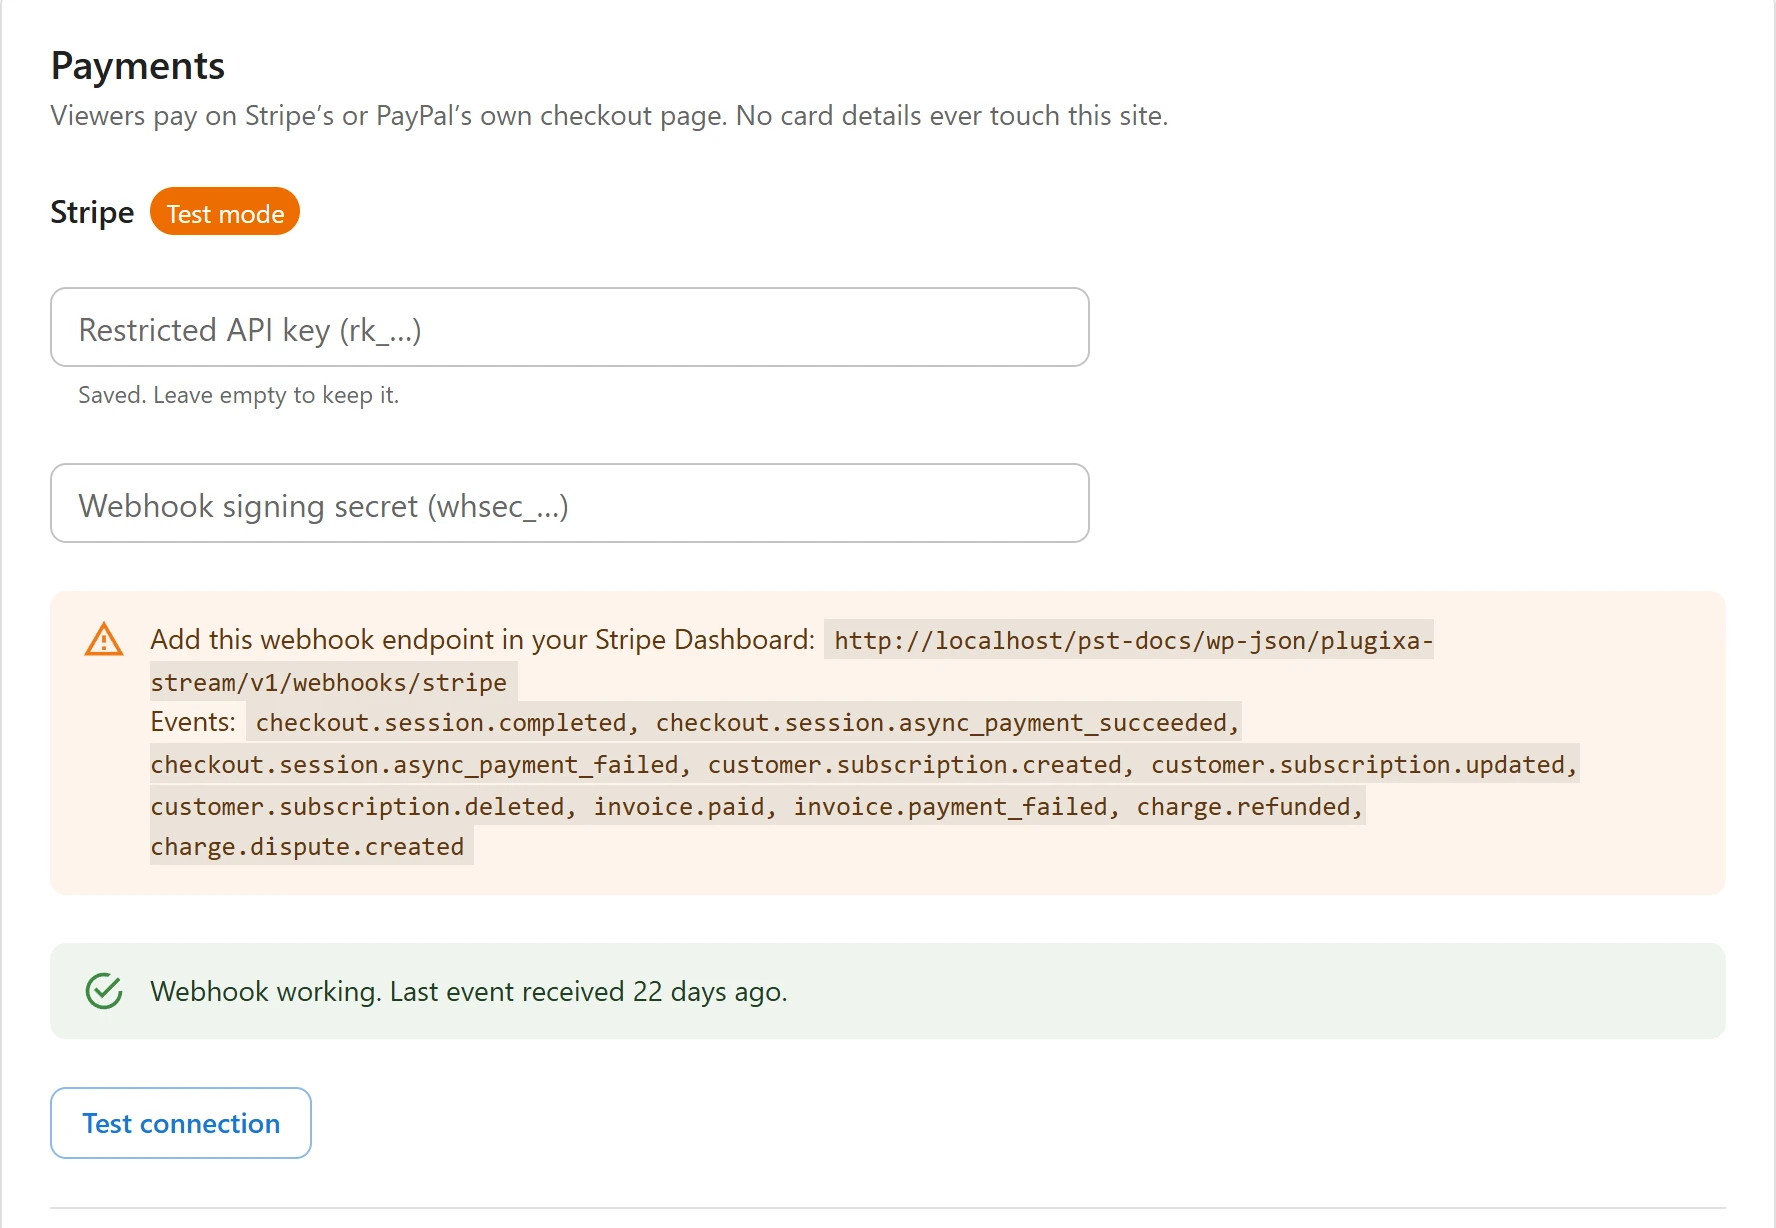
1. Save your key
| Field | Notes |
|---|---|
| Restricted API key (rk_…) | “Create a restricted key with write access to Checkout Sessions, Products, Prices, Subscriptions and Refunds.” In Stripe, under Developers > API keys. |
| Webhook signing secret (whsec_…) | The signing secret of the webhook endpoint you add in step 2 |
Click Save at the bottom of the tab. The Payments tab saves on its own, apart from the other settings.
Keys are stored encrypted and are never sent back to the browser. A saved field shows dots and “Saved. Leave empty to keep it.” To change a key, type the new one and click Save.
Once a key is saved, a badge next to Stripe shows the mode: Test mode for a test key, Live for a live one. Click Test connection: “Connected.” means Stripe accepted the key.
2. Add the webhook
The webhook is how Stripe tells your site about payments, renewals, refunds and disputes. Coins are only added and VIP only starts when the webhook arrives. Without it, Stripe takes the money and the viewer receives nothing.
-
Copy the endpoint address from the box on the tab. It looks like this:
https://example.com/wp-json/plugixa-stream/v1/webhooks/stripe -
In Stripe, go to Developers > Webhooks and add an endpoint with that address.
-
Select these events:
Event What the site does checkout.session.completedMarks the order Paid and adds the coins, or starts VIP. A payment still on its way waits for the next event. checkout.session.async_payment_succeededSame, once a delayed payment arrives checkout.session.async_payment_failedMarks the order Failed customer.subscription.created,customer.subscription.updated,customer.subscription.deletedKeeps the VIP status and its end date in step with Stripe invoice.paidRecords a renewal as a Paid order and extends VIP invoice.payment_failedUpdates the VIP status. The viewer keeps VIP until the period ends. charge.refundedMarks a coin pack order Refunded and removes its coins charge.dispute.createdSame as a refund: the order turns Refunded and its coins are removed -
Copy the endpoint’s signing secret into Webhook signing secret (whsec_…) and click Save.
Every event is checked against the signing secret, and an event older than 5 minutes is refused, so nobody can add coins by posting a fake event to the address. Events for checkouts that another site opened on the same Stripe account are ignored.
Is the webhook working?
Under the box, the tab checks for itself (it refreshes every 30 seconds):
- “No webhook event received yet. Make a test purchase after adding the endpoint.”
- A green message that the webhook works, with the time of the last event.
- A red message that events arrive but are rejected, with “Check that the signing secret above matches the endpoint in your Stripe Dashboard.”
3. Test, then go live
With a test key (rk_test_ or sk_test_) no real money is taken.
- Sign in on the site as a viewer and open Wallet in the Watch app.
- Buy a coin pack with one of Stripe’s test cards.
- Check that the coins arrive in the wallet, and that the order shows Paid on Orders.
To go live, save your live key, then add a webhook endpoint in live mode and save its signing secret: test and live endpoints have different secrets.
The checkout flow
- The viewer taps a pack or a plan in the wallet, and Card if PayPal is set up too.
- The site opens a Stripe Checkout session in your currency, with the viewer’s email address filled in. A pack shows as “300 coins + 30 bonus”, a plan under its name.
- The viewer pays, then comes back to the wallet. The wallet checks again for a few seconds, and the coins usually show at once.
- If the viewer leaves Stripe’s page with its back link, nothing is charged.
Each viewer has one Stripe customer, created at their first checkout and reused after it, so their payments sit together in your Dashboard. A checkout left unpaid for two days shows as Abandoned on the Orders page. A late payment on it still counts.
Subscriptions
A VIP plan is sold as a Stripe subscription. Nothing has to exist in Stripe first: the plugin creates a product named after the plan and its recurring price at the first checkout.
- Free trial: the account’s first plan starts with the Free trial (days) you set.
- Promo code: on a plan, the discounted price is the subscription’s price for as long as it runs.
- Price change: a new price applies to new subscribers. Existing ones keep theirs.
- Cancellation by the viewer, or with Stop renewal on the Orders page, sets the subscription to end with its period.
See VIP subscriptions.
Refunds
For a coin pack, click Refund on the order in Orders. The full amount goes back through Stripe, and the coins the pack added are removed from the wallet. Coins already spent are covered by locking again the episodes bought with them. See Orders and viewers.
A refund made in the Stripe Dashboard reaches the site through charge.refunded and has the same
effect for a full refund. A partial refund takes back the same share of the pack’s coins, and the
order stays Paid until the whole amount has gone back. Refunds on VIP payments are recorded on
their order too.
The Refund button only appears on coin pack orders. Refund VIP payments from the Stripe Dashboard, and cancel the subscription there too if the viewer should lose VIP at once.
Related
Quick Links
Share