

Contents
On this page
Bunny Stream - Plugixa Video
Bunny Stream PRO hands the conversion of your uploaded videos to Bunny Stream, a paid video hosting service, instead of FFmpeg on your own server. Bunny encodes each video and serves it to your viewers from its CDN. It is the way to offer adaptive streaming on a host where FFmpeg is not available, and it takes the encoding load and the video traffic off your server.
Bunny Stream is an app in the App manager, on by default in Pro. It needs the Media app. If the Bunny Stream tab is missing from Settings, switch the app on.
You need a Bunny account with a Stream video library. Bunny bills you directly for encoding, storage and traffic.
Setting it up
1. Connect your library
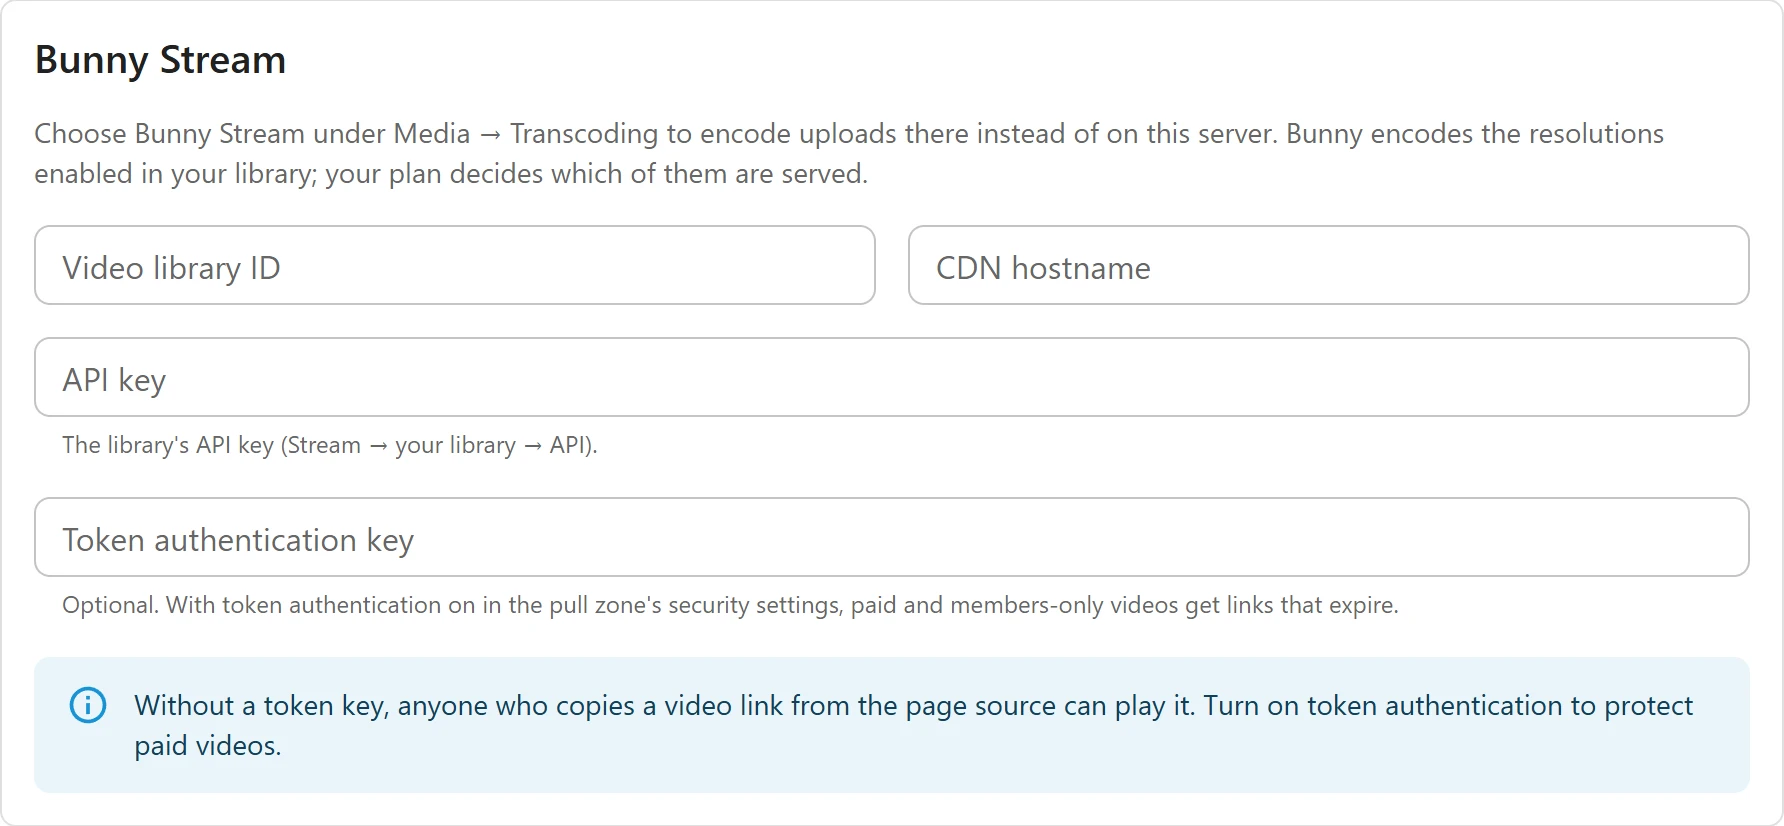
Open Settings -> Bunny Stream. Only users who can manage the plugin’s settings can change these fields.
| Field | Notes |
|---|---|
| Video library ID | The number of your Stream library. Digits only. |
| CDN hostname | The library’s pull zone host, such as vz-12345678-abc.b-cdn.net. You can paste it with https://: only the host is kept. |
| API key | “The library’s API key (Stream → your library → API).” |
| Token authentication key | Optional. See Protecting paid videos. |
All three of library ID, API key and CDN hostname are needed. Press Save.
The two keys are write-only: once saved they are never sent back to the browser, and their fields only show that a key is stored. Type a new value to replace one, or press Remove and save to delete it.
2. Choose Bunny for conversion
Open Settings -> Media and set Transcoding to Bunny Stream, then save. From now on, an uploaded video is converted on Bunny when Convert videos automatically after upload is on. See Uploading and encoding.
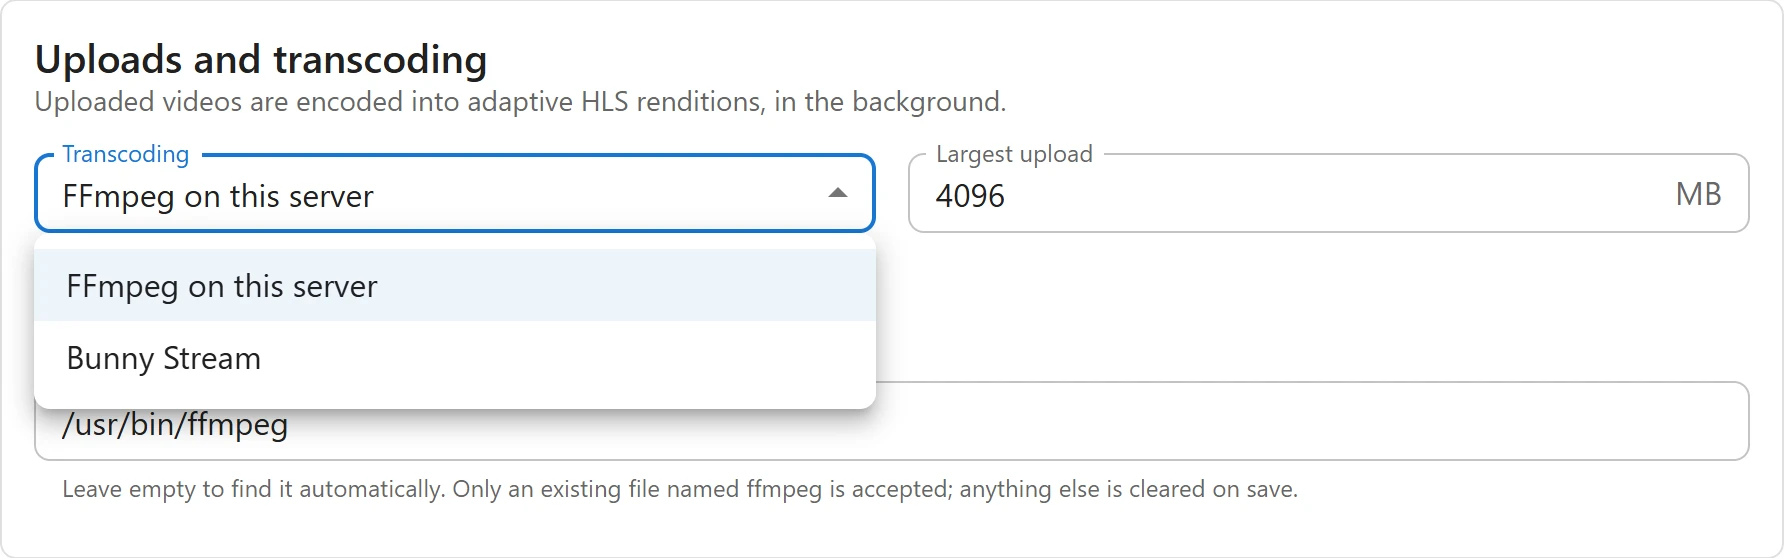
On a video’s media panel, Transcode with lets you pick the service for one conversion: FFmpeg on this server or Bunny Stream. A service that is not ready is greyed out, and the panel shows why, for example “Bunny Stream is not set up: enter the library ID, API key and CDN hostname in Settings → Bunny Stream.”
Your server needs the PHP cURL extension to upload to Bunny. Without it the media panel says “Uploading to Bunny Stream needs the PHP cURL extension.”
What is uploaded
For each video converted on Bunny, your server:
- Creates a video in your Bunny library, named after the video’s title.
- Uploads the video file you uploaded to WordPress, once, streamed straight from disk so large files do not fill the server’s memory.
- Checks back with Bunny until it has finished encoding.
Your uploaded file stays on your server as well. Nothing about your viewers is sent to Bunny by your server.
When you upload a new file for the same video, the old Bunny video is deleted and the new file is sent. When a video is deleted for good in WordPress (not just moved to the trash), its Bunny video is deleted too.
Qualities
Bunny encodes a video into every resolution enabled in your library’s encoding settings. It cannot be asked for only one. Each quality you ask for on the media panel becomes Ready when Bunny has finished and lists that resolution.
If you ask for a quality your library does not produce, it fails with: “Your Bunny Stream library does not encode 1080p. Enable it in the library’s encoding settings, then generate it again.”
Your Plugixa Video plan still decides which qualities are served. Bunny may produce more, but viewers only get the ones your plan allows: up to 1080p with Pro, and up to 2160p (4K), which needs the Pro licence for unlimited sites. See Uploading and encoding.
How playback works
Nothing changes for the viewer: the same player, the same quality menu. Behind it, the video’s playlist points at Bunny’s copies of each quality, so the video itself streams from your Bunny CDN host, not from your server. Your server only answers the short playlist files and the access check that decides whether the viewer may watch.
Videos converted earlier with FFmpeg are not moved to Bunny: they keep playing from your server.
Protecting paid videos
Without a token key, the settings tab warns: “Without a token key, anyone who copies a video link from the page source can play it. Turn on token authentication to protect paid videos.”
To close that gap:
- In Bunny, open your library’s pull zone, go to its security settings and turn on token authentication. Copy the token authentication key.
- Paste it into Token authentication key and save.
From then on the links to Bunny’s files carry a token that expires, made to last for the viewing so a long film is not cut off mid-play. A copied link stops working once its token has expired.
A video whose source is a link to your Bunny pull zone (pasted rather than uploaded) is signed the same way when it is not free.
What is sent to Bunny
Your server talks to video.bunnycdn.com with your library’s API key, and viewers’ browsers load
the video from the CDN host you entered. Nothing is sent until the library ID, API key and CDN
hostname are saved and Bunny is chosen for a conversion. Then your server sends each video’s
title and file. Bunny’s terms and
privacy policy apply. See also
Privacy and uninstall.
Quick Links
Share