

Contents
On this page
Stripe - Plugixa Video
Stripe takes card payments on Stripe Checkout, the payment page hosted by Stripe. The buyer leaves your site to pay and comes back to the video once done. Card details are typed on Stripe’s page and never reach your site. In the player, Stripe is the Card method.
Checkout shows the payment methods enabled in your Stripe Dashboard (cards, Apple Pay, Google Pay and others), handles 3-D Secure, and accepts Stripe promotion codes: create coupons in Stripe and buyers type the code on the payment page.
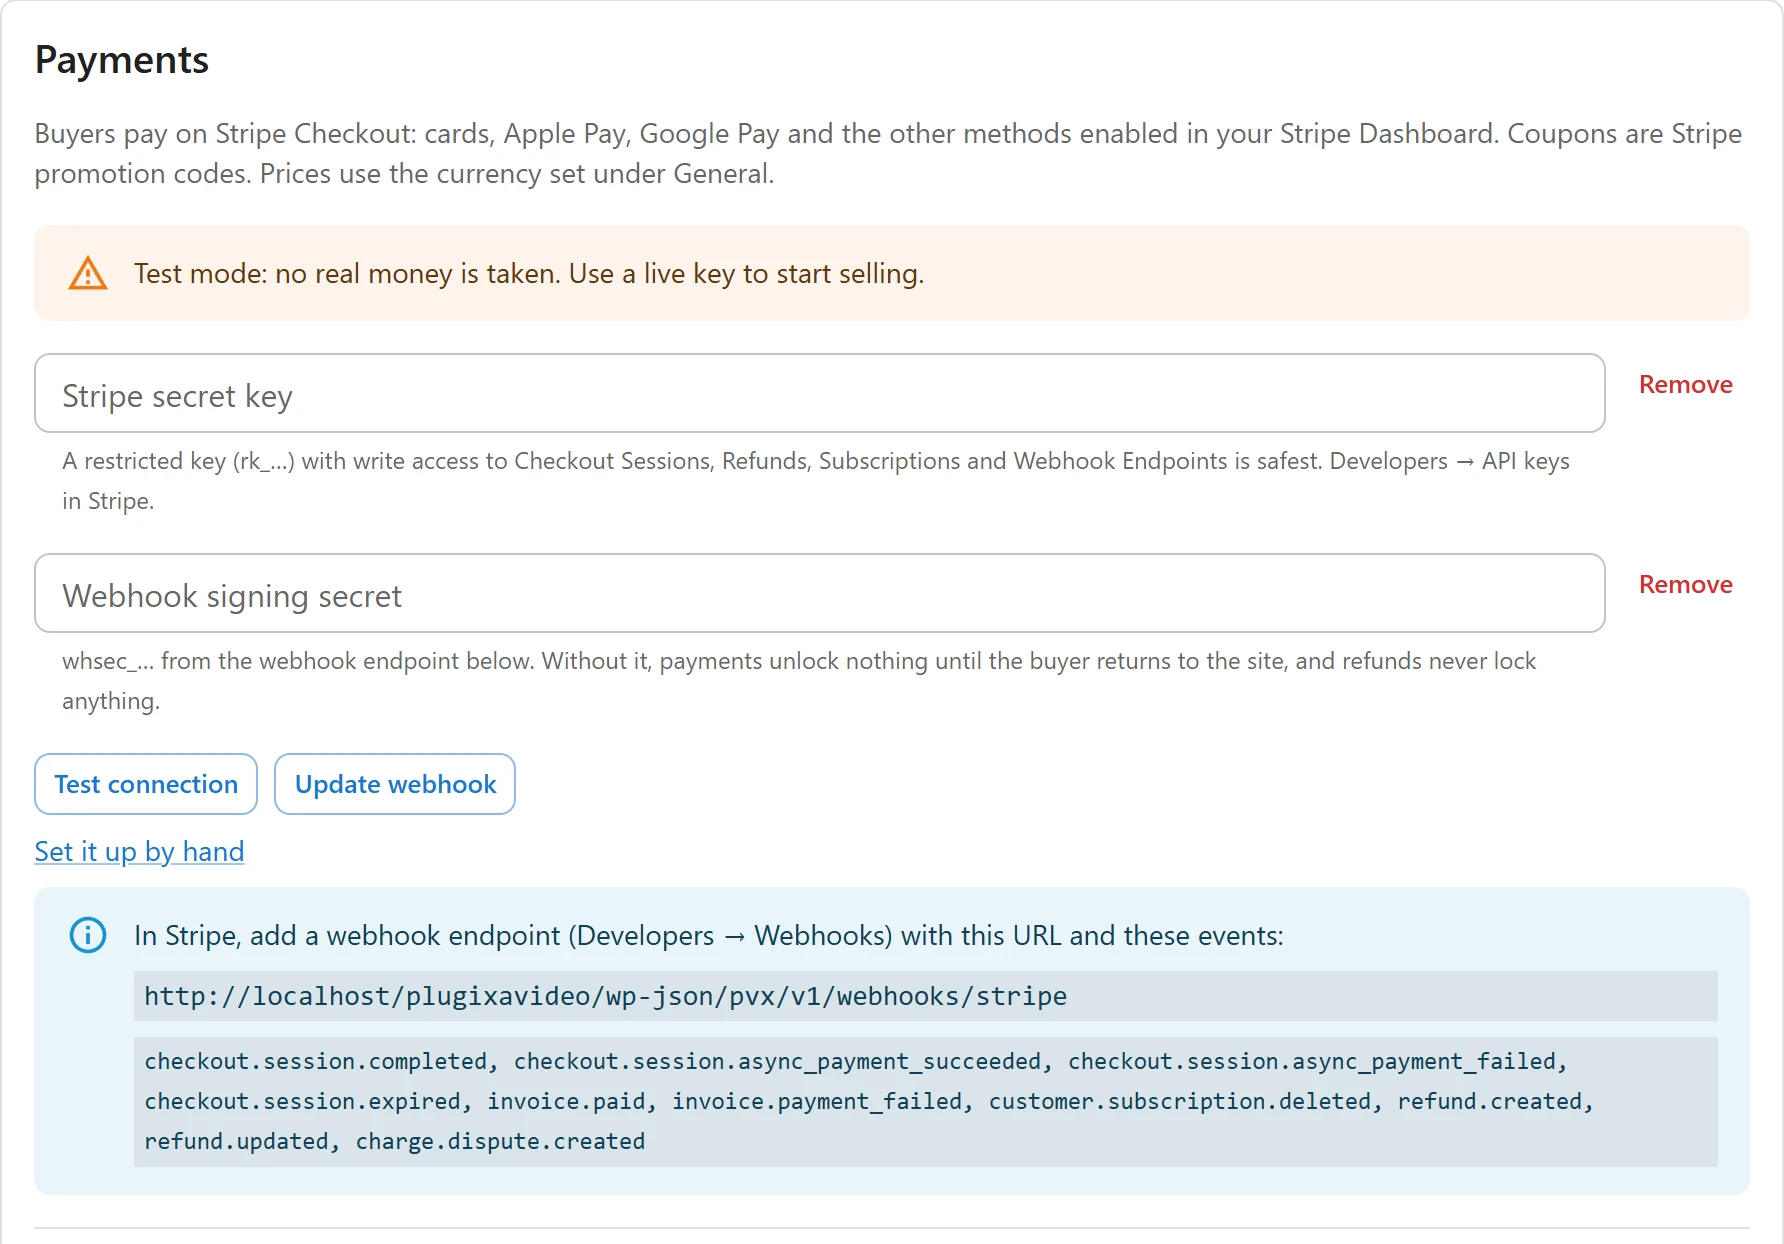
Set Stripe up under Settings -> Payments, at the top of the tab. The tab belongs to the Payments app, see Selling videos.
1. Save your key
| Field | Notes |
|---|---|
| Stripe secret key | “A restricted key (rk_…) with write access to Checkout Sessions, Refunds, Subscriptions and Webhook Endpoints is safest. Developers → API keys in Stripe.” A standard secret key (sk_...) works too. |
| Webhook signing secret | The whsec_... secret of the webhook endpoint. Filled in for you when the plugin creates the webhook, see step 2. |
Click Save at the bottom of the Settings page.
Keys are stored encrypted and are never sent back to the browser. A saved field only says that a key is saved. Type a new value to replace it, or click Remove (then Save) to delete it. If the server has no OpenSSL, the tab warns that keys cannot be stored safely.
Then click Test connection. “Connected. Your keys work.” means Stripe accepted the key. The two buttons work on saved keys only: with unsaved changes they are disabled and the tab reads “Save your changes first.”
2. Add the webhook
The webhook is how Stripe tells your site about payments, renewals, refunds and disputes. Without the signing secret, “payments unlock nothing until the buyer returns to the site, and refunds never lock anything.”
Automatically
Click Set up webhook automatically (it reads Update webhook once a webhook is saved). The plugin creates the endpoint in your Stripe account with the right events and saves its signing secret. “Webhook is set up.” confirms it.
This only works on a site Stripe can reach: an https address on a public host. On localhost or
a local domain the answer is “This site cannot be reached from the internet yet, so the webhook
cannot be created. Run this again on your live site with https.” and the manual steps open.
Running it again is safe: an existing endpoint for the same address is updated, or replaced when its secret was lost, so Stripe never sends each event twice.
By hand
-
Click Set it up by hand. The box shows your endpoint address and the events.
-
In Stripe, go to Developers -> Webhooks and add an endpoint with that address. It looks like this:
https://example.com/wp-json/pvx/v1/webhooks/stripe -
Select exactly these events:
Event What the site does checkout.session.completedMarks the order Paid and grants access. A bank debit still on its way waits for the next event. checkout.session.async_payment_succeededGrants access once a delayed payment arrives checkout.session.async_payment_failedMarks the order Failed checkout.session.expiredMarks an unfinished checkout Abandoned invoice.paidExtends a membership by its new period invoice.payment_failedKeeps access until Stripe’s next attempt and emails the member customer.subscription.deletedEnds the membership refund.created,refund.updatedRecords a refund once it has gone through; a full refund removes access charge.dispute.createdMarks the order Disputed and removes access -
Copy the endpoint’s signing secret into Webhook signing secret and click Save.
Every event is checked against the signing secret, and one older than 5 minutes is refused, so nobody can unlock a video by posting a fake event to the address.
3. Test, then go live
The mode follows the key. With a test key (sk_test_ or rk_test_) the tab warns: “Test mode:
no real money is taken. Use a live key to start selling.” Buy a paid video as a signed-in member
with one of Stripe’s test cards and check that it plays, and that the order shows Paid on
Orders.
To go live, save your live key, then set up the webhook again: test and live endpoints have different signing secrets.
The checkout flow
- The buyer clicks Buy, Rent or a plan under the locked player.
- The site creates a Stripe Checkout session with one line: the video’s title (for a rental, “Rental:” and the title; for a plan, “Membership:” and the plan name), its price in your currency, and the buyer’s email address filled in.
- The buyer pays on Stripe’s page, then comes back to the video page. The site asks Stripe about the payment straight away, so the video usually plays at once, even before the webhook arrives.
- If the buyer leaves Stripe’s page with its back link, nothing is charged and they return to the video page.
For a one-time purchase or rental, Stripe also creates its own invoice and a customer record. The site’s own receipt and invoice are sent as well.
Subscriptions
A membership plan is sold as a Stripe subscription billed monthly or yearly. No product or price has to exist in Stripe: the plan’s price is sent with each checkout.
- Free trial: the plan’s Free trial (days) becomes the subscription’s trial. Access starts at once.
- Renewals: each paid renewal (
invoice.paid) extends access to the new period end, plus 2 days of grace. - Failed renewals: Stripe retries on its own schedule. Access stays open until the next attempt, plus 2 days, and the member is emailed a link to pay.
- Cancellation by the member sets the subscription to end with the period. Your Cancel on the Orders page ends it at once.
Tax
Collect tax with Stripe Tax, under Settings -> Payments, asks Stripe to calculate tax at checkout. “Turn on only after adding your tax registrations in Stripe: without one, Stripe collects nothing.” It is off on a new site.
Related
Quick Links
Share