

Contents
Payments - Plugixa Chauffeur
Payment methods are set under Plugixa Chauffeur -> Settings -> Payments, “The ways customers can pay for a ride.” There are four: three offline methods that you confirm by hand, and Stripe for card payments online.
Each method is a switch. Turning one on reveals its fields. Press Save settings when you are done. The Settings screen needs an administrator.
What customers see
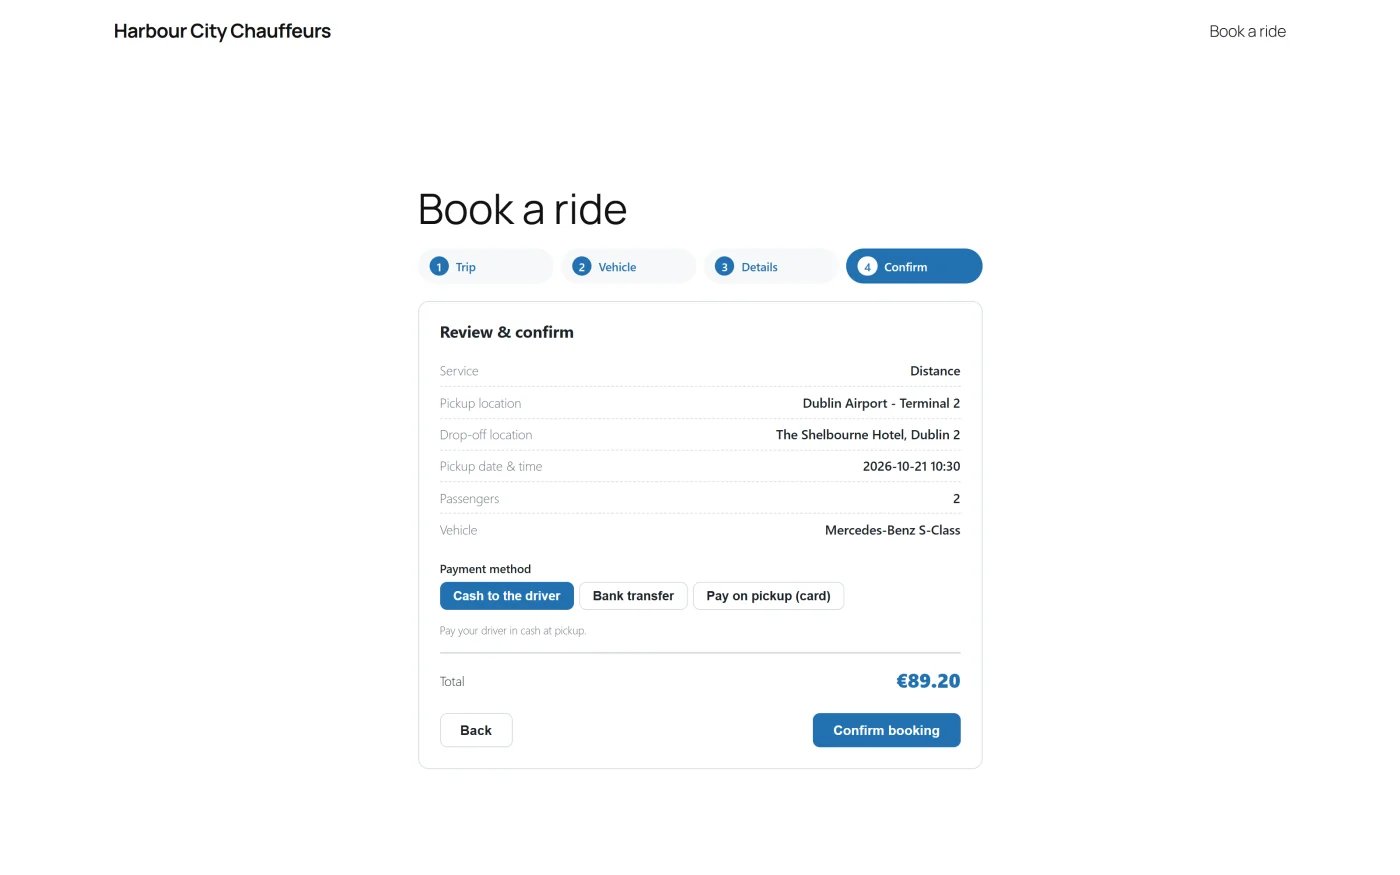
On the last step of the wizard, Payment method shows a button for every method that is switched on. The first one is pre-selected. Stripe comes first when it is available, then cash, bank transfer and pay on pickup.
| Method in Settings | Button in the wizard |
|---|---|
| Stripe | Pay online (card) |
| Cash to the driver | Cash to the driver |
| Bank transfer | Bank transfer |
| Pay on pickup | Pay on pickup (card) |
If every method is switched off, the wizard shows no payment choice and the booking is recorded with cash as its method. Keep at least one method on.
Offline methods
| Method | On by default | Field | Default instructions |
|---|---|---|---|
| Cash to the driver | Yes | Cash instructions | “Please pay the driver in cash at pickup.” |
| Bank transfer | No | Bank transfer instructions | Empty. Enter the account holder, the IBAN or account number, and the bank. |
| Pay on pickup | Yes | Pay-on-pickup instructions | “You can pay by card to the driver at pickup.” |
The instructions are shown to the customer in three places:
- under the payment buttons on the confirm step, when the method is selected,
- on the success screen after booking,
- in the booking emails.
An offline booking is saved as Pending and Unpaid. The plugin cannot know when cash or a transfer arrives, so open the booking and set Payment status to Paid yourself. See Bookings.
Stripe Checkout
Stripe is described in Settings as “Online card payment during booking. The booking is marked paid when Stripe confirms it.” The customer pays on a page hosted by Stripe, so card details never touch your site.
1 - Enter your keys
Switch Stripe on and fill in:
| Field | Where to find it |
|---|---|
| Publishable key | Stripe dashboard, API keys. Starts with pk_. |
| Secret key | Stripe dashboard, API keys. Starts with sk_. |
| Webhook signing secret | Created in the next step. Starts with whsec_. |
The Secret key is the one that matters: Stripe is offered to customers only when the switch is on and a secret key is saved. The publishable key is stored but version 1.0.0 does not use it, because the checkout page is hosted by Stripe.
Use your test keys first. Test and live keys each have their own webhook signing secret.
2 - Add the webhook
The webhook is how your site learns that a payment succeeded. Without it, customers can pay but their bookings stay Unpaid.
In the Stripe dashboard, add a webhook endpoint with this URL, replacing the domain with your own:
https://example.com/wp-json/plugixa-chauffeur/v1/public/stripe-webhook
Select the event checkout.session.completed. It is the only event the plugin acts on.
Stripe then shows a signing secret for the endpoint. Copy it into Webhook signing secret and press Save settings.
The Settings screen does not display the webhook URL. Build it from your site address as shown above. If your site does not use pretty permalinks, the REST API address is different, see REST API.
3 - Test it
Make a booking through your form with a Stripe test card. When you return to your site, open the booking in the admin: it should be Processing and Paid.
What happens during a Stripe payment
- The customer presses Confirm booking with the Stripe method selected.
- Your site saves the booking as Pending and Unpaid, and sends the booking emails.
- Your site asks Stripe for a Checkout Session and the customer’s browser is sent to Stripe.
- The customer pays, or abandons the payment.
- Stripe sends the customer back to the page the form is on. The wizard shows a payment received screen or a payment not completed screen, with the booking reference.
- Separately, Stripe calls your webhook. Your site verifies the signature and then sets the booking’s Payment status to Paid. If the booking was Pending, its status becomes Processing and the customer is sent the “Your booking is confirmed” email.
The screen in step 5 reflects what Stripe told the browser. The booking is marked Paid by step 6 only, so the two can be a few seconds apart.
What is sent to Stripe
For each payment the plugin sends the amount and currency, a line description made of the vehicle name and the booking reference, the customer’s email address, the booking’s id and reference, and the address to return to. Nothing is sent to Stripe until a customer chooses to pay online.
The amount is the fare stored on the booking, in the booking’s currency. Currencies without decimals, such as JPY, are handled correctly.
If the payment is not completed
The booking already exists, so it stays in your list as Pending and Unpaid, and the customer has already received the “booking received” email. The wizard does not offer a way to pay for that same booking again. If the customer starts over, a new booking is created. Follow up with the customer, or set the abandoned booking to Cancelled or Failed.
If Stripe cannot start the payment
When Stripe refuses the request, for example because the secret key is wrong, the customer sees Stripe’s error message on the confirm step. The booking has still been saved as Pending and Unpaid.
How the webhook is protected
Every webhook call must carry a valid Stripe signature made with your signing secret, and must be less than five minutes old. A call without one is refused. If the Webhook signing secret field is empty, every call is refused, so no booking can be marked Paid from outside.
A booking that is already Paid is left alone, so a webhook delivered twice does no harm.
Refunds
The plugin does not create refunds. Refund the payment in your Stripe dashboard, then set the booking’s Payment status to Refunded and its Booking status as you see fit.
Things that are not bugs
“Stripe is switched on but customers do not see it.” The secret key is empty. Stripe is offered only when the switch is on and a secret key is saved.
“The customer paid but the booking says Unpaid.” The webhook did not reach your site or its signature did not match. Check the endpoint URL, that checkout.session.completed is selected, and that the signing secret belongs to that endpoint and to the same mode (test or live) as your secret key.
“A paid booking is not Processing.” Only a Pending booking is moved to Processing. If you had already changed the status, it is kept and only the payment status changes.
What to do next
- Mark offline payments in Bookings.
- See which emails carry the payment instructions in Emails.
- Read what leaves your site in Privacy and uninstall.
- If a payment is not confirmed, see Troubleshooting.