

Contents
Getting started - Plugixa Easy Social Share Buttons
This page takes you from installing the plugin to a share set of your own on a live page. Nothing has to be configured first: the plugin shows buttons below your blog posts as soon as it is activated.
Install
From a ZIP
- In wp-admin, go to Plugins -> Add New -> Upload Plugin.
- Choose the plugin ZIP and install it.
- Activate.
By hand
Upload the plugin folder to /wp-content/plugins/, then activate it from
Plugins.
Requirements
- WordPress 6.5 or higher
- PHP 8.2 or higher
After activation you are shown an opt-in screen from Freemius, the service used for licensing and updates. You can skip it. See Privacy and uninstall for what is and is not sent.
What activation does
- Creates the first share set, Share set 1: Facebook, X, LinkedIn, WhatsApp, Email and Copy link, in the Default style, placed Below the content on Posts.
- Creates two database tables, one for share counts and one for your visitors’ clicks.
- Gives the Administrator role the plugin’s permissions.
- Stores the plugin’s default settings.
So a new install already shows a row of six buttons under every blog post. To start from nothing instead, delete Share set 1 or untick its placements.
Where the menu is
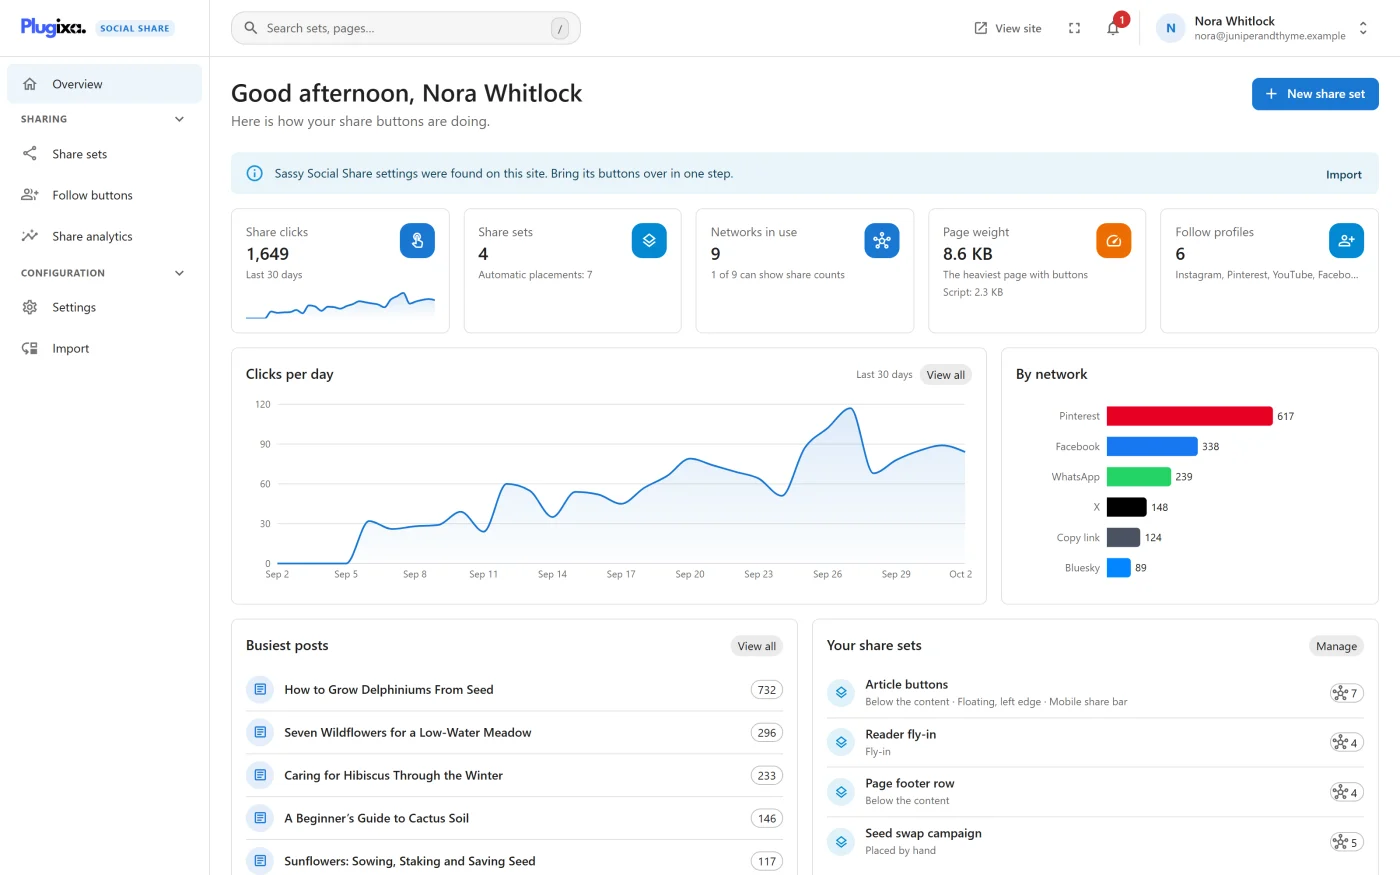
Open Plugixa Social Share in the WordPress admin menu. It is a top-level item with a share icon, below Users.
The plugin is one screen with its own sidebar, not a list of WordPress submenus. Overview sits at the top, and the rest is grouped under headings.
| Group | Screens |
|---|---|
| Sharing | Share sets, Follow buttons, Share analytics |
| Configuration | Settings, Import |
The header carries a search box that finds share sets and screens from
anywhere. Press / to open it, and type two letters to search. Beside it are
View site, a full-screen switch, a bell that lists anything needing
attention, and an account menu with Profile, Exit to WordPress and
Log out.
Pro adds no screens of its own. Its options appear inside the Settings tabs, the share set wizard, the Share analytics screen and the post editor.
Search, full screen and the sidebar
The header and the sidebar are the same on every screen of the plugin.
Search
The search box in the header opens a list you can drive from the keyboard.
Click the box, or press / anywhere in the plugin. Inside a text field, a
dialog or an open menu, / types a slash as usual.
| You type | The list shows |
|---|---|
| Nothing | Every screen, under Go to, in the sidebar’s order with its section beside it |
| Part of a screen’s name | The screens that match, plus the places inside a screen that match: each Settings tab, and New share set |
settings |
The Settings screen and every one of its tabs |
| Two letters or more | Also the share sets whose name contains them, up to eight, above the screens |
A share set is listed with the post types it appears on automatically, or Placed by hand when it has no automatic spot. Opening one takes you to that set in the wizard.
| Key | What it does |
|---|---|
/ |
Opens the search |
| Up and Down arrows | Move through the list |
| Enter | Opens the highlighted row |
| Esc | Closes the search |
Only screens whose feature is running are listed. The Google Analytics and Link previews tabs are offered while their features run, and share sets are searched while share buttons do. When nothing matches, the list says so. The search starts empty each time it is opened.
On a screen narrower than 600 pixels the box is drawn as a search icon. It opens the same list.
Full screen
The full-screen button in the header gives the whole browser window to the plugin: the WordPress admin bar and the WordPress menu are hidden, and the plugin’s own sidebar and header stay. Press the button again, or Esc, to leave. Dialogs, menus and messages work as they do outside full screen.
The button is not shown in a browser that cannot put a page in full screen, such as Safari on an iPhone.
View site and the account menu
View site opens your site’s home page in a new tab.
The account menu shows your name and email address beside your initial. It is an initial and not your profile picture, so no picture is requested from an outside service. When the header is short of room, the name and email go first and the initial stays, then View site goes. The opened menu always shows whose account it is.
The sidebar
Click a heading in the sidebar, such as Sharing or Configuration, to fold its screens away, and again to show them. The choice is remembered in your browser, for you only. The section that holds the screen you are on always stays open.
On a window narrower than 900 pixels the sidebar is hidden, and a menu button at the left of the header opens it.
Colour theme
The admin screens are drawn in one light theme. This version has no dark mode and no switch for one.
Your first share set
The walk-through below builds a second share set and places it as a floating sidebar on Pages.
1 - Start a new set
Go to Share sets and press New share set. The wizard has five steps, and the preview beside each one is drawn by the same code your site uses.
2 - Networks
Pick the destinations from the Available column. They move to Selected, where the up and down arrows set the order: top to bottom is left to right on the page. Press Next.
3 - Style
Leave Each network’s own colour selected, or choose One colour for every button and pick one. Then choose a style from the gallery. The Readability panel tells you whether the labels can be read on the colours drawn. Press Next.
4 - Layout
Choose Icon only for a sidebar, and a size. Press Next.
5 - Where it appears
Tick Pages under Show on, then click Float left on the diagram of the page. If another set already uses that spot on Pages, the wizard says so and tells you that saving moves it to this set. Press Next.
6 - Name and save
Give the set a name, which only you see, and press Save share set. The screen confirms Saved as with the set’s name and lists every way to place it by hand:
- the shortcode, for example
[plugixa_share id="2"] - the PHP line, for example
<?php plugixa_share( 2 ); ?> - the Share buttons block
- the Share buttons Elementor widget
Open any page on your site in a window at least 1024 pixels wide and scroll down: the sidebar appears on the left edge.
Changing or removing a set
Open Share sets, click a set’s Edit icon, change any step and press Save. Every place the set appears changes with it.
To hide the buttons on one post only, use the Share buttons panel in the post editor. See Per-post controls.
To switch every button off at once, untick Show share buttons under Settings -> General.
Letting someone else use the plugin
Administrators have every permission from activation. Other roles can be given the plugin’s own capabilities with a role editor plugin:
| Capability | Allows |
|---|---|
plugixa_social_share_view |
Opening the screens and reading share sets and analytics |
plugixa_social_share_edit |
Creating, changing and deleting share sets, and the follow buttons |
plugixa_social_share_manage_settings |
Changing Settings and running an import |
plugixa_social_share_export |
Exporting analytics as CSV PRO |
Holding any one of them shows the menu. One post’s own Share buttons panel needs none of these: anyone who can edit the post can use it.
What to do next
- Learn the opening screen in Overview.
- Read each wizard step in detail in Share sets.
- See every automatic spot in Placements.
- Link your own profiles in Follow buttons.
- Coming from another plugin? See Import.