

Contents
Contact form - Plugixa Chat
The Contact form channel lets a visitor send you a message without leaving your site. The form opens inside the widget. Every message is saved as a lead in your own database and a copy is emailed to you.
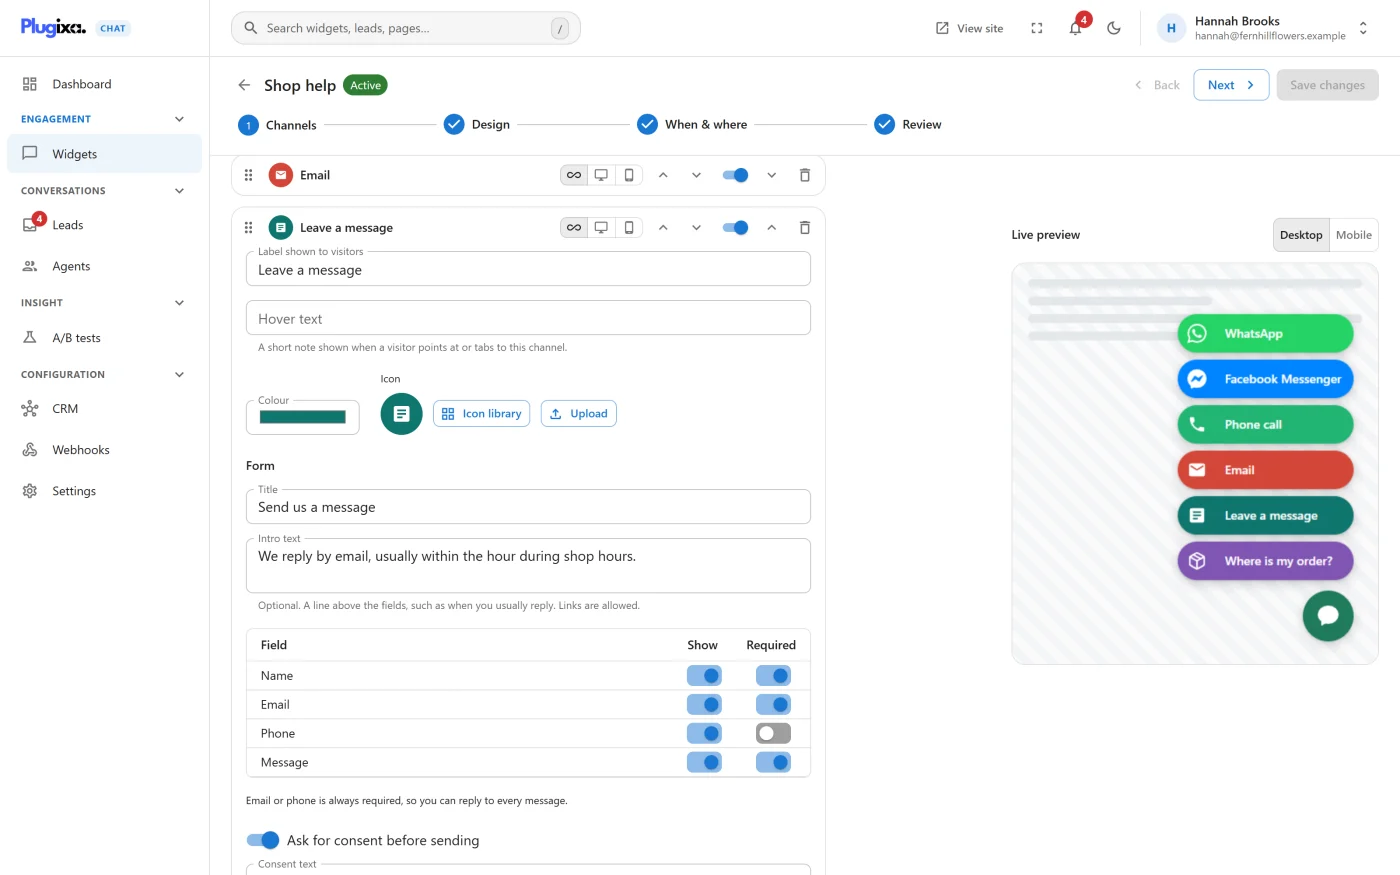
Adding the form
- Open a widget and go to the Channels step.
- In the grid, under Contact, click Contact form.
- Open the channel’s card. Its settings are under the heading Form.
The form needs no destination. A widget uses the first Contact form channel it has, so add it once per widget.
Form settings
| Setting | What it does | If left empty |
|---|---|---|
| Title | The heading of the form. Up to 100 characters | “Send us a message” |
| Intro text | “Optional. A line above the fields, such as when you usually reply. Links are allowed.” Up to 1000 characters | No intro |
| Fields | Which fields are shown and which are required. See below | |
| Ask for consent before sending | Adds a checkbox the visitor must tick | Off |
| Consent text | “Shown beside the checkbox. You can link to your privacy policy.” Up to 500 characters | “I agree to be contacted about my message.” |
| Offer a newsletter checkbox | Adds an optional checkbox | Off |
| Newsletter checkbox text | The text beside that checkbox. Up to 500 characters | “Send me news and offers by email.” |
| Button text | The text on the send button. Up to 40 characters | “Send message” |
| Thank-you message | Shown after the message is sent. Up to 300 characters | “Thanks! We will get back to you soon.” |
Fields
The table has a Show and a Required switch for each field.
| Field | Shown by default | Required by default | Longest answer |
|---|---|---|---|
| Name | yes | yes | 191 characters |
| yes | yes | 191 characters | |
| Phone | no | no | 64 characters |
| Message | yes | yes | 5000 characters |
“Email or phone is always required, so you can reply to every message.” If neither is required when you save, Email is switched back on and made required.
A field that is shown and not required is marked “(optional)” on the form.
In Pro you can add your own questions after these four. See Custom form fields PRO.
Consent and newsletter
The two checkboxes do different jobs.
| Checkbox | For the visitor | What is recorded |
|---|---|---|
| Consent | Must be ticked, or the form shows “Please tick this box to send your message.” | The lead shows Agreed to be contacted |
| Newsletter | Optional. Leaving it unticked never affects the message | The lead shows Wants news and offers or Did not ask for news |
“Each lead records whether it was ticked, and the CSV export includes it, so you only email people who asked.” In Pro, the newsletter box is what the CRM connectors PRO act on.
What the visitor sees
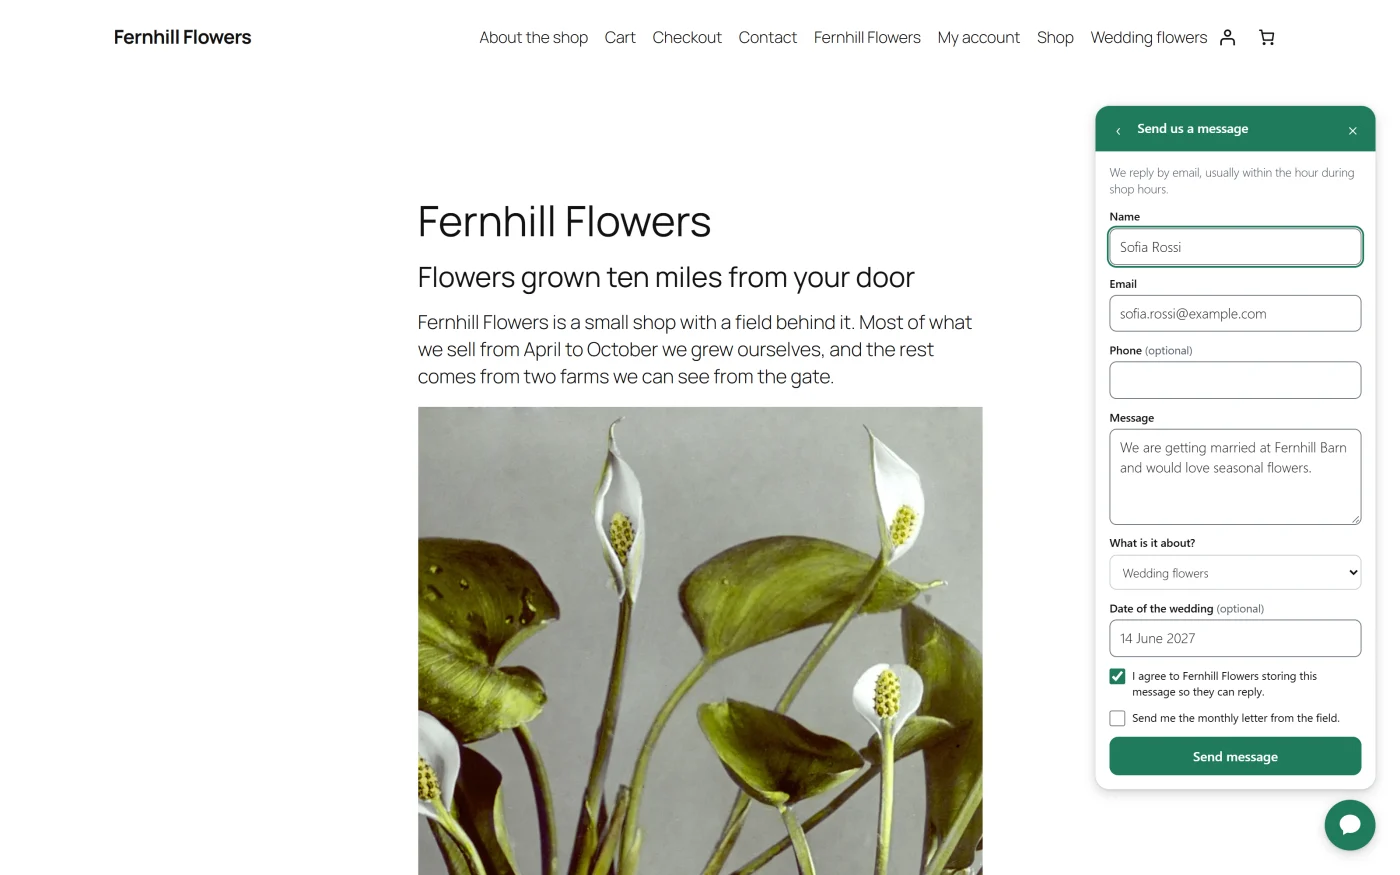
The visitor opens the widget and presses the form’s row. The list of channels is replaced by the form, with a back arrow to return to the list and a close button.
- Pressing send checks the fields first. A missing or invalid field shows a message under it, such as “This field is required.” or “Enter a valid email address.”, and the cursor moves to the first one.
- A phone number must look like one: digits, with spaces, dashes, dots, brackets and a leading + allowed. Otherwise the form shows “Enter a valid phone number, including the country code.”
- While the message is on its way the button reads “Sending…”.
- After it is sent, the form is replaced by the thank-you message.
- If sending fails, the form shows “Your message could not be sent. Please try again.” and keeps what the visitor typed.
The form only accepts messages while its widget is Active.
Spam protection
Three checks are always on. They need no setting and no outside service.
| Check | How it works |
|---|---|
| A hidden trap field | A field people cannot see. A program that fills it in is ignored |
| A minimum typing time | A form sent less than three seconds after it was opened is ignored |
| A limit per visitor | Five messages every five minutes. After that the form answers “Too many requests. Please wait a moment and try again.” |
A message caught by the first two is discarded without telling the sender, so a spam program learns nothing.
Cloudflare Turnstile
If spam still gets through, turn on Turnstile under Settings -> Leads.
- Follow Get your keys to create a Turnstile widget in your Cloudflare account.
- Paste the Site key and the Secret key.
- Press Save. The label beside the heading changes from Off to On.
Both keys are needed. With Turnstile on, every contact form shows the Turnstile check above the send button, and a message without a passed check is refused with “Please complete the security check and send your message again.”
If your site cannot reach Cloudflare to verify a check, the message is accepted, so an outage at Cloudflare does not cost you leads.
To stop using it, press Turn off Turnstile. That removes both keys.
Turnstile is an outside service. “When it is on, visitors who open the form load a script from Cloudflare, and their IP address and the check result are sent to Cloudflare. Mention this in your privacy policy.” See Privacy and uninstall.
The notification email
Every stored message is emailed to you, unless you switch that off.
| Part | Content |
|---|---|
| To | The addresses under Settings -> Leads -> Send to, or the site admin email when that is empty |
| Subject | “[Site name] New message from” followed by the sender’s name, email or phone |
| Reply-To | The visitor’s email address, so pressing Reply answers them |
| Body | Plain text: name, email, phone, the message, the page it was sent from, the widget’s name, and a link to the Leads screen |
In Pro, answers to your own questions are added to the body.
The email is sent with WordPress’s own mail function, so it follows whatever mail setup your site has. If notifications do not arrive, see Troubleshooting.
The settings are described in Settings.
What to do next
- Read and export messages in Leads.
- Ask your own questions with Custom form fields PRO.
- Send each lead to another system with Webhooks PRO.