

Contents
Getting Started - Plugixa Permalink Manager
This page takes you from a fresh install to a site whose addresses you chose. It takes about ten minutes.
Before you start
The plugin needs pretty permalinks. In WordPress go to Settings, Permalinks and choose anything except “Plain”. If the site is on plain permalinks the plugin stores your addresses but cannot serve them, and the dashboard tells you so.
Install
- In WordPress go to Plugins, Add New Plugin.
- Search for “Plugixa Permalink Manager”, or choose Upload Plugin and pick the ZIP file.
- Click Install Now, then Activate.
Activation changes nothing about your addresses. Every post, page and category keeps the address it had a minute ago until you decide otherwise.
On first activation the free plugin asks whether you want to receive update and security notices by email. Choose Skip if you would rather not; the plugin works exactly the same either way. See Privacy and data.
Run the setup
Open Plugixa Permalink Manager in the admin menu. The dashboard offers a short setup: four steps, about a minute.
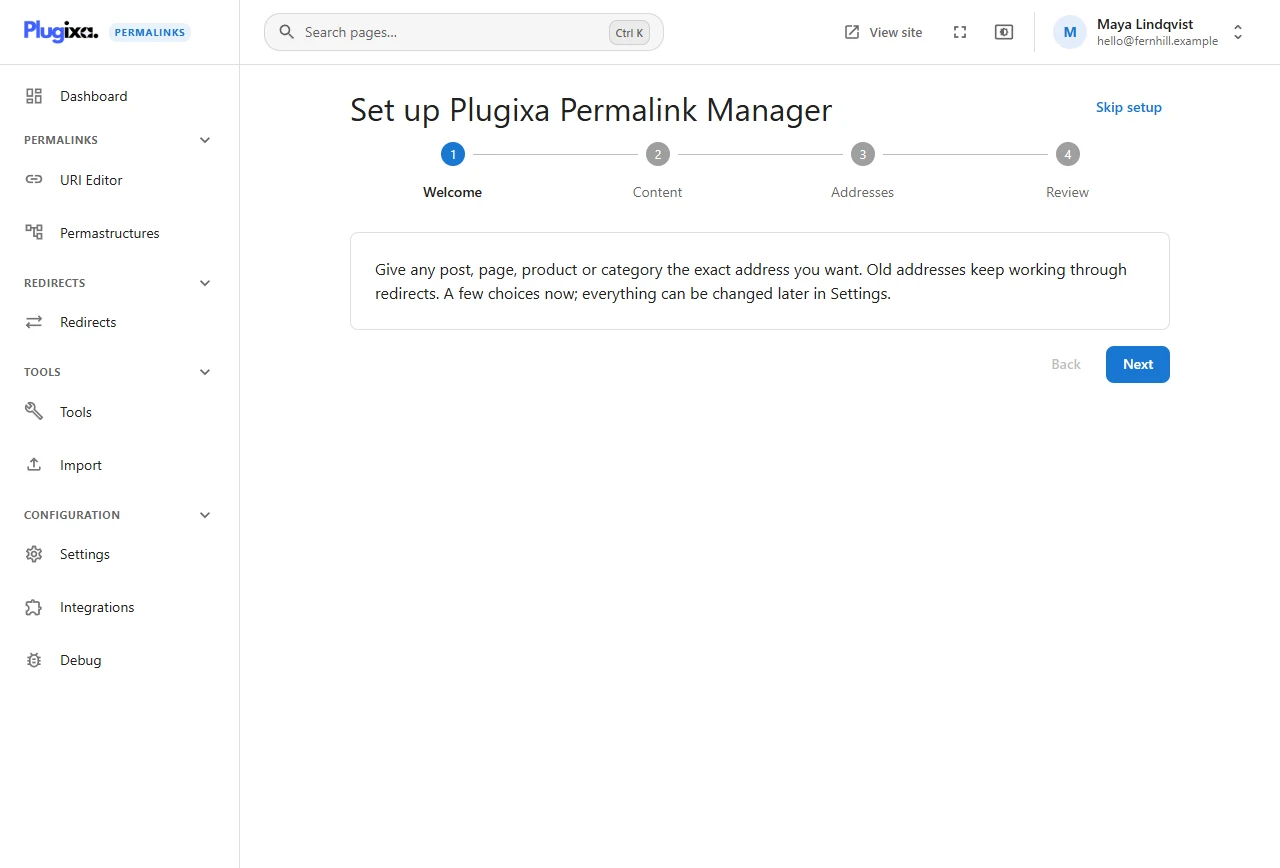
It asks which content types should have custom addresses and how addresses should behave when content is saved. Everything it sets can be changed later in Settings, and Skip setup is a perfectly good answer. More in Setup wizard.
Set your first address by hand
- Open URI Editor.
- Find the item. Use the search box, or change the content type with the selector beside it.
- Type the address you want in the Permalink field, for example
help/size-guide. - Click Save changes.
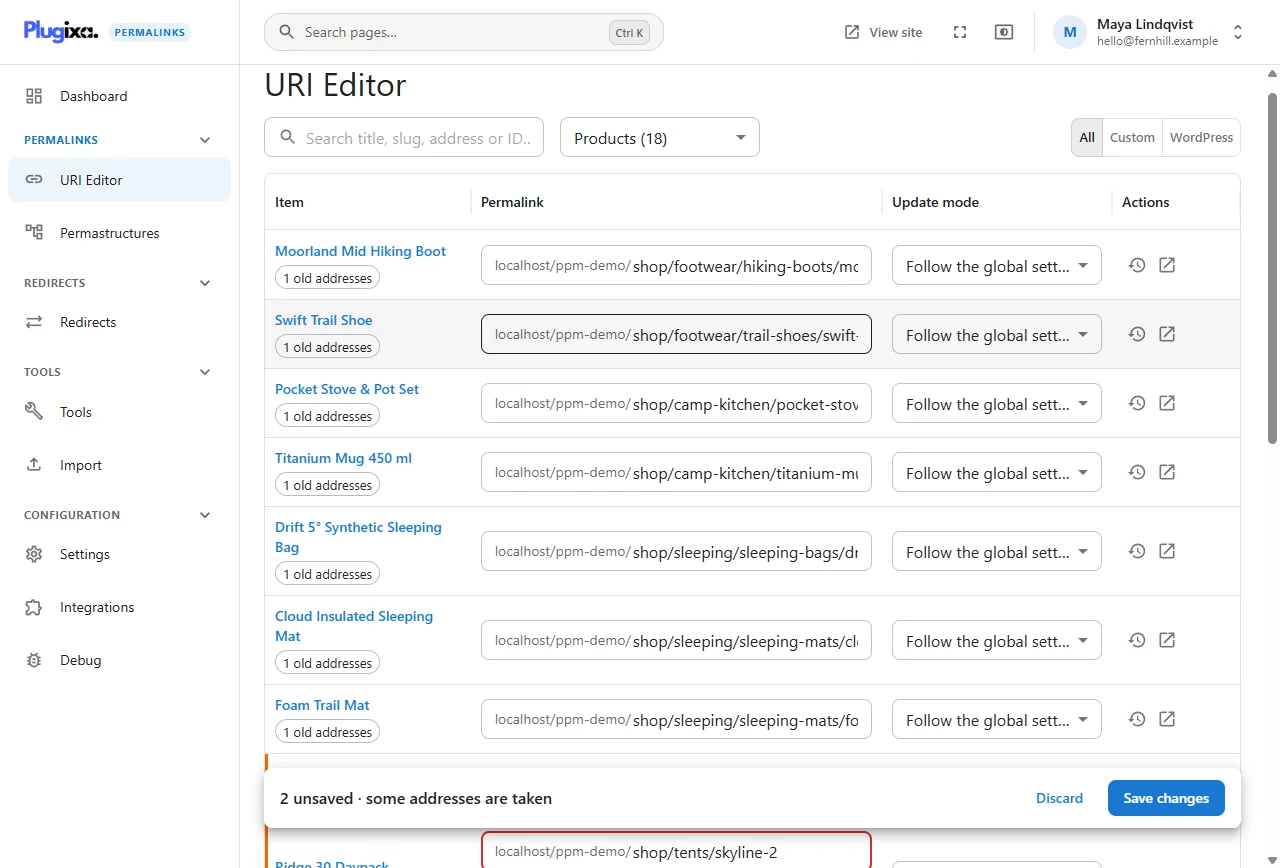
The address is checked while you type. If another item already uses it, the field says who and suggests a free alternative. Nothing is saved until you click Save changes, and the message that confirms the save has an Undo button.
Visit the new address: the page is there. Visit the old one: you are redirected to the new one.
Set your first pattern
Typing addresses one at a time does not scale to a shop or a busy blog. A permastructure is a pattern that generates them.
- Open Permastructures and choose the content type’s tab, for example Posts.
- Type a pattern, picking tags from the list below the field. On the
demonstration site posts use
journal/%category%/%postname%. - Check the Preview table: it shows real items from your site with their current address and the address the pattern would give them.
- Click Save.
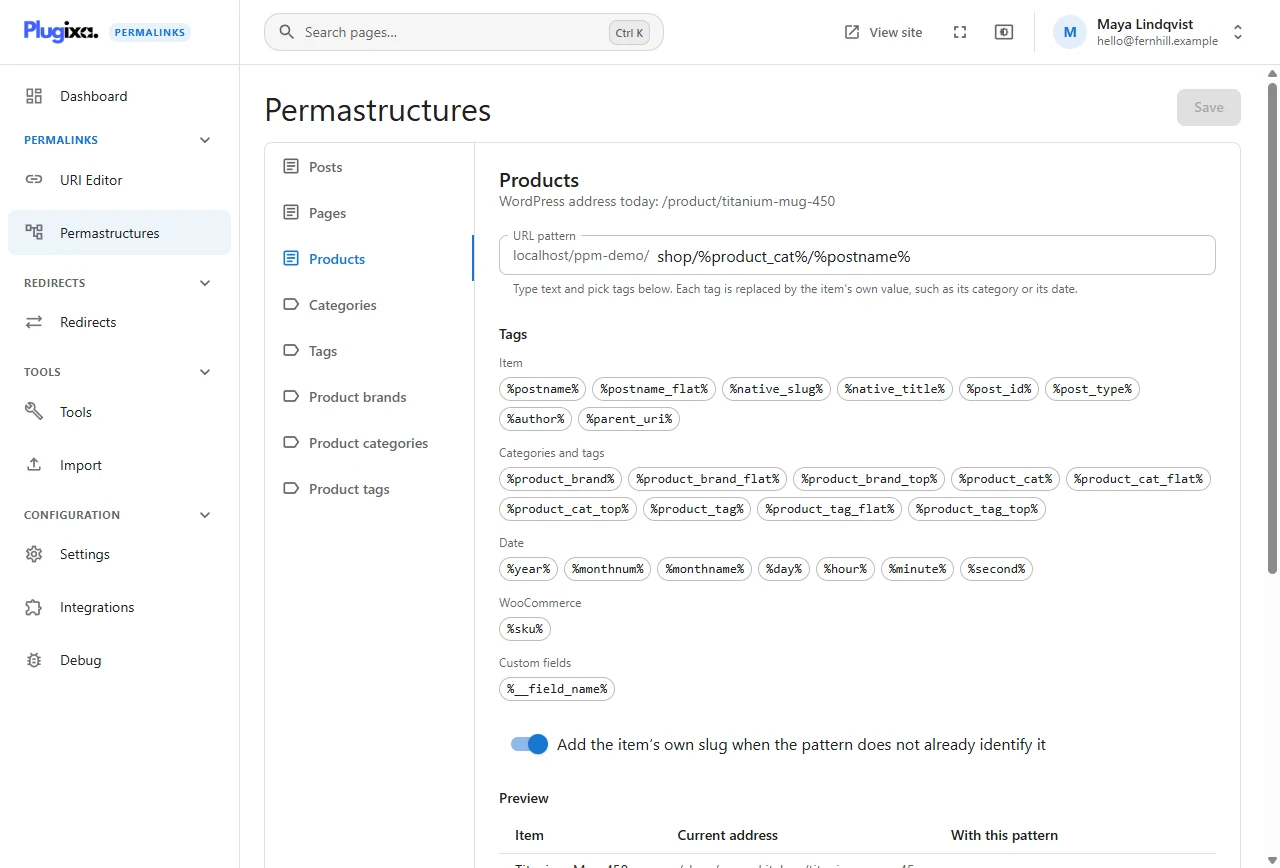
A saved pattern gives addresses to new items. Existing items do not move. To apply the pattern to what you already have, open Tools, Regenerate addresses, preview the result, and run it. See Regenerate addresses.
Deactivating and deleting
Custom addresses are served by this plugin. If you deactivate it, your content falls back to its WordPress addresses straight away, and comes back the moment you activate it again.
Deleting the plugin keeps your data unless you switched on Delete all permalink data when the plugin is deleted in Advanced settings. Installing the plugin again, free or Pro, picks up every address and redirect where you left them.