

Contents
Getting Started - Plugixa Recipe
This guide walks you from a clean WordPress install to a published recipe page in under five minutes.
Install
From the WordPress.org plugin directory
- In wp-admin, go to Plugins → Add New.
- Search for Plugixa Recipe.
- Click Install Now, then Activate.
From a ZIP file
- Download
plugixa-recipe.zipfrom your Plugixa account (for Pro) or WordPress.org (for Free). - In wp-admin, go to Plugins → Add New → Upload Plugin.
- Choose the ZIP and click Install Now, then Activate.
What happens on activation
When you activate the plugin, the installer:
- Creates 24 database tables with prefix
{wpdb_prefix}plugixa_recipe_*. - Seeds 16 cuisines (Italian, French, Chinese, Japanese, Indian, Mexican, Thai, Greek, Spanish, Middle Eastern, Korean, Vietnamese, American, Mediterranean, Brazilian, Moroccan).
- Seeds 8 courses (Appetizer, Starter, Main Course, Side Dish, Dessert, Beverage, Snack, Breakfast).
- Seeds default views (Grid, Slider, Masonry, List).
- Registers custom rewrite rules:
/recipe/{id}/{slug}/,/recipe-category/{slug}/,/recipe-cuisine/{slug}/,/recipe-print/{id}/. - Adds the
plugixa_recipe_*capabilities to the administrator role. - Registers the
[plugixa_recipe]shortcode, 8 widget shortcodes, and the Gutenberg block. - Registers the Elementor widget if Elementor is active.
Activation also flushes rewrite rules automatically - no need to visit Settings → Permalinks.
First look
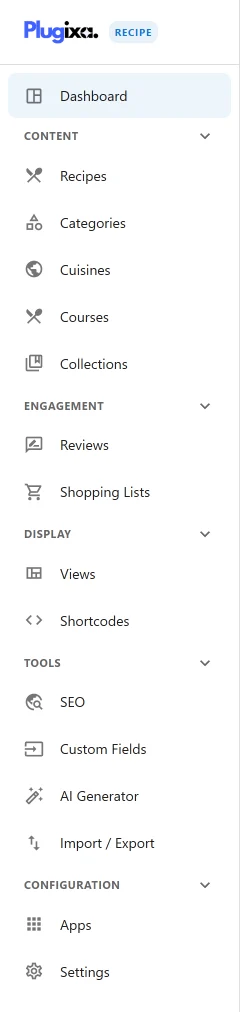
After activation, a new Recipes menu appears in wp-admin (dashicon: dashicons-food):
| Menu item | What it does |
|---|---|
| Dashboard | Stats (totals, top-rated, most-viewed), recent activity, quick actions |
| Recipes | Create, edit, order, filter (status, category, cuisine, diet flags, featured) |
| Categories | Group recipes (Breakfast, Dessert, …) with images and ordering |
| Cuisines | Tag recipes by region (16 pre-seeded, extend as needed) |
| Reviews | Moderate 5-star reviews, reply as admin |
| Collections | Public/private collections, cookbooks, meal plans |
| Shopping Lists | Per-user aggregated shopping lists |
| Views | Design presets for recipe grids (layout, colors, typography, …) |
| Shortcodes | Saved shortcode configurations + visual builder |
| Custom Fields PRO | Define custom fields per recipe |
| AI Generator PRO | Generate recipes from topic, URL, or document |
| Import / Export PRO | JSON, CSV, WPRM, WP Recipe Maker |
| SEO Analyzer PRO | Per-recipe SEO score with actionable checks |
| Nutrition | Browse and bulk-edit nutrition records |
| Settings | 10-tab global configuration |
| Account | Your Plugixa license and upgrade link |
Publish your first recipe
1 · Create a category (optional but recommended)
Go to Recipes → Categories → Add New.
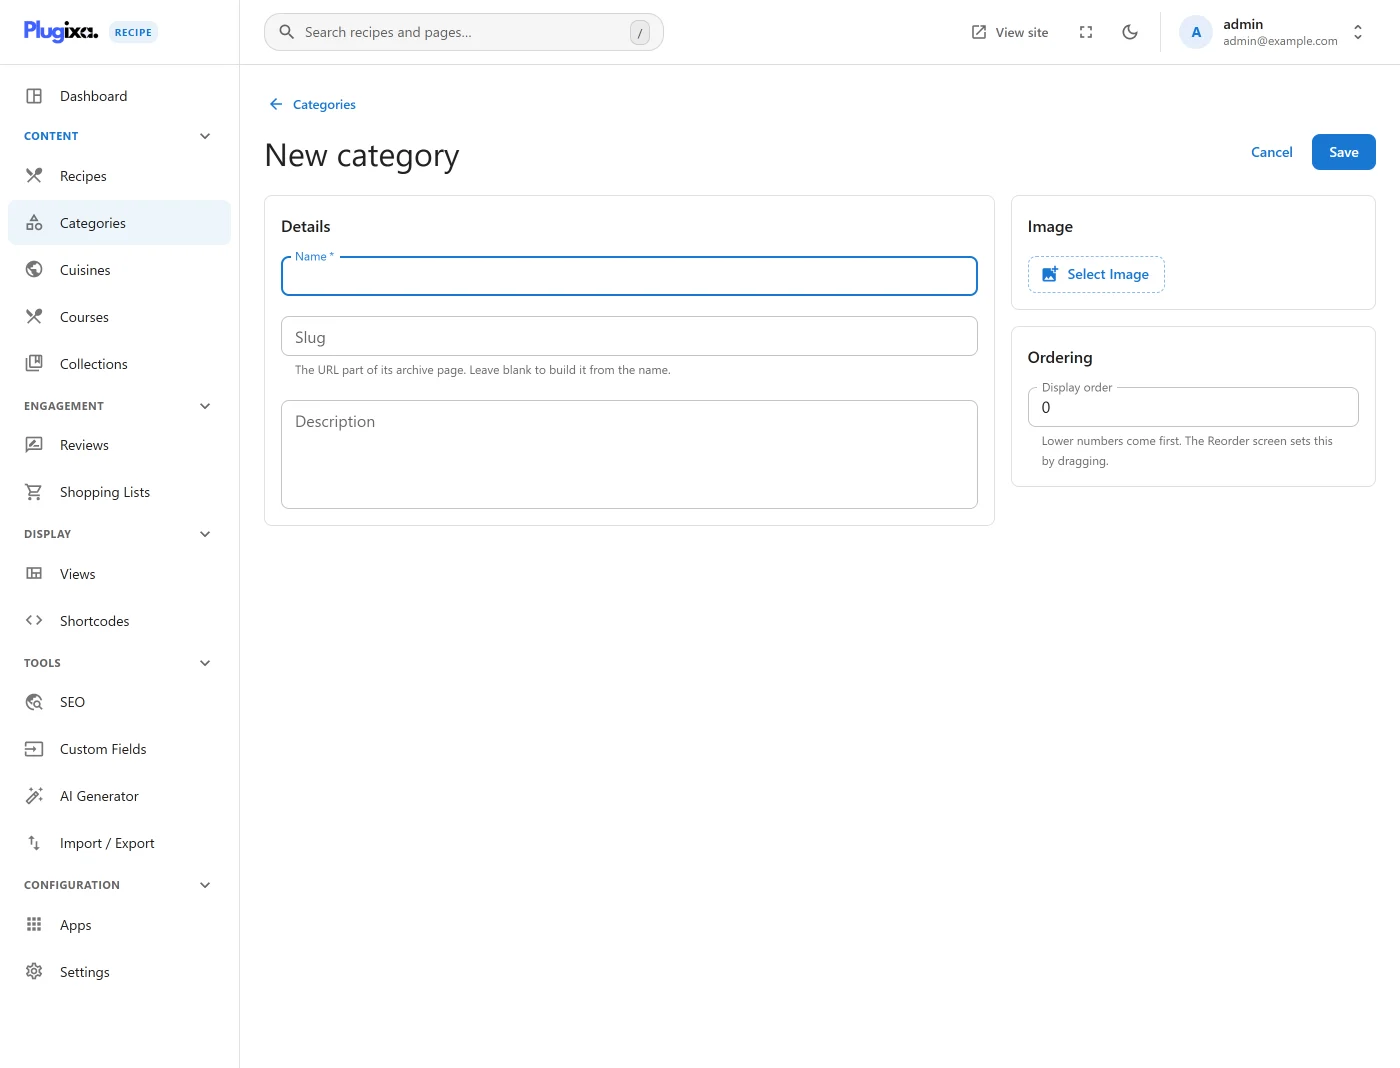
- Name - a label like “Breakfast” or “Dessert”.
- Slug - auto-filled from the name; this appears in
/recipe-category/{slug}/. - Description - shown on the archive page.
- Image - optional cover image.
Save. You now have an empty category.
2 · Create a recipe
Go to Recipes → Recipes → Add New.
The editor is organised into 8 tabs:
| Tab | What to fill in |
|---|---|
| Basic | Title, slug, description, excerpt, main image, gallery, video URL, status |
| Tags & Diet | Category, cuisine, course, tags, equipment, 11 diet flags (vegetarian, vegan, gluten-free, dairy-free, keto, low-carb, nut-free, paleo, sugar-free, halal, kosher) |
| Time & Servings | Prep time, cook time, rest time, servings, yield amount, difficulty, cost, season |
| Ingredients | Grouped ingredients (e.g., “For the sauce”): quantity, unit, name, notes, affiliate link |
| Instructions | Grouped steps with text, per-step image, per-step video, step duration |
| Nutrition | 17 FDA label fields (calories, macros, vitamins, minerals) |
| Extras | Notes, tips, source & source URL, author name, Featured / Editor’s pick flags |
| Custom Fields PRO | Any custom fields you’ve defined |
Click Save. Set status to published to make it live.
3 · Display recipes on a page
Create a new WordPress page (Pages → Add New), and add the shortcode:
[plugixa_recipe]
Or use the Plugixa Recipe Gutenberg block and pick a view/category from the block sidebar. See Blocks.
Publish the page. Visit it on the frontend - your recipes are live.
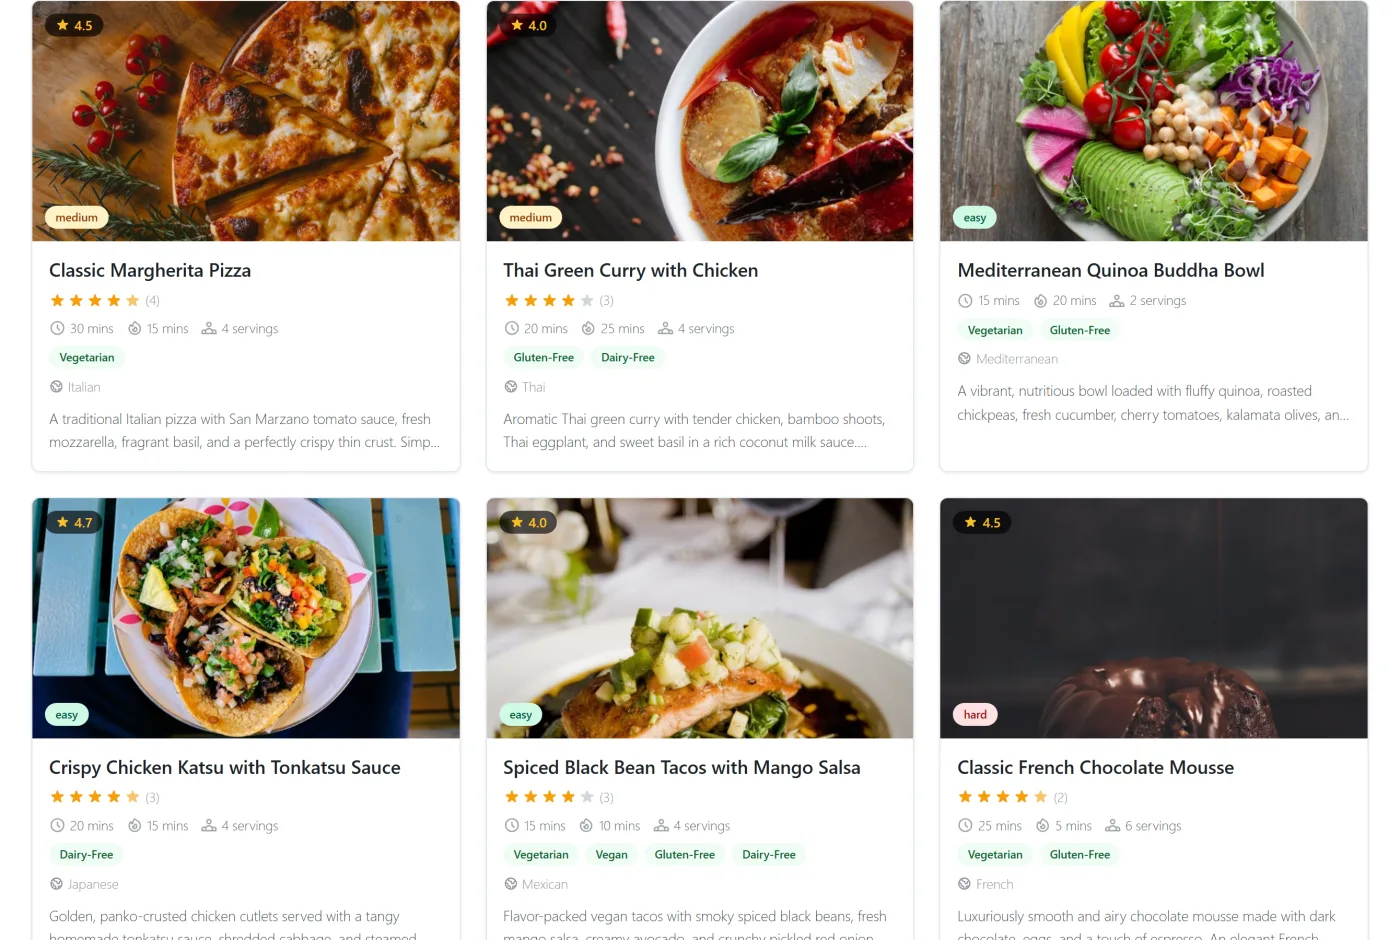
Each card links to /recipe/{id}/{slug}/, which is rendered with the single recipe template (title, hero image, meta, ingredients, instructions, nutrition label, reviews, share).
What to do next
- Customize the design - see Views.
- Organize with categories & cuisines - see Categories and Cuisines.
- Filter and paginate - see Shortcodes.
- Collect reviews - see Reviews.
- Let users build collections / meal plans - see Collections.
- Generate recipes with AI PRO - see AI Generator.
- Import from another plugin PRO - see Import / Export.
Quick tips
- The plugin ships with reasonable defaults, so
[plugixa_recipe]on its own produces a usable grid immediately. - All utility classes are prefixed
pxr-*(TailwindCSS prefixpxr), so the plugin never clashes with your theme. - JSON-LD schema markup is available on Pro - Google starts treating your recipes as rich results right away.
- Want to preview without publishing? Set a recipe’s status to
draftand log in as editor to preview.
System requirements
| Requirement | Minimum |
|---|---|
| WordPress | 6.0 |
| PHP | 8.0 |
| MySQL | 5.7 (or MariaDB 10.3) |
| Browser | Current Chrome, Firefox, Safari, Edge |
The plugin ships prebuilt assets - no Node.js or build step is required on your server.
Uninstalling
Deactivating the plugin leaves your data in place. To remove all data:
- Plugins → Deactivate Plugixa Recipe.
- Plugins → Delete.
- When prompted, the
uninstall.phpscript drops all 24 tables, custom capabilities, and theplugixa_recipe_settingsoption.
Your recipes, categories, cuisines, views, shortcodes, reviews, and settings are dropped. This is irreversible.