

Contents
Getting started - Plugixa Car Parking
This page takes you from installing the plugin to seeing your first test booking in the admin. It takes about ten minutes and needs no payment account, because activation creates a starter car park you can book straight away.
Install
From a ZIP
- In wp-admin, go to Plugins -> Add New -> Upload Plugin.
- Choose the plugin ZIP and install it.
- Activate.
By hand
Upload the plugixa-car-parking folder to /wp-content/plugins/, then activate
it from Plugins.
Requirements
- WordPress 6.5 or higher
- PHP 8.2 or higher
The plugin uses Freemius for licensing and updates. After activation it asks whether you want to share diagnostic data. Skip leaves the plugin fully working and sends nothing. See Privacy and uninstall.
What activation does
- Creates the plugin’s own database tables.
- Gives the Administrator role the plugin’s capabilities. No other role gets access.
- Stores the default settings: currency
USD, new bookings start as Pending, Pay on arrival switched on and booking emails switched on. - Schedules an hourly job that expires pending bookings nobody confirmed.
- Creates starter content, so the booking form works before you configure anything.
The starter content
| What | Details |
|---|---|
| Four space types | Standard, Covered, Disabled and Electric |
| One location | Main Car Park, active, open around the clock, billed per day |
| Its spaces | 50 Standard, 20 Covered, 5 Disabled and 10 Electric |
| Prices | A price per day and per hour for each type, from 8.00 to 18.00 per day |
| One booking form | Default Booking Form, with the slug default |
Each part is created only when its list is empty, and only on activation. An update never puts back something you deleted. The starter prices are added together with the starter location, so on a site that already has a location the four space types arrive without prices.
Rename, edit or delete any of it. See Locations and Space types.
Activation does not create any page. You place the form yourself, below.
Where the menu is
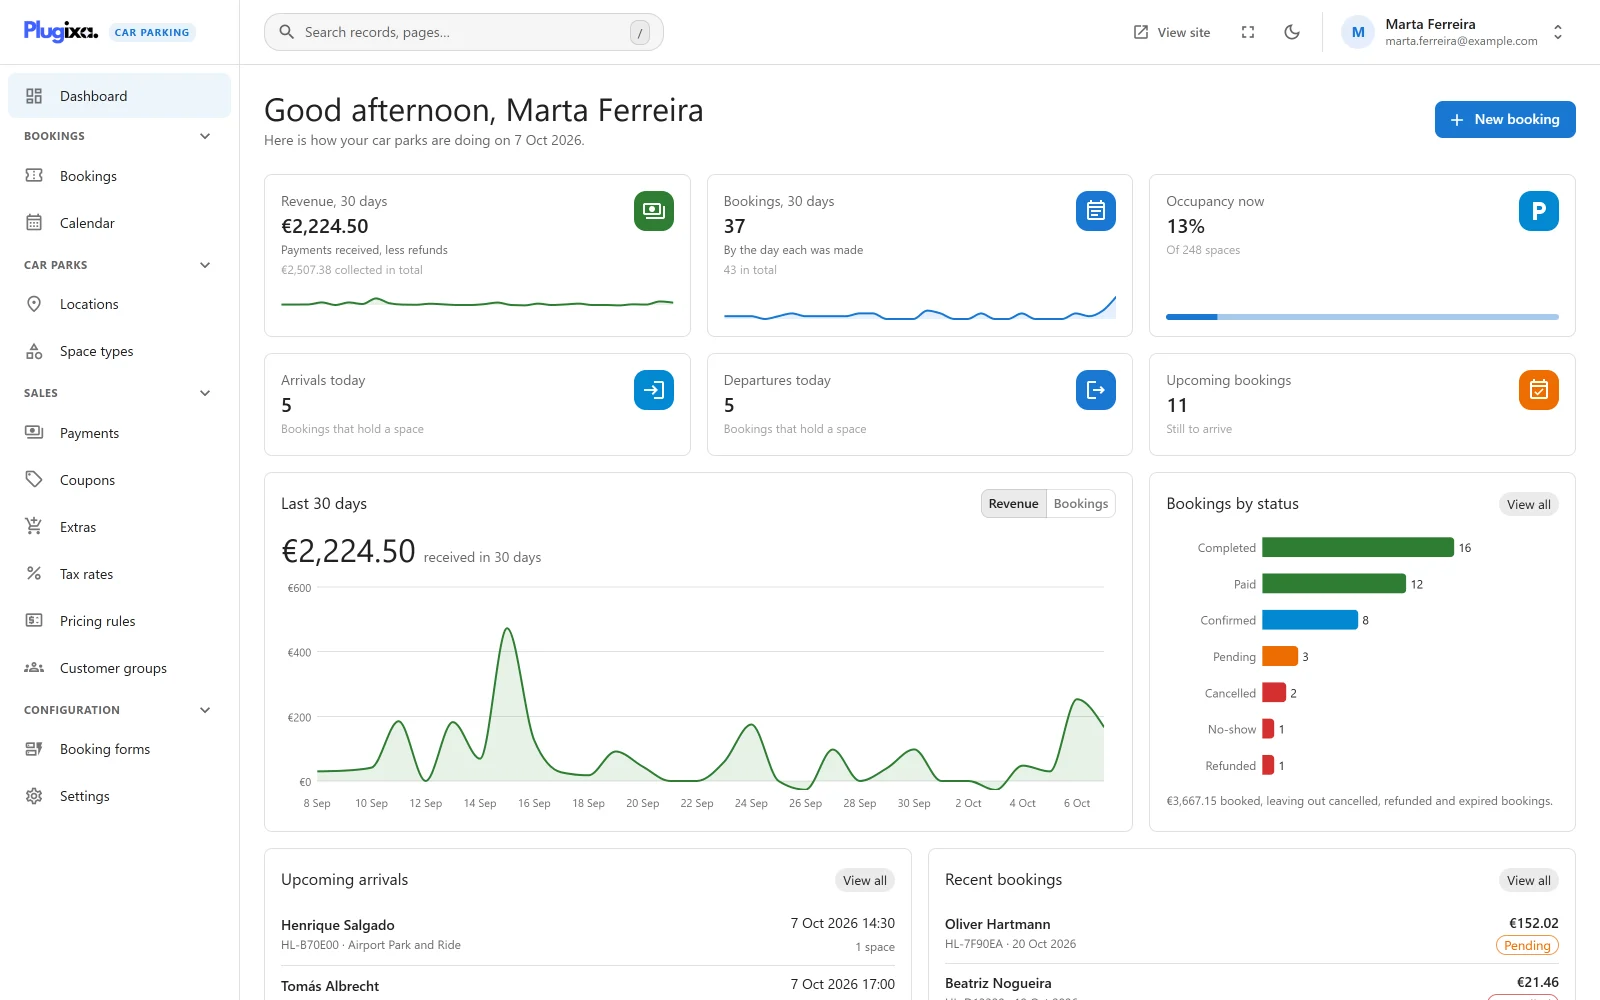
Open Car Parking in the WordPress admin menu. Under it are shortcuts to Dashboard, Bookings, Calendar, Locations and Settings.
All of them open the same page: a single application with its own sidebar. Every screen lives inside it.
| Sidebar group | Screens |
|---|---|
| (top) | Dashboard |
| Bookings | Bookings, Calendar |
| Car parks | Locations, Space types |
| Sales | Payments, Coupons, and with Pro PRO Extras, Tax rates, Pricing rules and Customer groups |
| Configuration | Booking forms, Settings |
A search box at the top finds bookings and jumps to any screen. See Dashboard.
Step 1: Check the basics
Open Car Parking -> Settings.
- On General, set Business name, Currency code and Currency symbol, and the date and time format.
- On Notifications, check Sender address and Send new-booking notices to. Both start as the site’s admin email.
- Click Save.
Every option is described in Settings.
Step 2: Make the car park yours
- Open Car Parking -> Locations and edit Main Car Park. Give it your name and address.
- Set its Opening hours, and how many spaces of each type it has in the Spaces panel.
- Open Car Parking -> Space types, edit each type you keep, and set its prices in the Prices panel.
A space type needs a price in the unit its location is billed in. A type with a price per day and none per hour costs nothing at a location billed per hour. See Pricing.
Step 3: Place the booking form
-
Create a page, for example “Book parking”.
-
Add this shortcode, or the Car Parking Booking Form block:
[plugixa_car_parking] -
Publish the page.
See Shortcodes and Blocks.
Step 4: Add the two customer pages
These are optional, and worth the two minutes.
- Create a page that holds
[plugixa_car_parking_summary]. In Settings -> Bookings -> Pages, choose it as Booking summary page. Booking emails then carry a private link to the customer’s booking. - Create a page that holds
[plugixa_car_parking_account]. Customers use it to find a booking and cancel it. See Customer account.
Step 5: Take a test booking
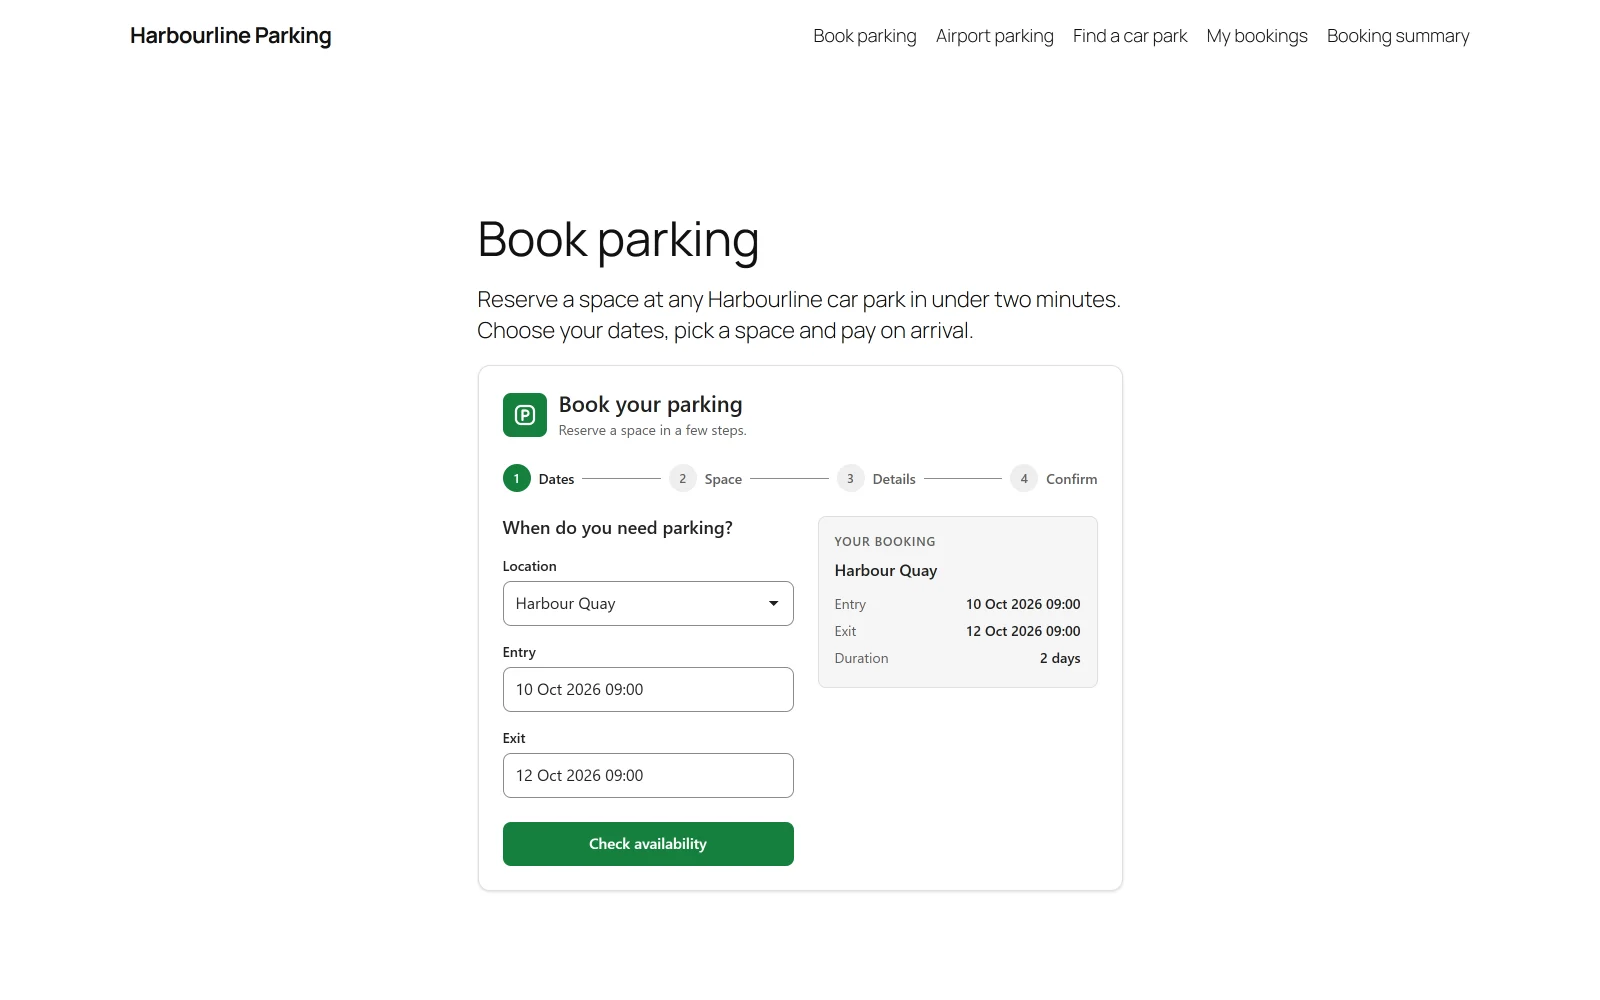
- Open the booking page in a private window, so you see it as a visitor.
- Choose the dates and click Check availability.
- Pick a space type, fill in your details and confirm.
- Note the reference on the confirmation. It starts with
PKG-.
Each step is described in Booking wizard.
Step 6: See it in the admin
Open Car Parking -> Bookings. The test booking is at the top, with the status Pending.
- Open it and click Confirm to accept it.
- A pending booking that nobody confirms or pays expires after 30 minutes and frees its space. Change that in Settings -> Bookings -> Booking window. See Availability.
- When the customer pays at the car park, record it in the booking’s Payments panel. See Payments.
Two emails were sent for the booking: one to the customer and one to you. If neither arrived, see Troubleshooting.
What to do next
| To | Read |
|---|---|
| Add fields to the form, or make a second form | Booking forms |
| Offer discount codes | Coupons |
| Change what the emails say | Emails |
| See what Pro adds | Free vs Pro |