

Contents
Getting started - Plugixa CRM
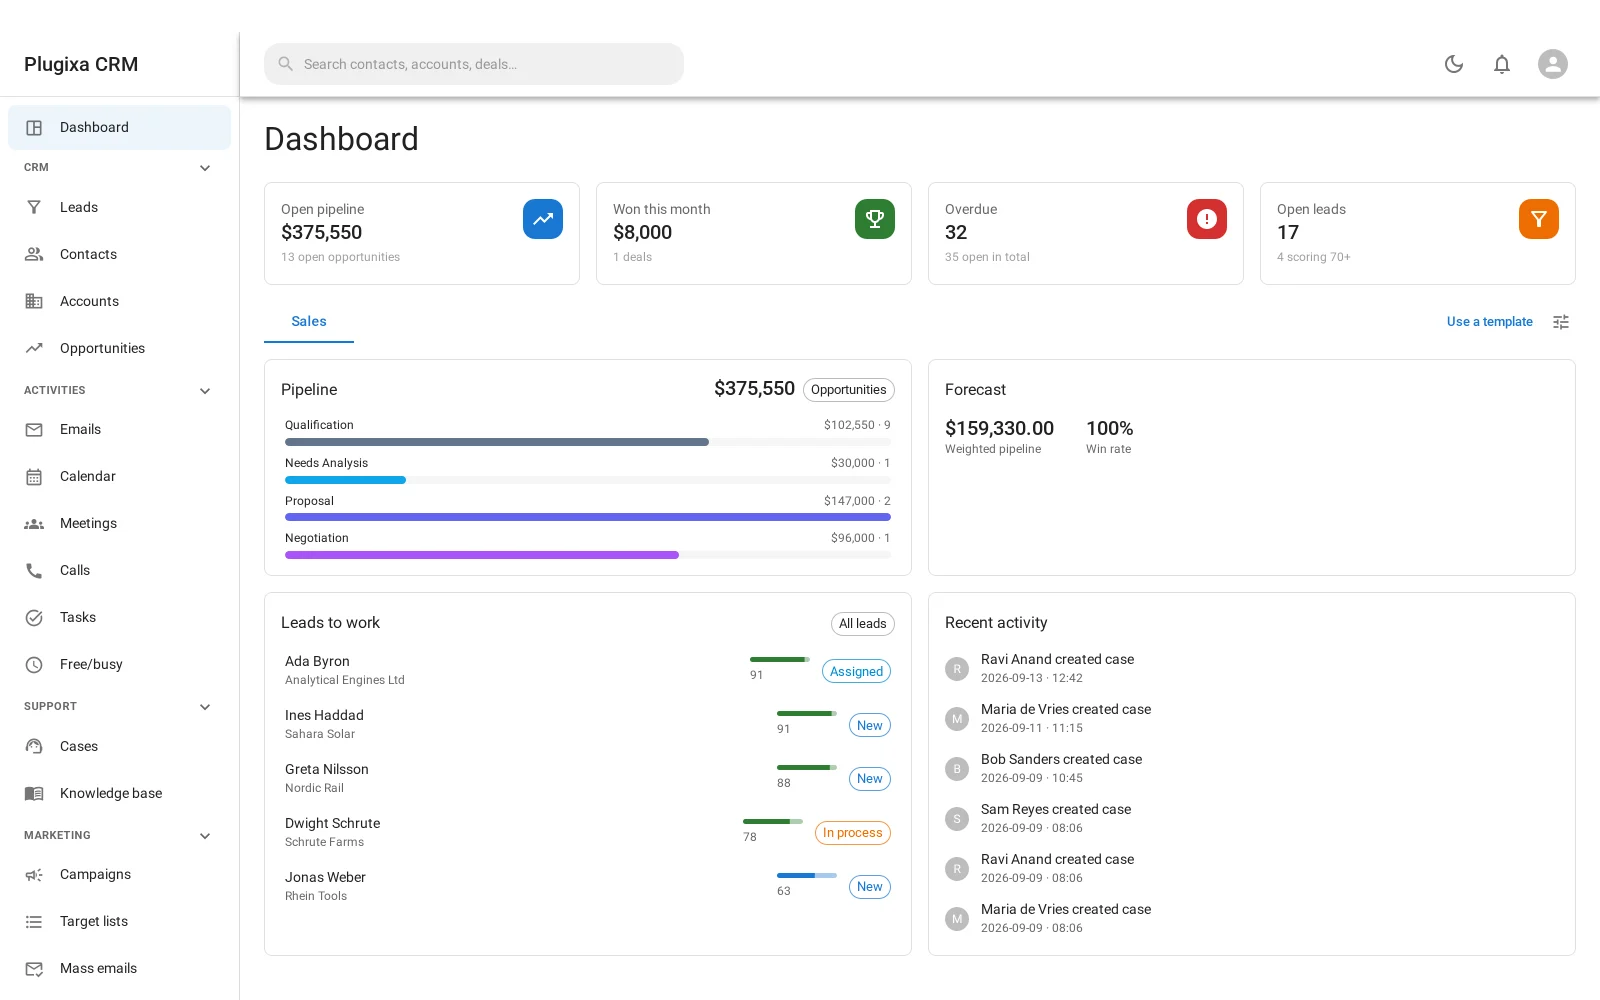
This walks from a clean install to a real deal on a pipeline. Nothing has to be configured first, and there is already something to look at when you arrive.
Install
Plugins -> Add New -> Upload Plugin, choose the ZIP, activate. Or unzip into
/wp-content/plugins/ so the main file sits at
/wp-content/plugins/plugixa-crm/plugixa-crm.php.
Free and Pro are separate downloads, not a switch. The Pro build is the free plugin plus a
pro/directory, so there is nothing to unlock in place: you install the other ZIP over the top, and the data stays exactly where it is.
Activation creates the plugin’s own database tables. It does not create posts or custom post types, because accounts, contacts, deals and their history are relational data.
You are not starting from nothing
Activation also seeds twenty-four example records across four modules: a couple of accounts and contacts, a lead, a deal, a case, an article, a web form. They exist so that every screen has something on it the first time you open it.
Delete any of them and nothing objects. If you later want them back, Settings -> Example content puts back only the ones that are actually gone: renamed, edited and trashed examples are left completely alone, because a seeder that restores a fresh copy alongside the one in your bin is not answering the question you asked.
Where things are
Everything lives under one WordPress menu item, Plugixa CRM, as a single-page application. The sidebar groups it:
| Group | Holds |
|---|---|
| CRM | Leads, Contacts, Accounts, Opportunities |
| Activities | Emails, Calendar, Meetings, Calls, Tasks, Free/busy |
| Support | Cases, Knowledge base |
| Marketing | Campaigns, Target lists, Mass emails |
| Business | Documents |
| Analytics | Reports |
| Administration | Mail accounts, templates, web forms, portal users, duplicates, working hours, import, access, teams, roles, settings, integrations - plus custom fields on a paid build |
The order to do things in
The CRM has one dependency worth knowing: a deal needs a pipeline, and a pipeline exists already. Everything else can be created in any order.
1 - Create an account
Accounts -> Create. A name is all that is required. Add the website, the industry and a billing address if you have them.
An account is a company. It is the thing most reporting groups by, so creating one before its people saves relinking later.
2 - Add a contact
Contacts -> Create. First and last name, then attach them to the account.
A contact can belong to more than one account, and the link records the role they play at each. That matters more than it sounds: the person who signs the contract at one company is often the technical evaluator at another.
Add their email addresses and phone numbers on the contact itself. There can be several of each, with one of them primary.
3 - Or start with a lead instead
If you do not know yet whether this is a customer, create a lead rather than an account and a contact. A lead holds the company name as plain text, so your account list does not fill up with companies that never bought anything.
When it qualifies, Convert creates the account, the contact and the opportunity in one step, with nothing retyped.
4 - Create a deal
Opportunities -> Create. Name it, attach the account, put in an amount and a close date, and pick a stage.
Each stage carries a probability, and the forecast is the pipeline weighted by those probabilities rather than the face value of everything open. Drag the card between stages on the board as things move.
5 - Log what you did
A deal that nobody touches is a deal nobody is working. Add a task, a call or a meeting, or just a note. All of them appear on the record and on the calendar.
Worth doing early
| Do this | Because |
|---|---|
| Set the currency in Settings | Amounts are stored in it and every total is summed in it |
| Set working hours | Free/busy answers with the time somebody can actually be booked |
| Connect a mailbox | Incoming mail becomes cases by itself |
| Create a role | Until you do, everyone with access can see everything |
Already have your data?
Import it. CSV or Excel, with a column-matching step before anything is written, lookups by name or code, and errors reported by line number rather than invented for you. An import can be reverted.
Put it on your own site
Staff who should not be in wp-admin do not have to be. Add [plugixa_crm_app] to
a page and the whole application runs there, inside your theme, with the same API
and the same permissions. See
Shortcodes and Blocks.
Troubleshooting
| Symptom | Usual cause |
|---|---|
| The menu is not there | The signed-in user lacks plugixa_crm_manage. An administrator has it. |
| Screens are empty on a new install | They should not be: activation seeds examples. Use Settings -> Example content to check. |
| A deal cannot be saved | It needs a stage, and a stage belongs to a pipeline. One ships by default. |
| Amounts look wrong | Check the currency in Settings -> General. Everything is summed in it. |
| Nobody can see anything after I made a role | A role is a grant, not a filter. Check what it allows, then who holds it. |
| Example content came back after I deleted it | Only if it was purged, not trashed. Trashed examples are left alone. |
What to do next
- Understand the records: Accounts and Contacts.
- Work the pipeline: Opportunities.
- Bring your data in: Import and Export.
- Decide who sees what: Roles, Teams and Permissions.