

Contents
On this page
Getting started - Plugixa PDF Vouchers for WooCommerce
This page takes you from a fresh install to a first voucher sold. It takes about ten minutes.
Requirements
| Requirement | Version |
|---|---|
| WordPress | 6.6 or later |
| PHP | 8.2 or later |
| WooCommerce | 9.0 or later, active |
The plugin declares WooCommerce as a required plugin, so WordPress asks you to activate WooCommerce first. It works with WooCommerce High-Performance Order Storage (HPOS) and with both the Classic and the Block Cart and Checkout.
PDFs, QR codes and barcodes are made on your own server. Nothing about your vouchers, orders or customers is sent to an outside service.
Install the plugin
- In WordPress, go to Plugins > Add New Plugin and click Upload Plugin.
- Choose the plugin ZIP file and click Install Now, then Activate.
- The plugin opens its setup wizard, Welcome to PDF Vouchers.
The wizard opens once, for a user who can manage the plugin’s settings. To come back to it later,
open admin.php?page=plugixa-pdf-vouchers#/welcome.
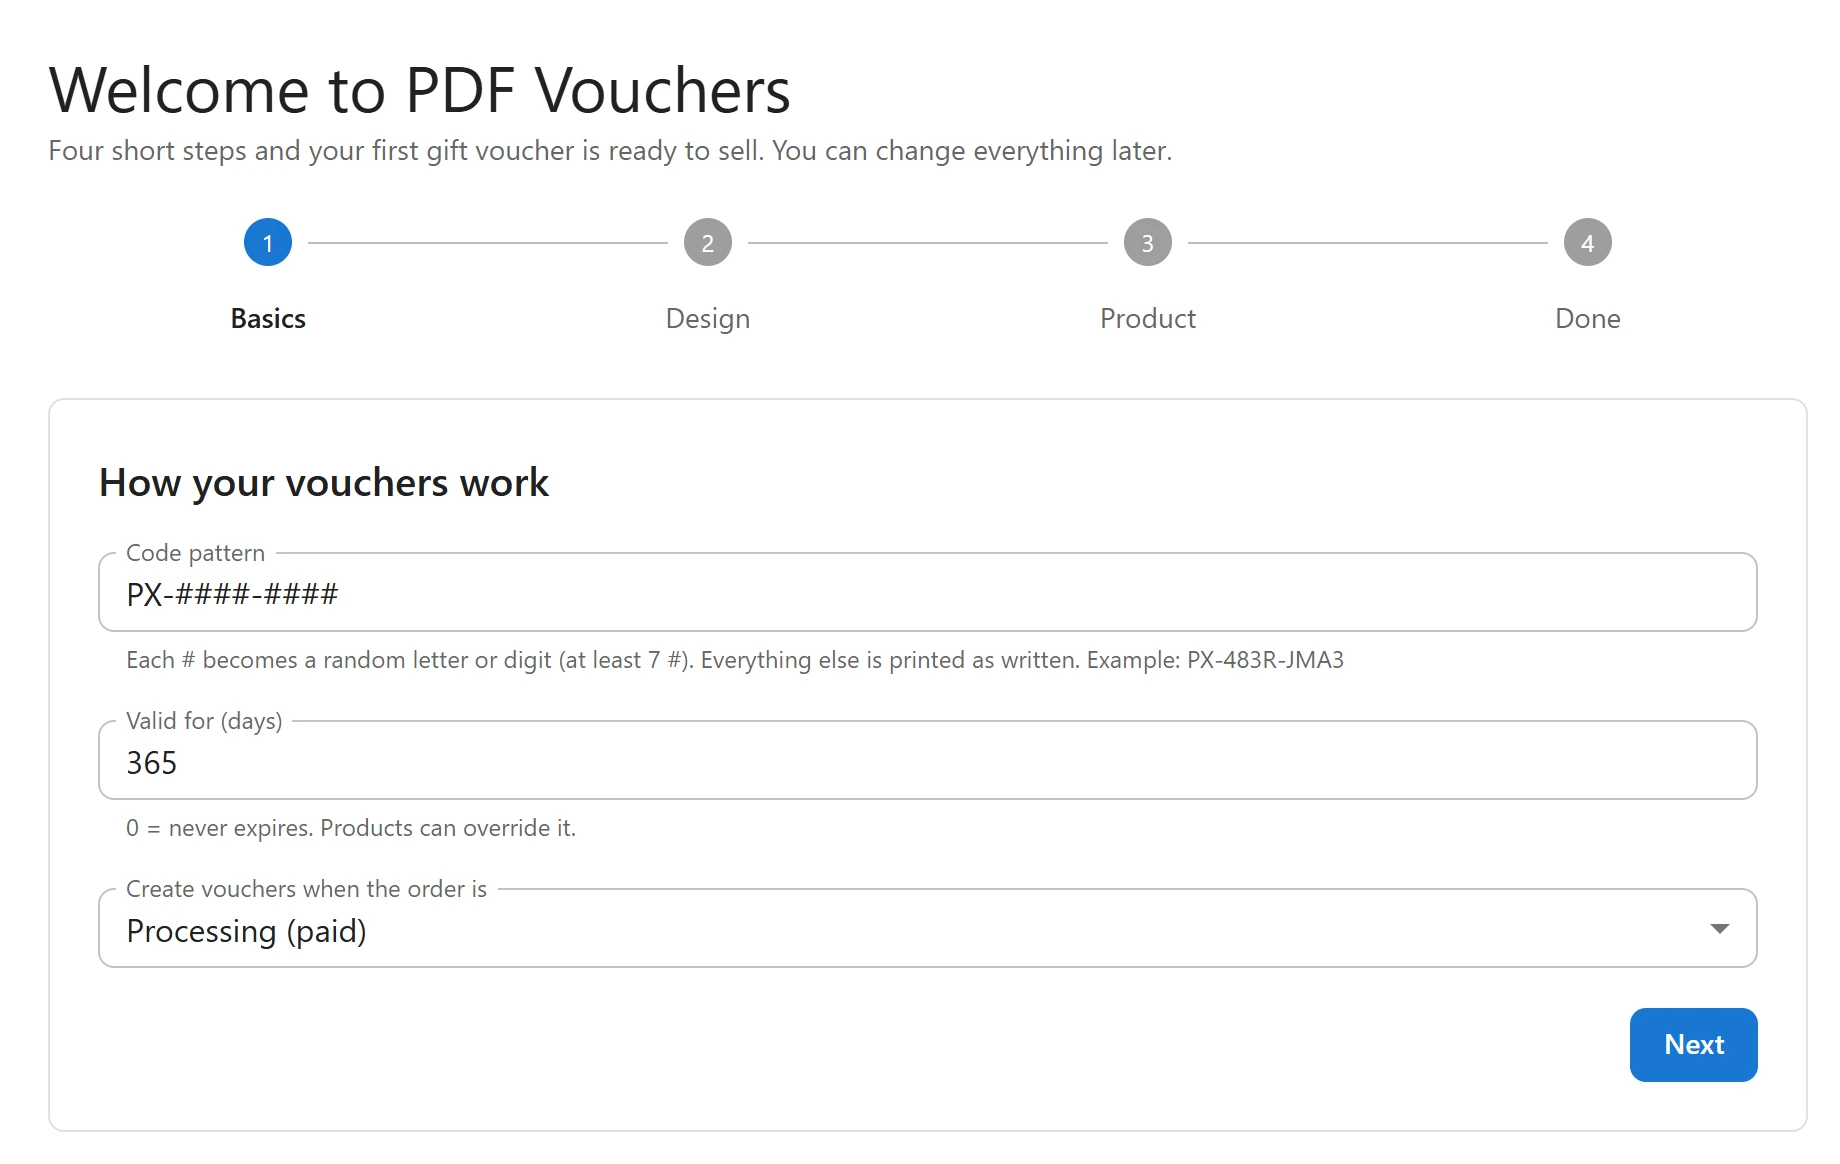
Run the setup wizard
The wizard has four steps: Basics, Design, Product and Done. Everything you choose here can be changed later.
- Basics: set the Code pattern (each
#becomes a random letter or digit, with at least 7 of them), how many days a voucher is Valid for (0 means it never expires), and Create vouchers when the order is Processing (paid) or Completed. An example code shows how your pattern prints. - Design: pick the design printed on your vouchers, Classic, Modern or Minimal. Colours, logo and texts are edited later in PDF designs.
- Product: give your first voucher product a name and list the amounts the customer can choose, then click Create product. The product is created as a draft, with one option per amount, so you can check it before it goes on sale. Click Skip if you prefer to set up a product yourself.
- Done: open your voucher product to review and publish it, then click Go to the dashboard.
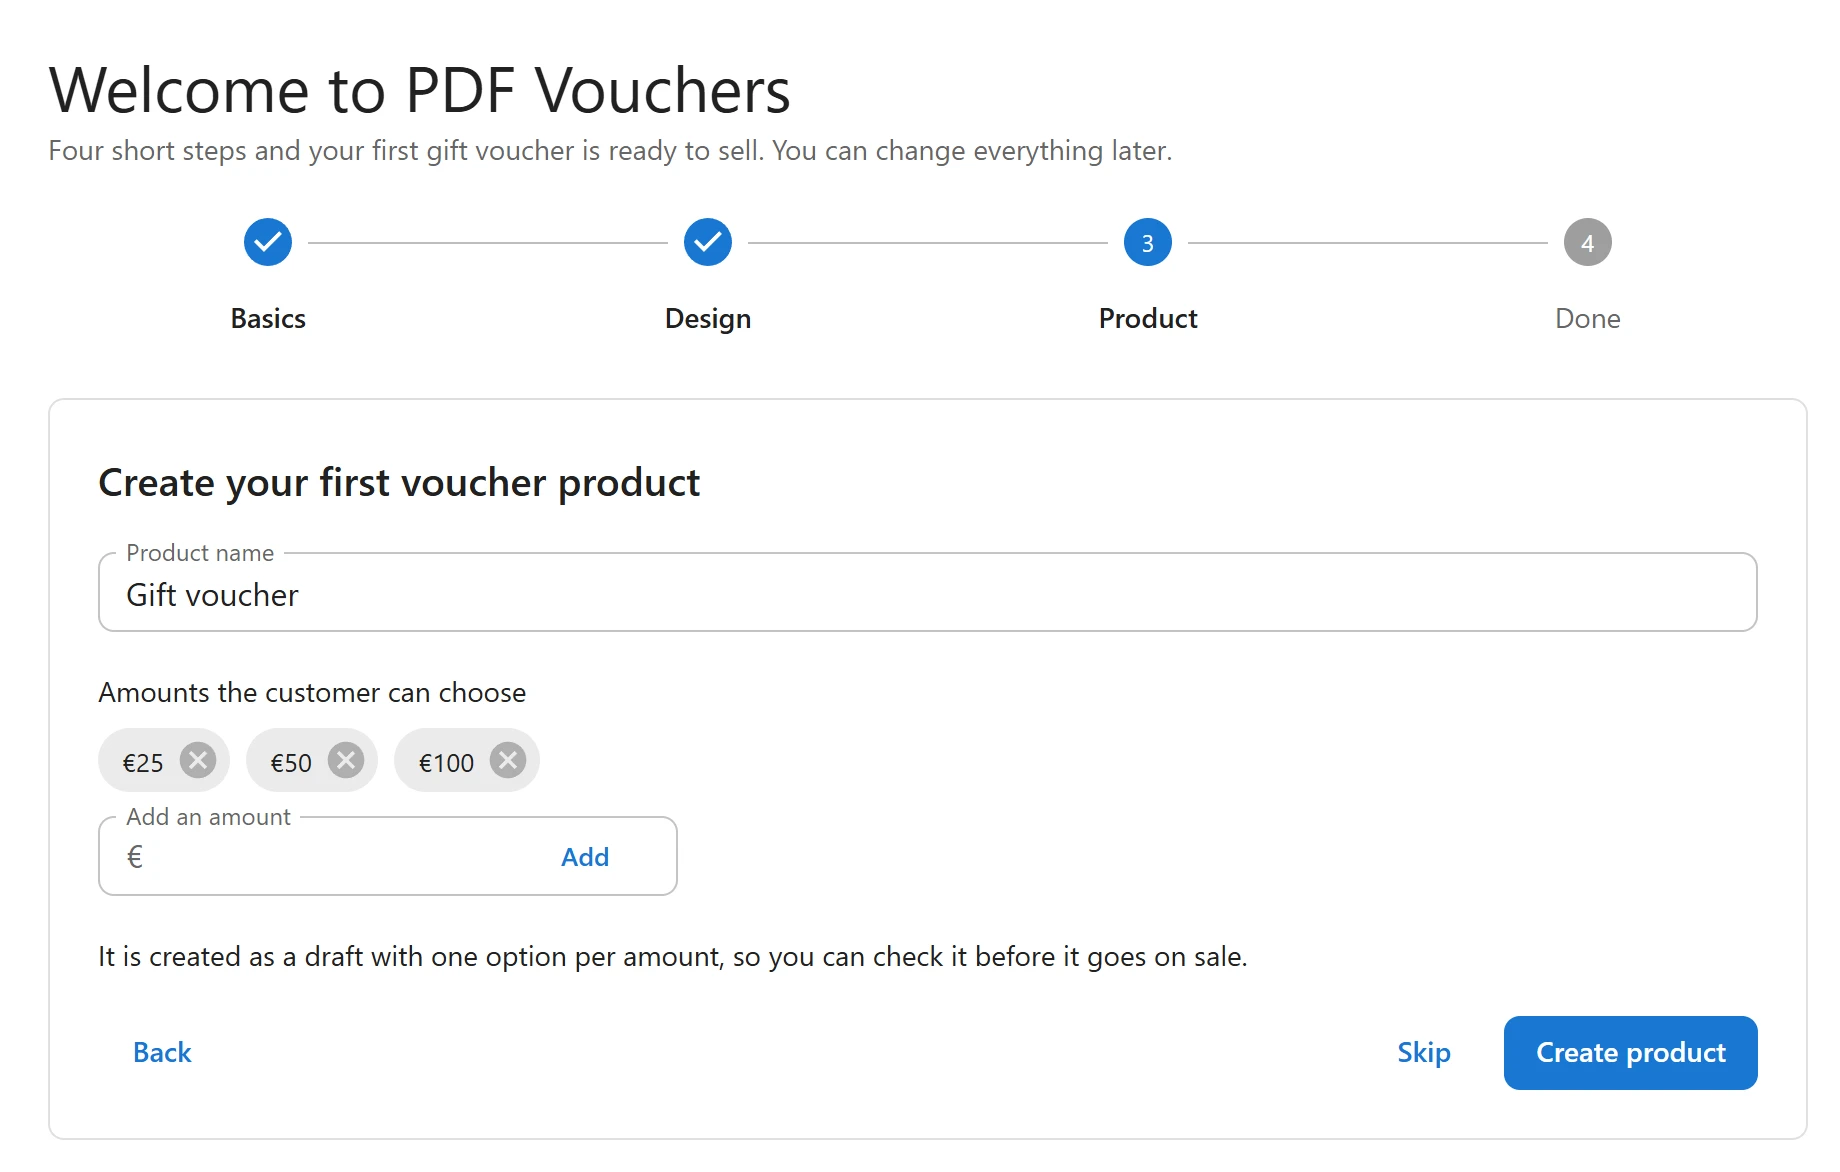
If you already have a voucher product, the Product step says so and links to it.
Check and publish the product
The wizard’s product is a variable product with one variation per amount, and Sell as a voucher already ticked on its PDF Voucher tab.
- Open the product, check its name, description and image.
- Open the PDF Voucher tab to choose the voucher type, expiry and design. See Voucher products.
- Click Publish.
Add the balance check
Recipients like to know what is left on their voucher. Add the Voucher Balance block to a page,
or the shortcode [plugixa_voucher_balance]. See
Balance check.
Test a purchase
Buy one voucher yourself with a test payment method (for example Cash on delivery or Direct bank transfer, switched on under WooCommerce > Settings > Payments):
- Open the product page, choose an amount and fill in the gift form with your own email as the recipient.
- Check out.
- Set the order to Processing (or Completed, if you chose that in the wizard). For a bank transfer order, change its status by hand.
- The voucher is created: the order notes say Voucher issued, followed by the masked code.
- Open your inbox. The voucher email has the PDF attached and a link to download it.
- In a new cart, type the code in the coupon field and see it pay for the order.
The new voucher is also listed under Plugixa PDF Vouchers > Vouchers, with its history. See Vouchers.
Next steps
- Voucher products: gift card or product voucher, expiry and number of uses.
- PDF designs: your logo, colours and texts.
- Emails and delivery: edit the voucher email.
- Settings: codes, holds and the buyer’s copy.
Quick Links
Share