

Contents
On this page
Apple Wallet and Google Wallet - Plugixa PDF Vouchers for WooCommerce
With a wallet account set up, the voucher email and My Account show Add to Apple Wallet or Save to Google Wallet. The recipient keeps the voucher on their phone, with its code and balance.
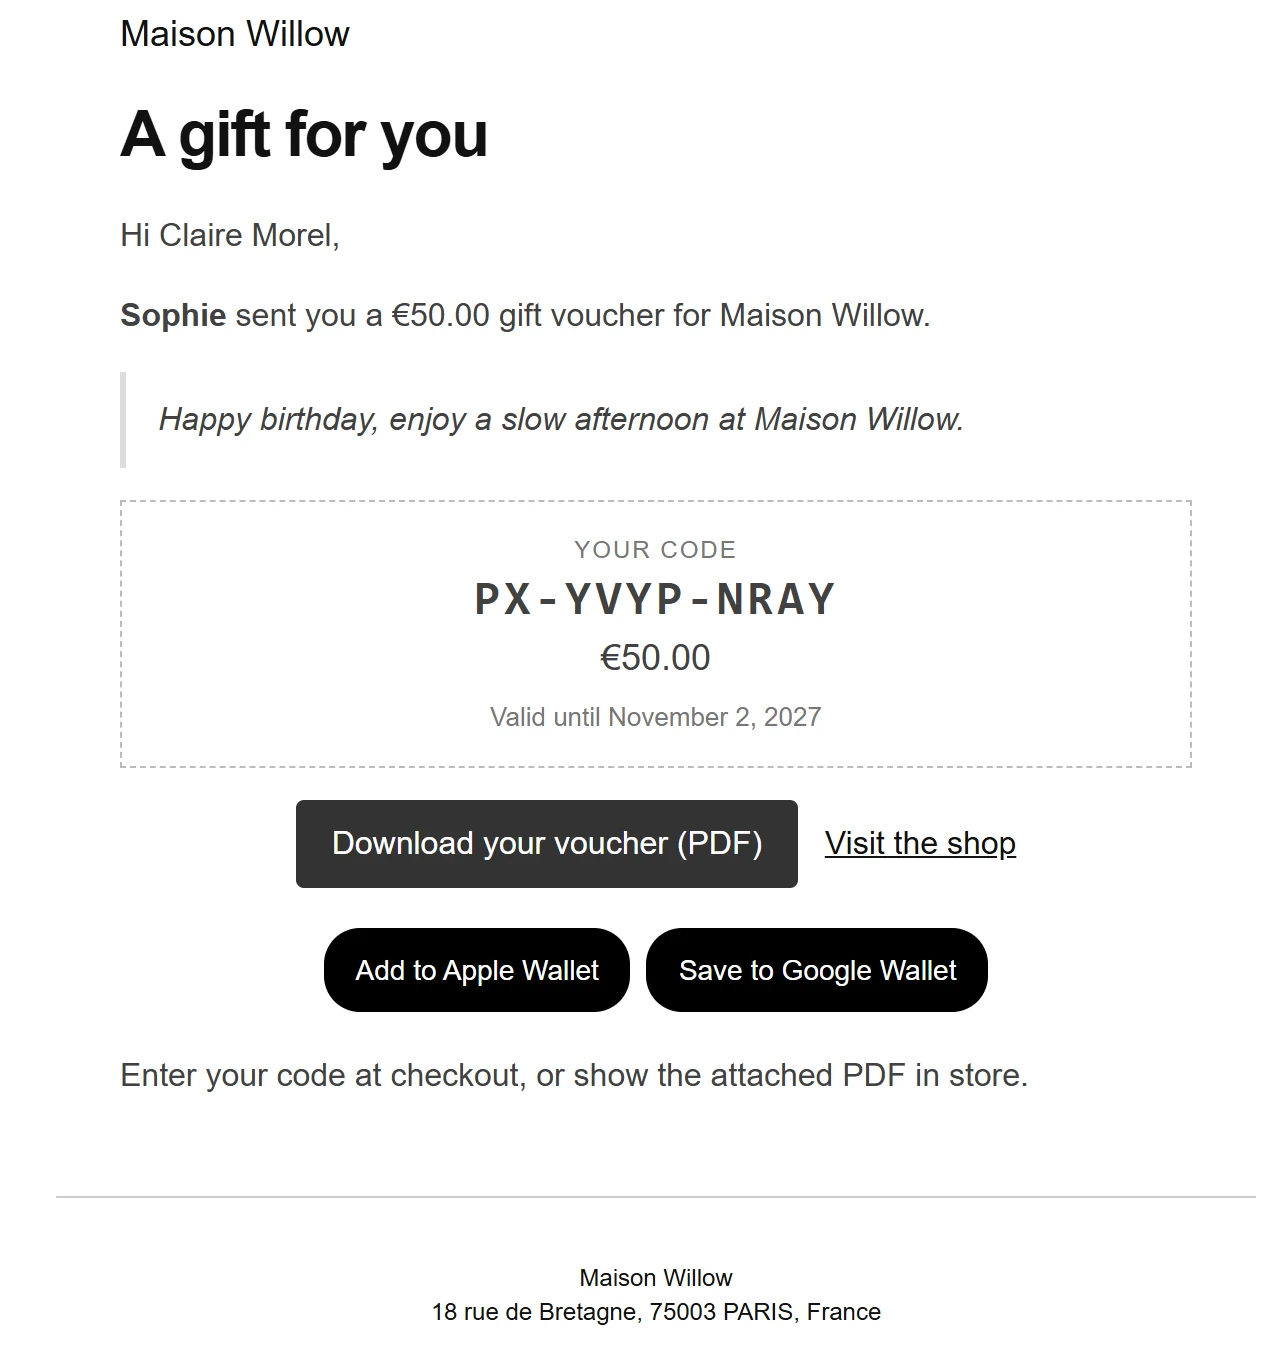
How the passes behave
| Apple Wallet | Google Wallet | |
|---|---|---|
| Made | Fresh on every download, as a .pkpass file |
When the customer taps the link, from a signed link |
| Balance | The balance of the day it was added. The back of the pass says when it was taken. | Updated after each use, by a background job, so checkout never waits on Google. |
Both buttons are signed links, like the PDF download link: they cannot be guessed and stop working if the voucher’s code changes.
Set up the accounts
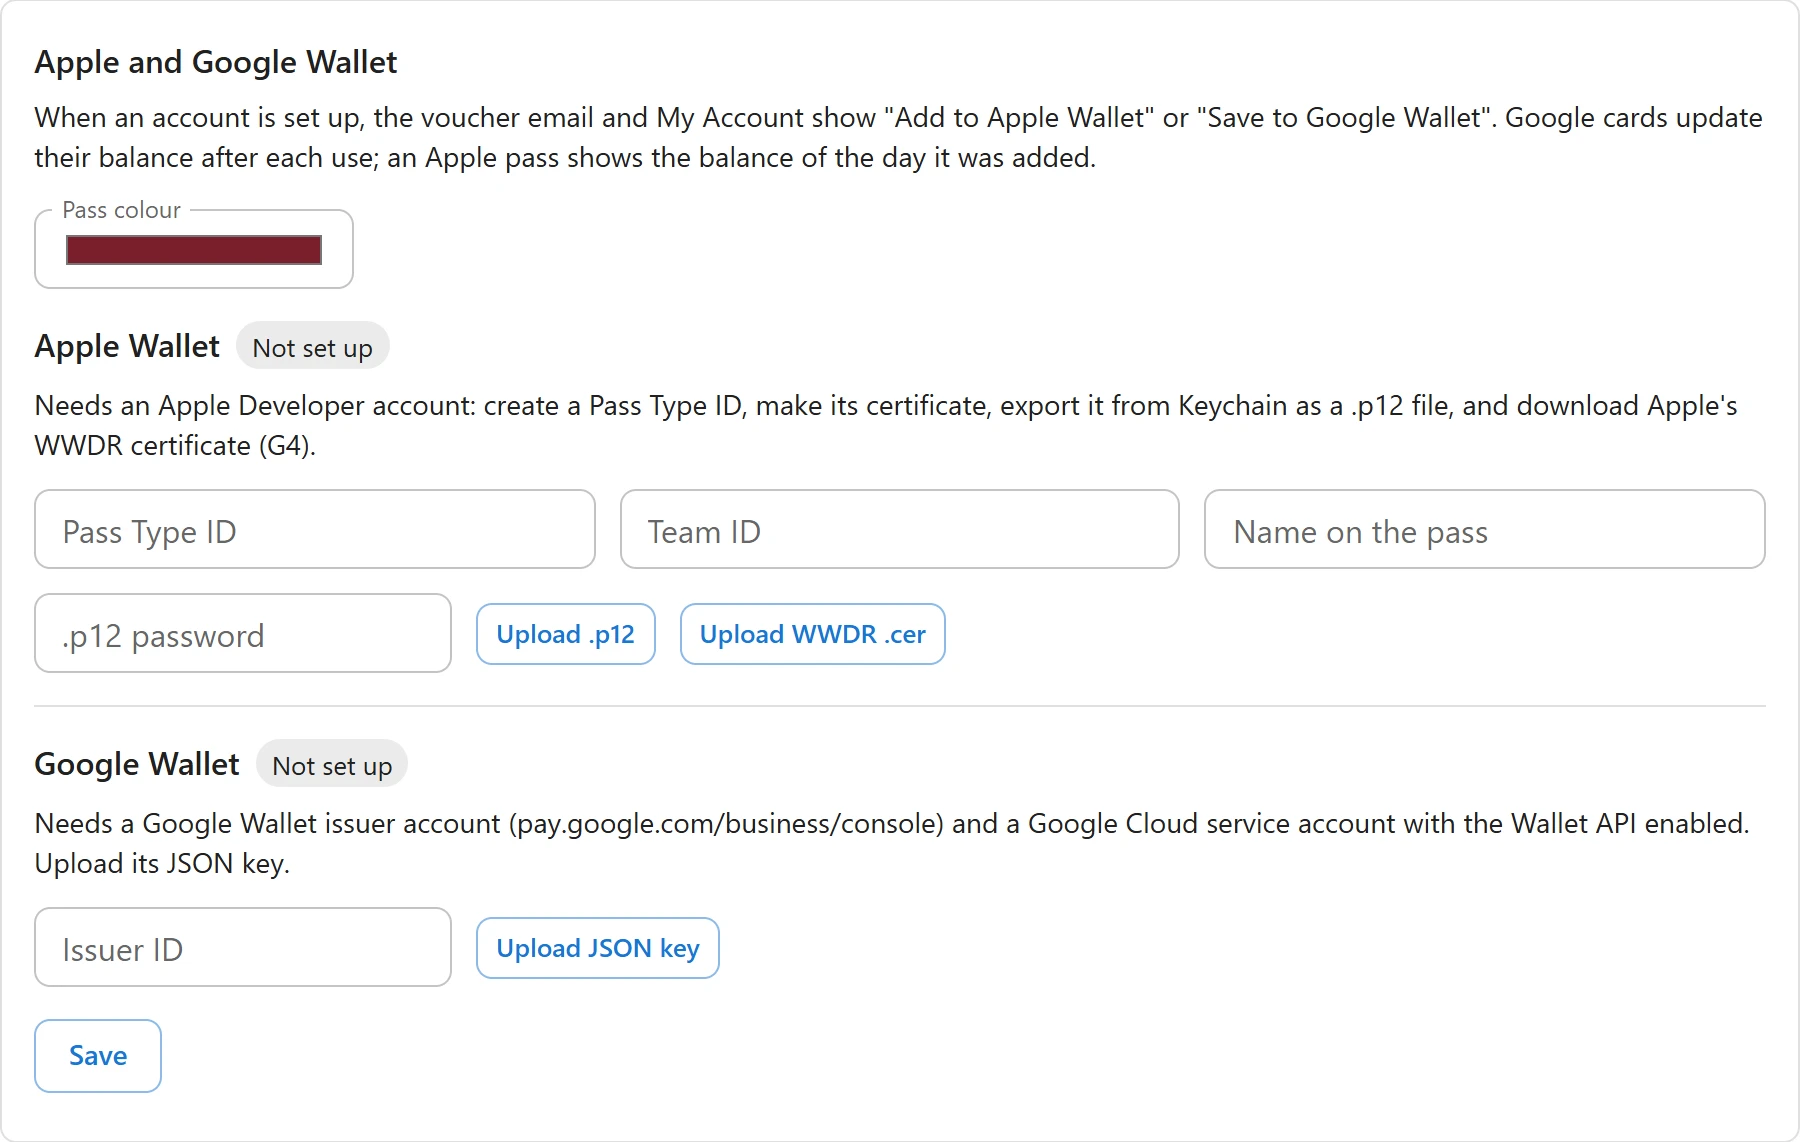
Go to Plugixa PDF Vouchers > Settings, box Apple and Google Wallet. Each wallet shows Ready or Not set up. You can set up one or both.
Apple Wallet
Needs an Apple Developer account: create a Pass Type ID, make its certificate, export it from Keychain as a .p12 file, and download Apple’s WWDR certificate (G4).
- In your Apple Developer account, create a Pass Type ID (for example
pass.com.example.giftcard) and its certificate. - Open the certificate in Keychain Access on a Mac and export it with its private key as a
.p12file, with a password. - Download Apple’s WWDR intermediate certificate, G4 (a
.cerfile). - In the settings box, fill in Pass Type ID, Team ID and Name on the pass (your store name), and pick a Pass colour.
- Click Upload .p12, choose the file and type its .p12 password.
- Click Upload WWDR .cer and choose the WWDR file.
- Click Save. Apple Wallet shows Ready, with the certificate’s Valid until date.
Pass certificates expire: when it is time, use Replace .p12 with a new one.
Google Wallet
Needs a Google Wallet issuer account (pay.google.com/business/console) and a Google Cloud service account with the Wallet API enabled. Upload its JSON key.
- Open a Google Wallet issuer account in the Google Pay and Wallet console and note your Issuer ID.
- In Google Cloud, enable the Google Wallet API, create a service account and download its JSON key. Give the service account access to your issuer in the Wallet console.
- In the settings box, fill in the Issuer ID.
- Click Upload JSON key and choose the key file.
- Click Save. Google Wallet shows Ready.
Forget removes a stored key or certificate. Replace JSON key, Replace .p12 and Replace WWDR upload a new one.
How the keys are stored
Private keys are stored encrypted (AES-256 with a key derived from your site’s own salts) and never leave your server: the settings screen only says that a key is stored. They are read only when a pass is made. If your server’s PHP has no OpenSSL, the box says This server cannot encrypt secrets (OpenSSL is missing), so wallet keys cannot be stored.
What is sent where
- Apple passes are made on your server. Apple receives nothing from the plugin.
- Google cards are created by Google when the customer taps Save to Google Wallet, and updated through the Google Wallet API after each balance change. Google receives the card details: the code, the balance and currency, the recipient’s name, the expiry date and your store name.
Quick Links
Share