

Contents
Recipe Editor - Plugixa Recipe
Since version 1.2.0, a recipe is written on one page. Every part of the recipe sits in its own section, a section bar keeps every part one click away, and nothing is hidden behind a tab. Open it from Recipes > Add Recipe, or click a recipe’s title in the recipe list.
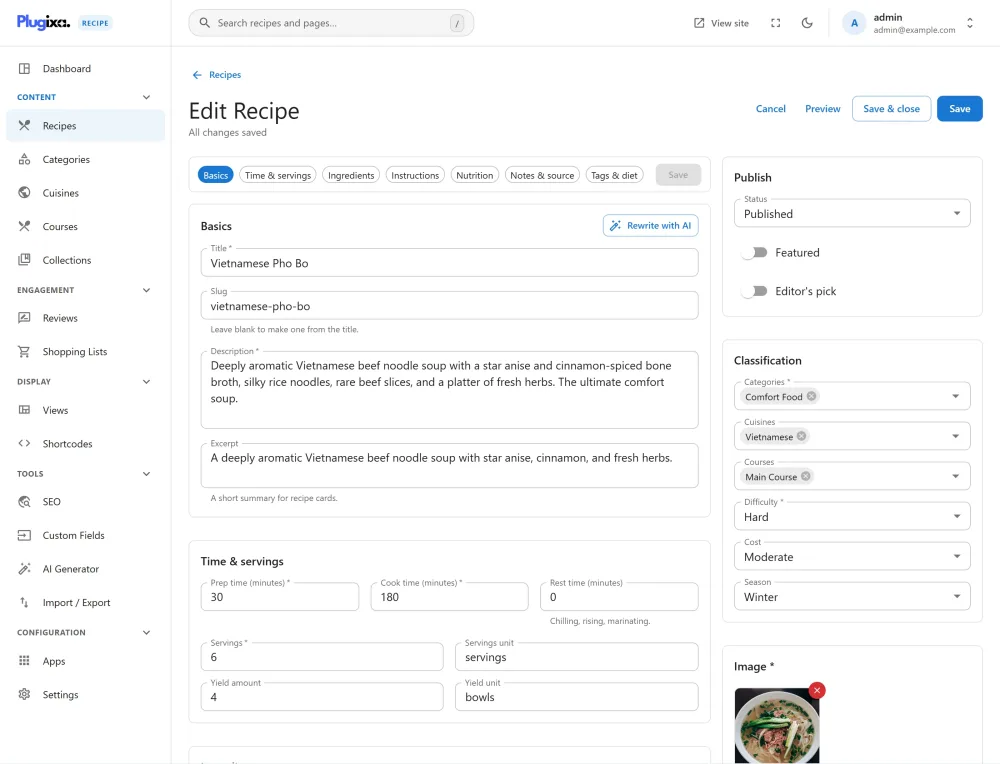
The section bar
The bar at the top lists the sections of the recipe:
| Section | What it holds |
|---|---|
| Basics | Title, slug, description and excerpt |
| Time & servings | Prep, cook and rest time, servings, servings unit, yield amount and yield unit |
| Ingredients | The ingredient list, with group headings |
| Instructions | The steps, with group headings |
| Nutrition | The nutrition label (shown when the Nutrition app is on) |
| Notes & source | Notes, tips, source name and source URL |
| Tags & diet | The eleven diet labels, tags and equipment |
| SEO | Search title and description |
Click a section to scroll to it. The bar stays in view while the page scrolls, highlights the section you are in, and shows how many problems each section holds, so a required field you missed is never out of sight. Its Save button stays in view too. Custom fields PRO add their own sections below the built-in ones.
The sidebar
- Publish: status, Featured and Editor’s pick.
- Classification: categories, cuisines and courses, plus difficulty, cost and season. Type in the categories, cuisines or courses field to search them, or to create a new one without leaving the recipe.
- Image and Gallery: drag gallery photos to change their order.
- Video: the preview player loads only when you click Preview, so nothing is fetched from YouTube or Vimeo until you ask for it.
Ingredients
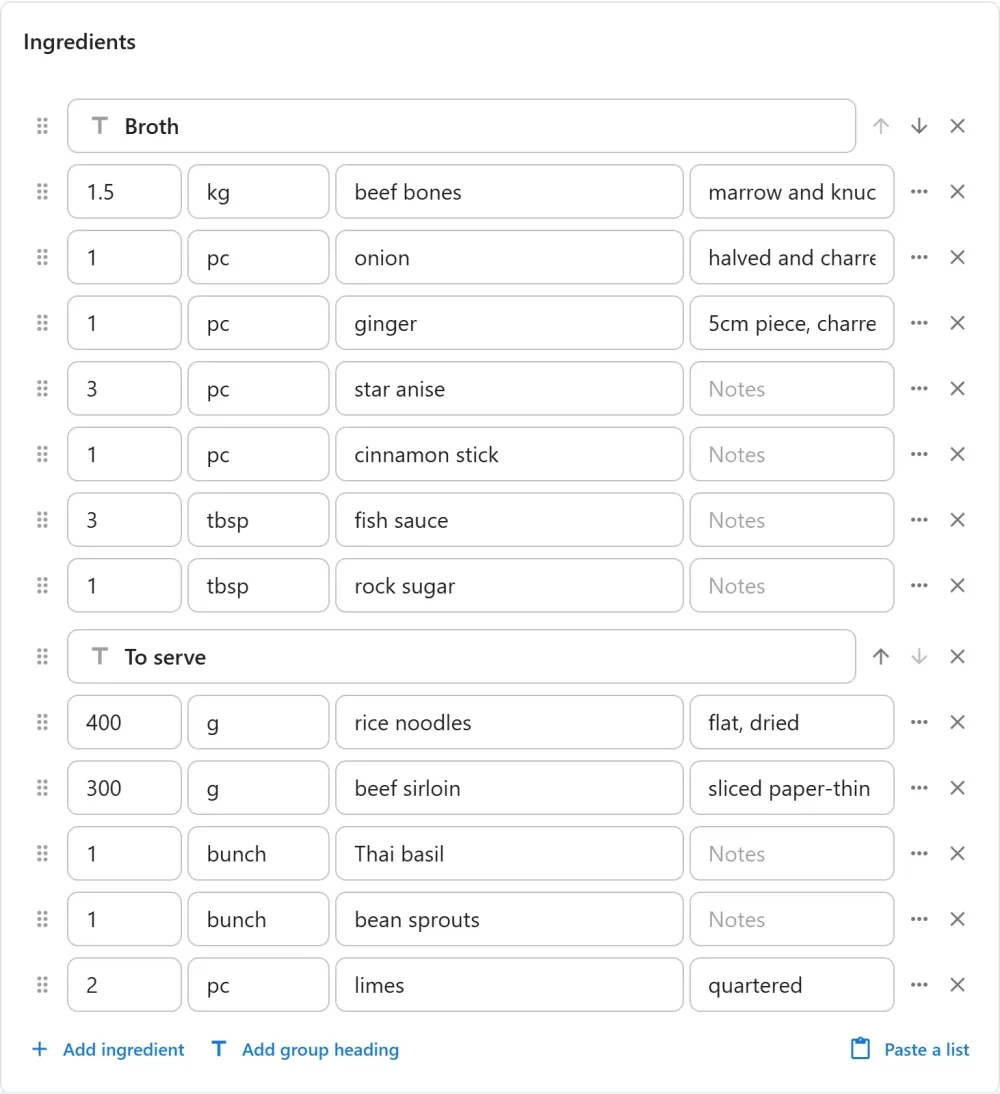
Each row holds an amount, a unit, the ingredient and a note such as “finely chopped”.
- Suggestions: the unit field suggests units from your units list, which includes count units (piece, pinch, clove, slice, dash, can). The ingredient field suggests ingredients you have used before.
- More options: the … button on a row opens the ingredient’s link (an affiliate or product page), an optional mark and a substitute. All three show on the recipe page.
- Groups: Add group heading inserts a heading such as “For the sauce”. The rows below it belong to that group.
- Order: drag a row by its handle, or use the arrows, to move it within a group or into another one.
Amounts accept fractions and decimals (1/2, 1 1/2, 1.5). Reader Tools scales them on the recipe page, so enter the amounts for the servings you set in Time & servings.
Paste a list
Already have the recipe in a document? Click Paste a list under the ingredients or the steps, and paste the whole list.
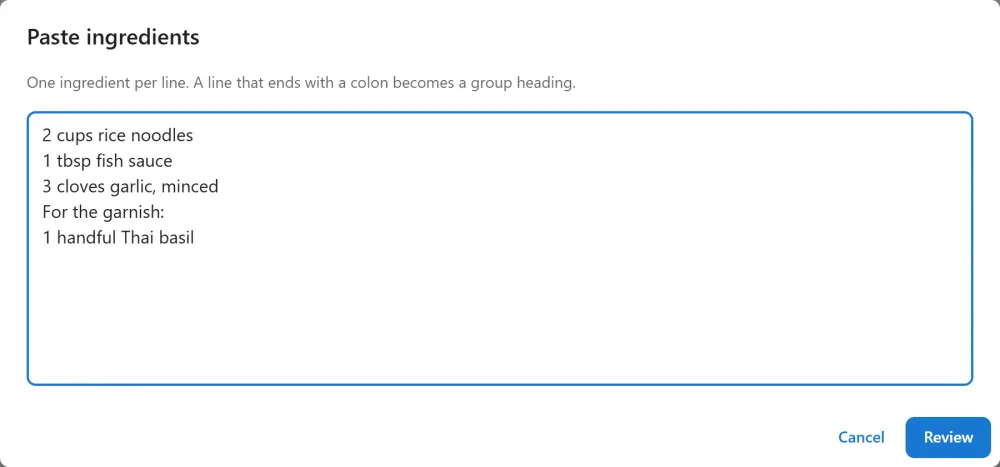
- Put one ingredient, or one step, per line.
- A line that ends with a colon (
For the garnish:) becomes a group heading. - Click Review to check how each line was read before the rows are added.
Instructions
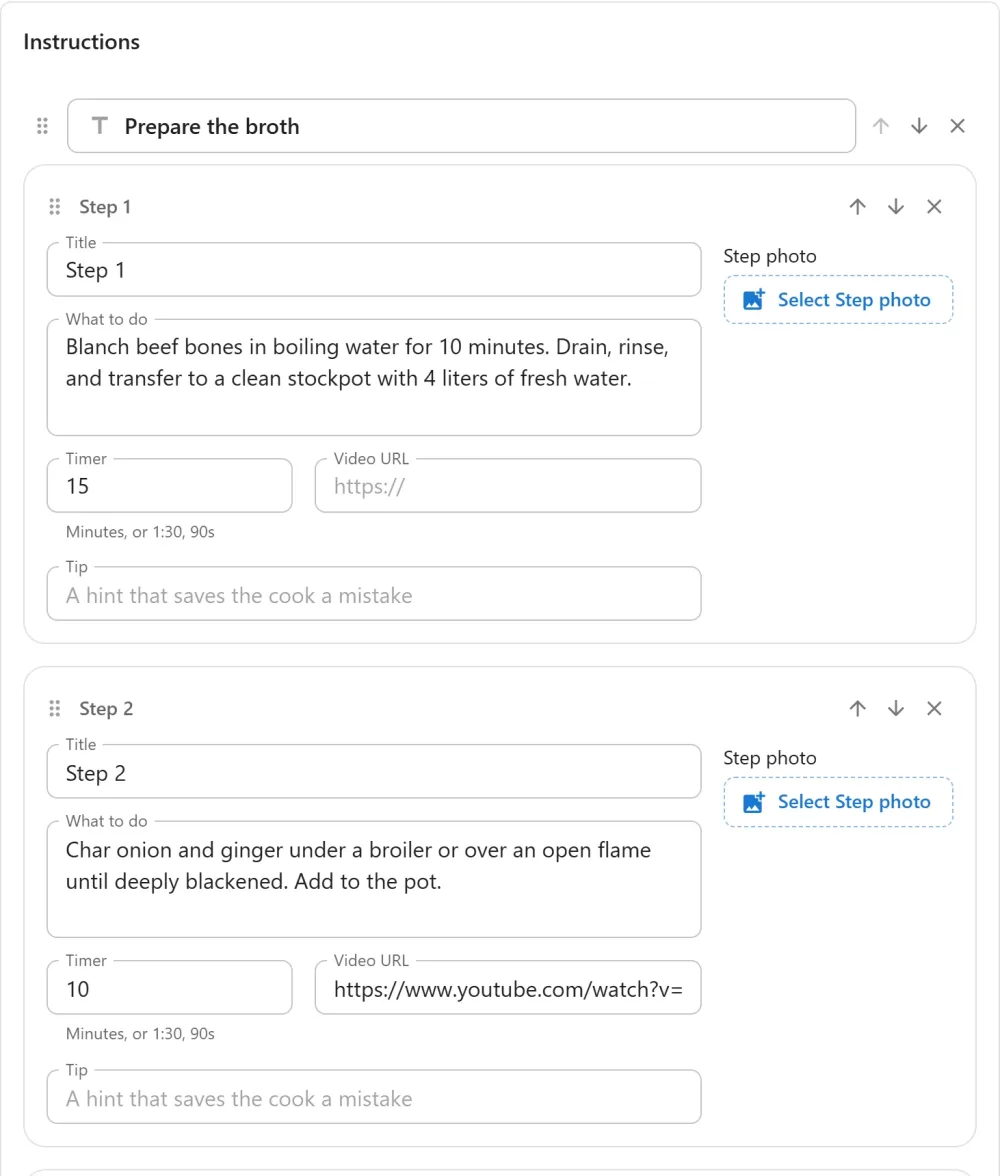
Each step has:
- Title: an optional short name for the step.
- What to do: the step itself.
- Timer: how long the step takes. Type minutes (
15), minutes and seconds (1:30) or seconds (90s). On the recipe page, the timer becomes a button that starts a countdown. See Reader Tools. - Video URL: a YouTube or Vimeo link for this step.
- Tip: a hint that saves the cook a mistake.
- Step photo: a picture of the step, chosen from the media library.
Steps take group headings and drag-and-drop, the same as ingredients. See Instructions for how they appear on the recipe page.
Nutrition
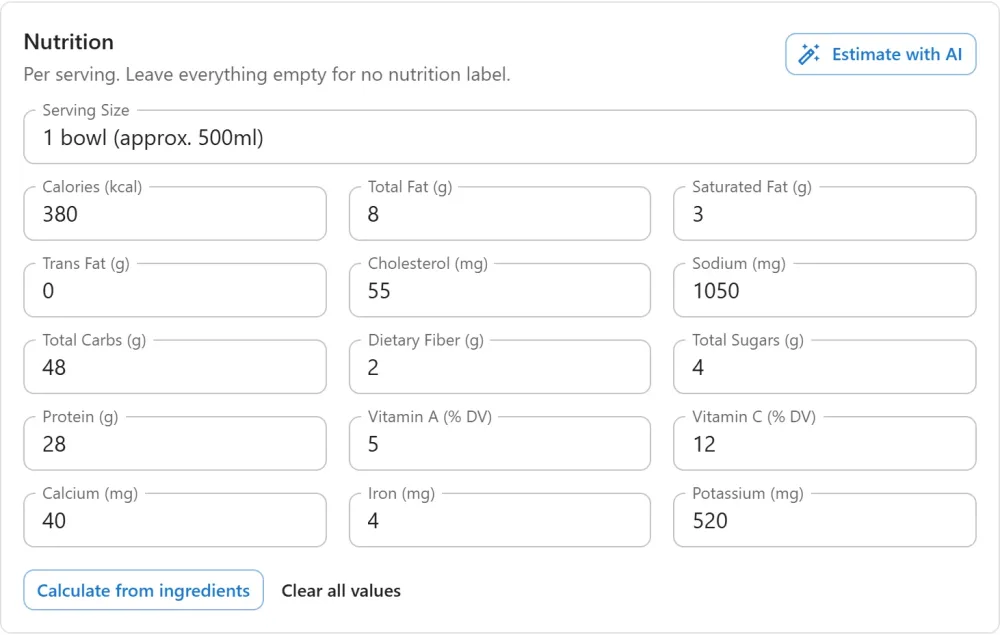
The label has a serving size and fifteen nutrients, all per serving. Leave every field empty to show no nutrition label. Instead of typing the values, you can:
- press Calculate from ingredients to work them out with the Nutrition Calculator, when that app is on;
- press Estimate with AI PRO to let the AI Generator estimate them.
See Nutrition for how the label is displayed.
Tags & diet
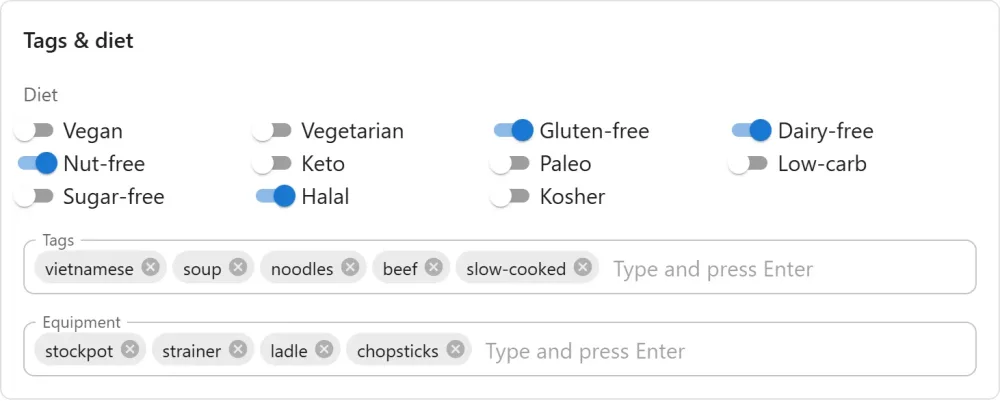
- Diet: eleven switches. Every label you switch on is shown on the recipe page and written into the recipe’s structured data.
- Tags: free labels. Type one and press Enter.
- Equipment: the tools the recipe needs, such as “stockpot”. The list is shown on the recipe page.
Preview while you write
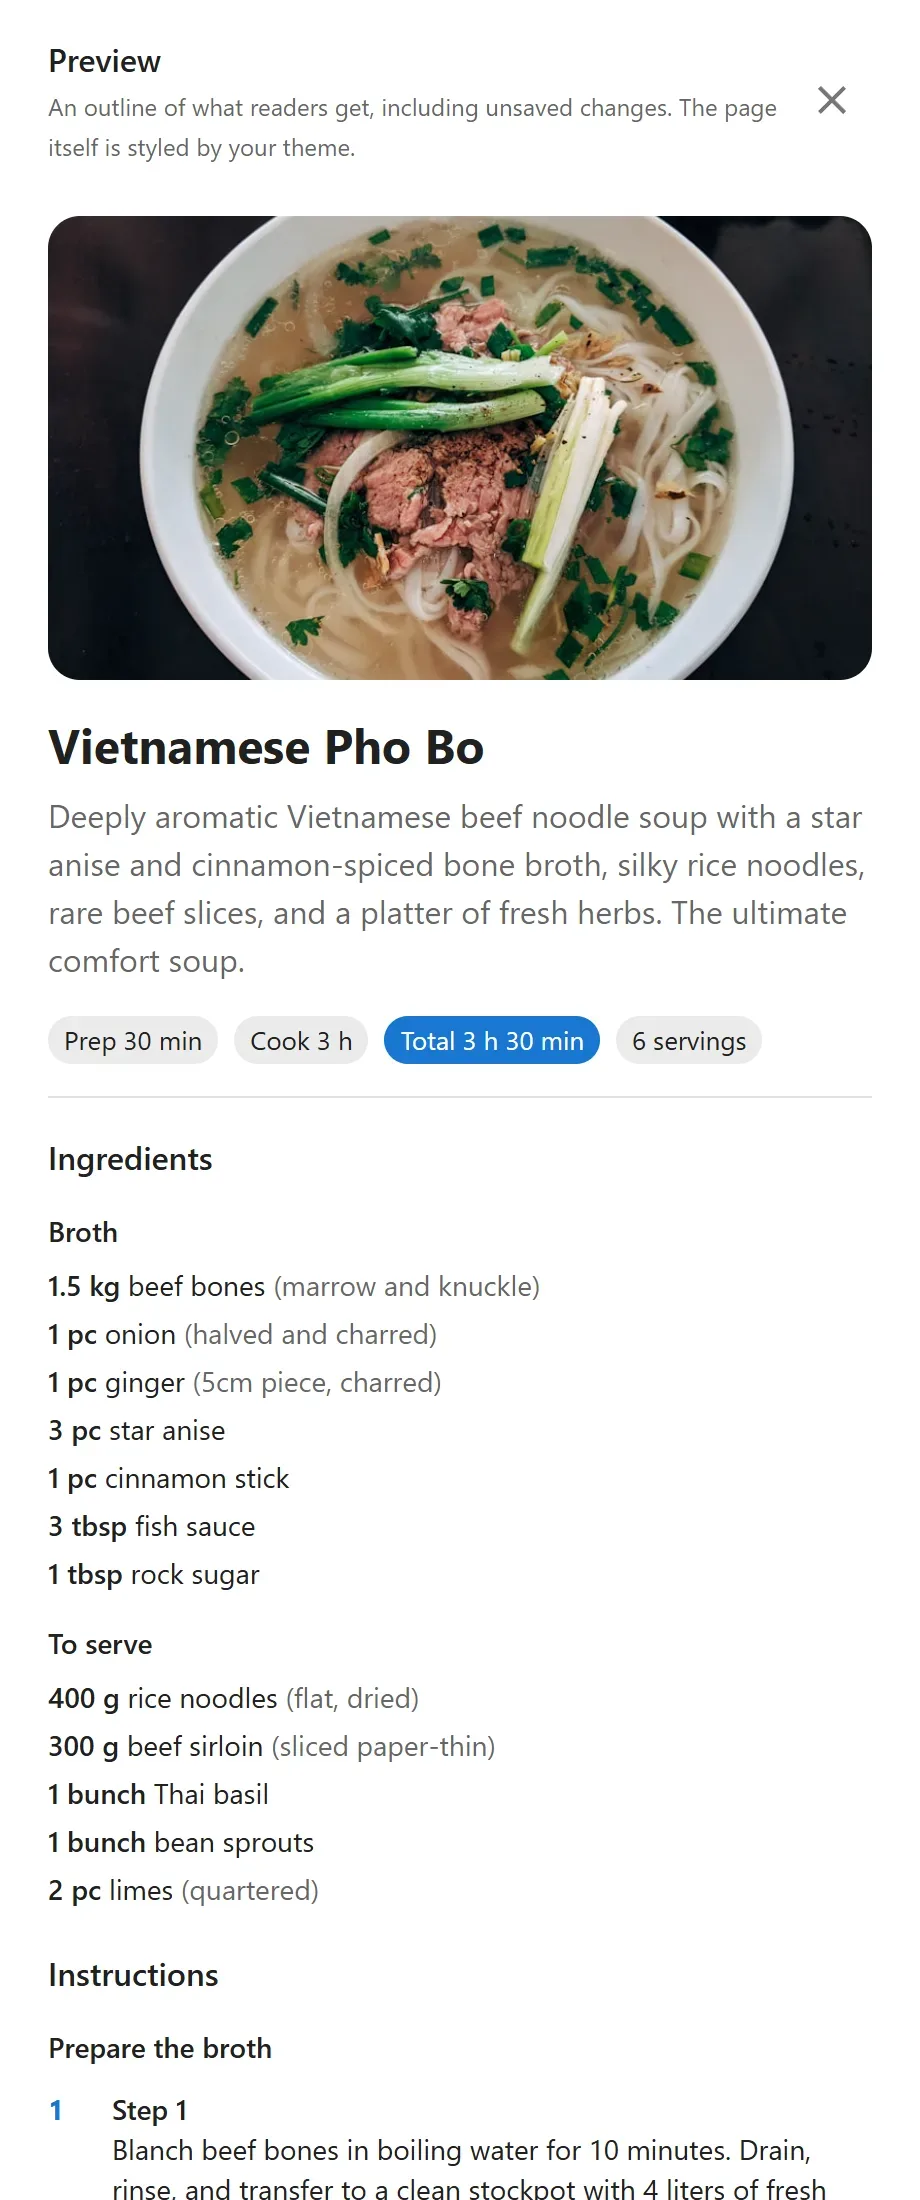
Click Preview at the top of the page to open an outline of what readers will see, including changes you have not saved yet. The recipe page itself is styled by your theme and your View.
Saving and drafts
- Ctrl+S (Cmd+S on a Mac) saves the recipe. Save & close saves it and returns to the list.
- The editor keeps a draft in your browser as you type. If the tab closes before you save, the draft is offered back the next time you open the recipe.
- Leaving the page with unsaved changes asks you to confirm first.
- A save sends the whole recipe in one request. A save that would leave the recipe with no ingredients or no steps is refused, so a slip of the mouse cannot empty a published recipe.
Publishing a recipe, and taking a published one down, needs the WordPress publish capability (Authors and above by default). Contributors can still write drafts and submit them for review.
Related pages
- Recipes Management: the recipe list, filters and bulk actions
- Ingredients and Instructions
- Courses, Categories and Cuisines
- Frontend Submission: the visitor’s version of this editor