

Contents
On this page
Getting started - Plugixa Video
This page takes you from a fresh install to a first video playing on your own site. Each step links to the page that covers it in full.
Requirements
- WordPress 6.9 or higher
- PHP 8.2 or higher
- The WordPress REST API reachable by visitors who are not signed in. The player asks your site for the video through it.
The free plugin plays YouTube and Vimeo links, links to MP4 and HLS files, and MP4 files from your media library, with nothing to install on the server. Uploading files, and converting them into adaptive HLS with FFmpeg, is part of Pro PRO. See Uploading and encoding.
1. Install and activate
- In WordPress go to Plugins -> Add New and search for “Plugixa Video”, or upload the ZIP file with Upload Plugin.
- Click Install Now, then Activate.
Pro comes as its own ZIP file and is installed the same way.
A new item, Plugixa Video, appears in the WordPress menu. Everything in the plugin is inside it: one admin app with its own sidebar, opening on the Videos list.
What activation does
- Creates the plugin’s own database tables and saves the default settings.
- Gives the plugin’s permissions to the Administrator role.
- With Pro PRO, creates two video categories, Movies and Series. They are created once: if you rename or delete them later, they stay that way.
- Asks WordPress to refresh its permalinks, so video pages (
/video/<slug>) and channel pages (/channel/<slug>) work at once, and with Pro, series pages (/series/<slug>). - Opens the setup wizard, if the site has no videos yet and the wizard was never finished or skipped.
Activation does not create any page by itself. The wizard does that, and only when you confirm.
If the licensing opt-in screen appears first, answer it either way: the wizard opens after it. The wizard does not open after a bulk activation, and only for users who may change the plugin’s settings.
2. Run the setup wizard
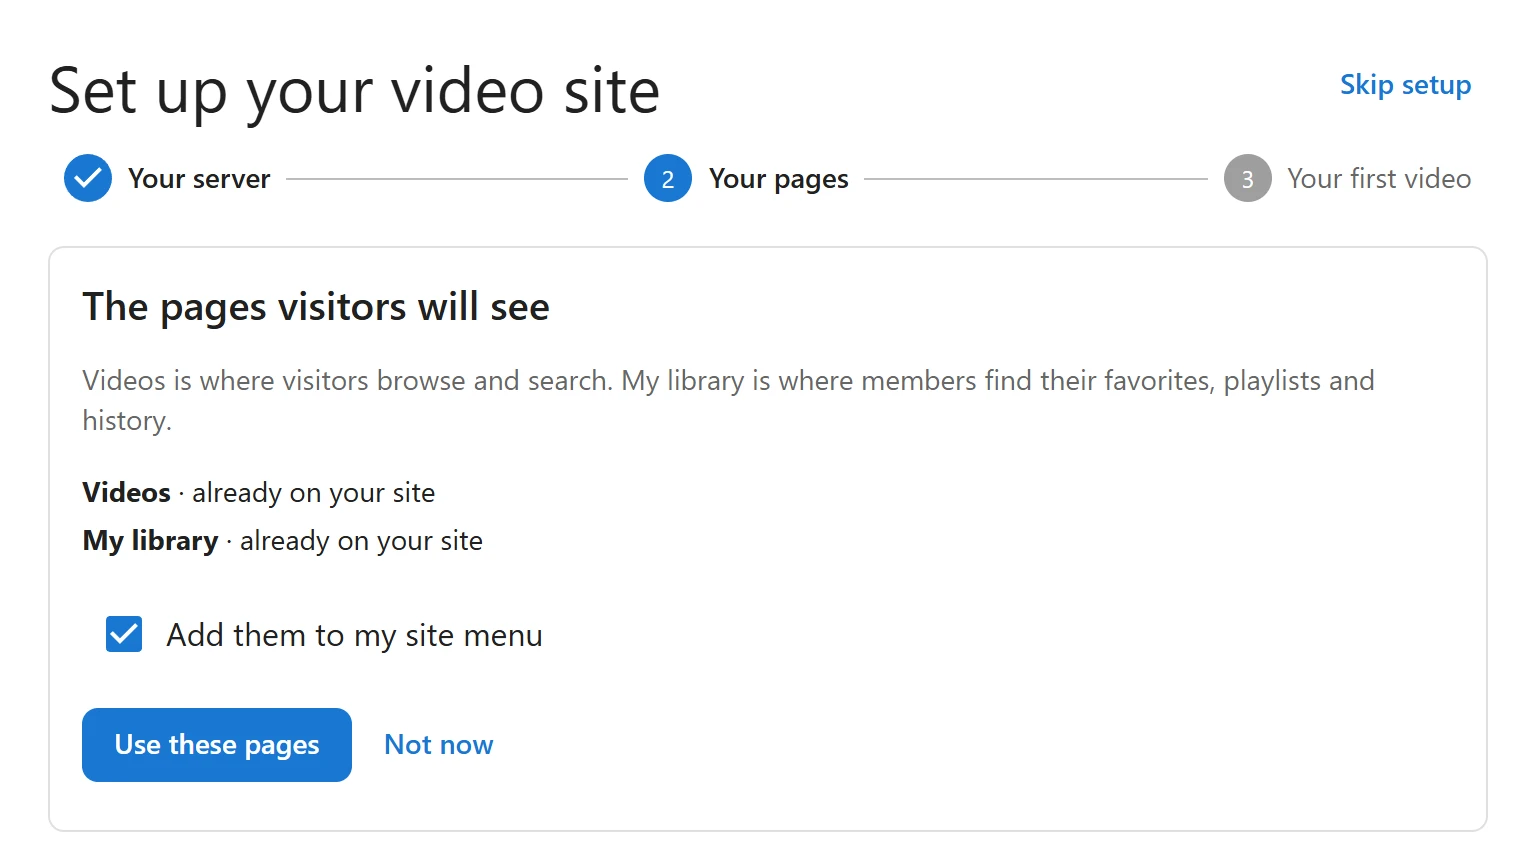
The wizard has two steps, and three with Pro. Skip setup, at the top, leaves it at any
time. You can open it again at Plugixa Video with the address ending in #/setup.
-
Your server PRO: with Pro, a first step says whether your server can convert videos. Either answer is fine. Click Continue.
-
Your pages: the public pages visitors will see:
Page Shortcode What it is Videos [pvx_browse]Where visitors browse and search My library [pvx_library]Where members find their favorites, playlists and history. Offered while the Viewer library app is on. Each line says whether the page is already on your site or will be created. A page counts as already there when it is the page set in Settings, or a published page holding that shortcode. Click Create pages (or Use these pages when both exist), or Not now.
With Add them to my site menu ticked, the wizard adds the pages to your menu. On a classic theme it uses the menu of the first menu location that has one, and never creates a menu. On a block theme it adds them to your saved navigation, or tells you the theme lists new pages by itself.
-
Your first video: click Use a YouTube or Vimeo link to open a new video form, or Finish, I will add videos later. With Pro, you can also drop a video file to upload it PRO.
Running the wizard again never creates a second copy of a page or a menu item. New pages are published and, on a block theme, get the Video: Full-width page template.
3. Add your first video
- Open Videos and click New video.
- Type a Title.
- Under Video, choose how the video plays:
- Upload a file PRO: drop a file, or click Choose a file. The video is saved as a draft and the file uploads at once.
- YouTube or Vimeo: paste the link. The title, description, length and poster are filled in for you. See Video sources.
- Link to a video file: an MP4 or an HLS stream (
.m3u8), or pick an MP4 from your media library with Library.
- Under Access, keep Free for everyone, or choose Members for signed-in users only. See Access control.
- Set Status to Published and click Save.
A video cannot be published or unlisted until it has a file or a link. With Pro, an uploaded file is not playable the moment it arrives: tick Publish automatically when the video is ready in its Video file panel and it goes live by itself. See Uploading and encoding.
4. Watch it on your site
A published video has its own page at once. Click View at the top of the form, or the open icon in its row of the Videos list.
To put the player on any other page or post:
-
Copy the shortcode from the Shortcode column of the Videos list, or from the box at the bottom of the video form:
[pvx_video id="123"] -
Paste it into the page. In the block editor you can use the Plugixa Video block instead and pick the video.
-
Add
autoplay="true"to start playing as soon as the page loads. Browsers may only allow that for a muted video.
See Shortcodes, Blocks and, if you build with Elementor, Elementor.
5. Follow the getting-started list
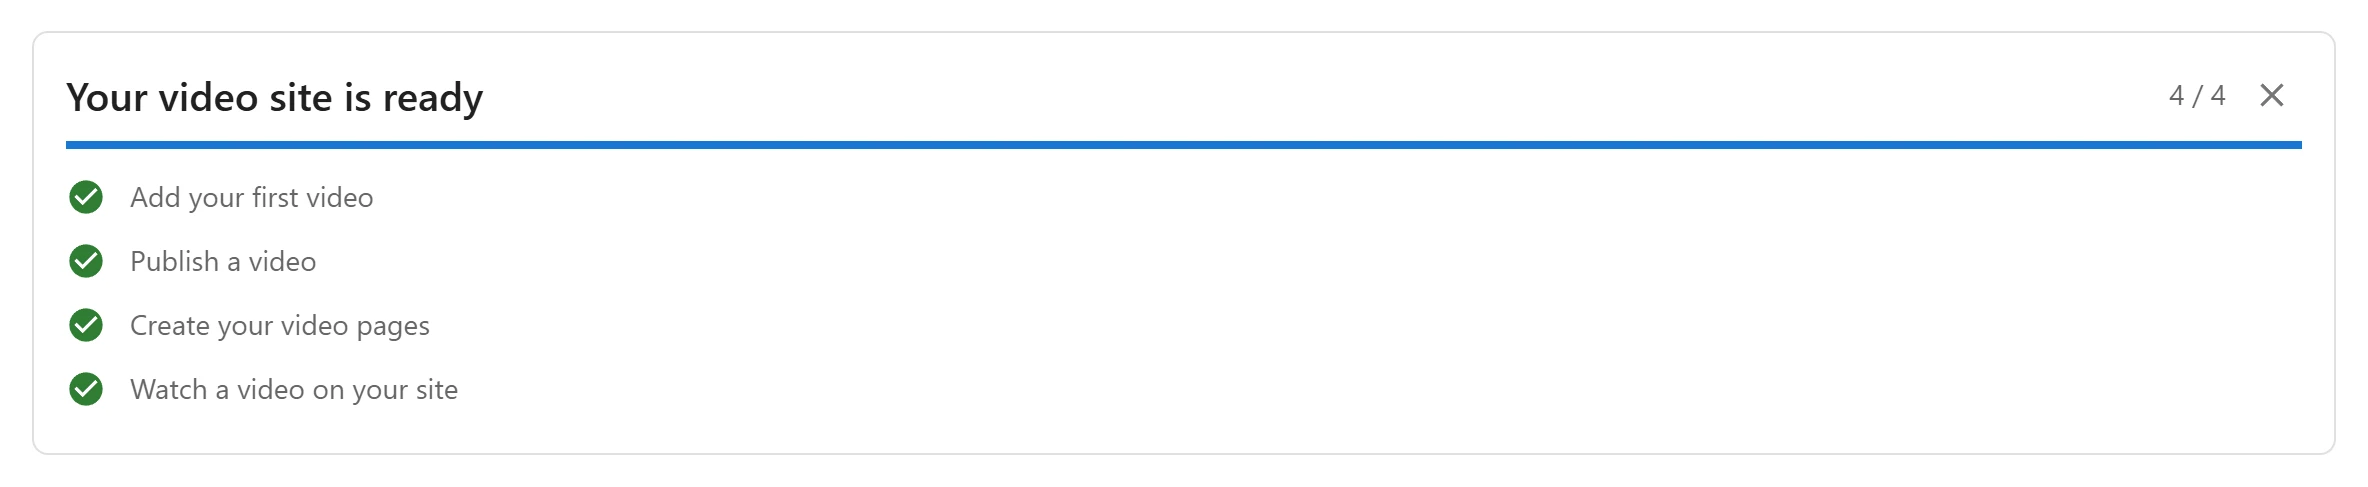
Until you hide it, a Get started list sits above the Videos list for users who may change settings. It has four steps, each read from your site as it is now:
| Step | Done when |
|---|---|
| Add your first video | The site has a video in any status |
| Publish a video | A video is published |
| Create your video pages | The wizard’s pages exist |
| Watch a video on your site | A published video has been viewed |
The next open step shows a button that takes you there. The cross at the top right hides the list.
What to do next
- Organize the library with Channels, Movies and series PRO and Categories and tags.
- Make Playlists for your browse page.
- Check the width and colors in Appearance.
- Switch off what you do not use in the App manager.
- See what Pro adds: Free vs Pro.
Quick Links
Share