

Contents
On this page
Getting started - Plugixa Stream
This page takes you from a fresh install to a series playing on your site. It takes a few minutes once your video files are in the Media Library or online.
Requirements
| What | Version |
|---|---|
| WordPress | 6.7 or higher, tested up to 7.1 |
| PHP | 8.2 or higher |
The viewer app loads its series and episodes from the WordPress REST API, so the REST API must answer visitors who are not signed in. A security plugin that blocks it for guests stops the app from loading.
1. Install and activate
- In WordPress, open Plugins > Add New Plugin and click Upload Plugin.
- Choose the plugin ZIP file and click Install Now.
- Click Activate.
A Plugixa Stream menu appears in the WordPress sidebar. It opens the admin app on its Dashboard.
If you bought Pro, install the Pro ZIP the same way. Pro is a second copy of the plugin that takes over from the free one and keeps all your series, episodes and viewer data. When both copies are active, only one runs and WordPress shows a notice asking you to deactivate the one you no longer need.
What activation sets up
Activation does four things, and running it again never duplicates any of them:
| What | Details |
|---|---|
| Database tables | Tables for viewing progress and viewers’ lists, named with your table prefix and plugixastream_. Series and episodes themselves are WordPress posts. |
| The Watch page | A published page called Watch, at /watch/, holding the [plugixa_stream_app] shortcode. It is only created when no page has the shortcode yet. |
| Capabilities | The administrator role gets the Plugixa Stream capabilities to view, create, edit and delete titles and to manage settings. No new role is created. |
| Permalinks | The rewrite rules are refreshed so series pages (/series/<slug>/), episode pages (/episode/<slug>/) and the browse page (/series/) work at once. |
The Watch page is shown full-screen, without your theme’s header, footer or styles: the viewer app is the whole page. You can pick another page under Settings > General > Watch page. See Settings and The watch app.
Until you change them, the home screen has two rows, Trending now and New releases, and the first 5 episodes of every series are free.
2. Create your first series
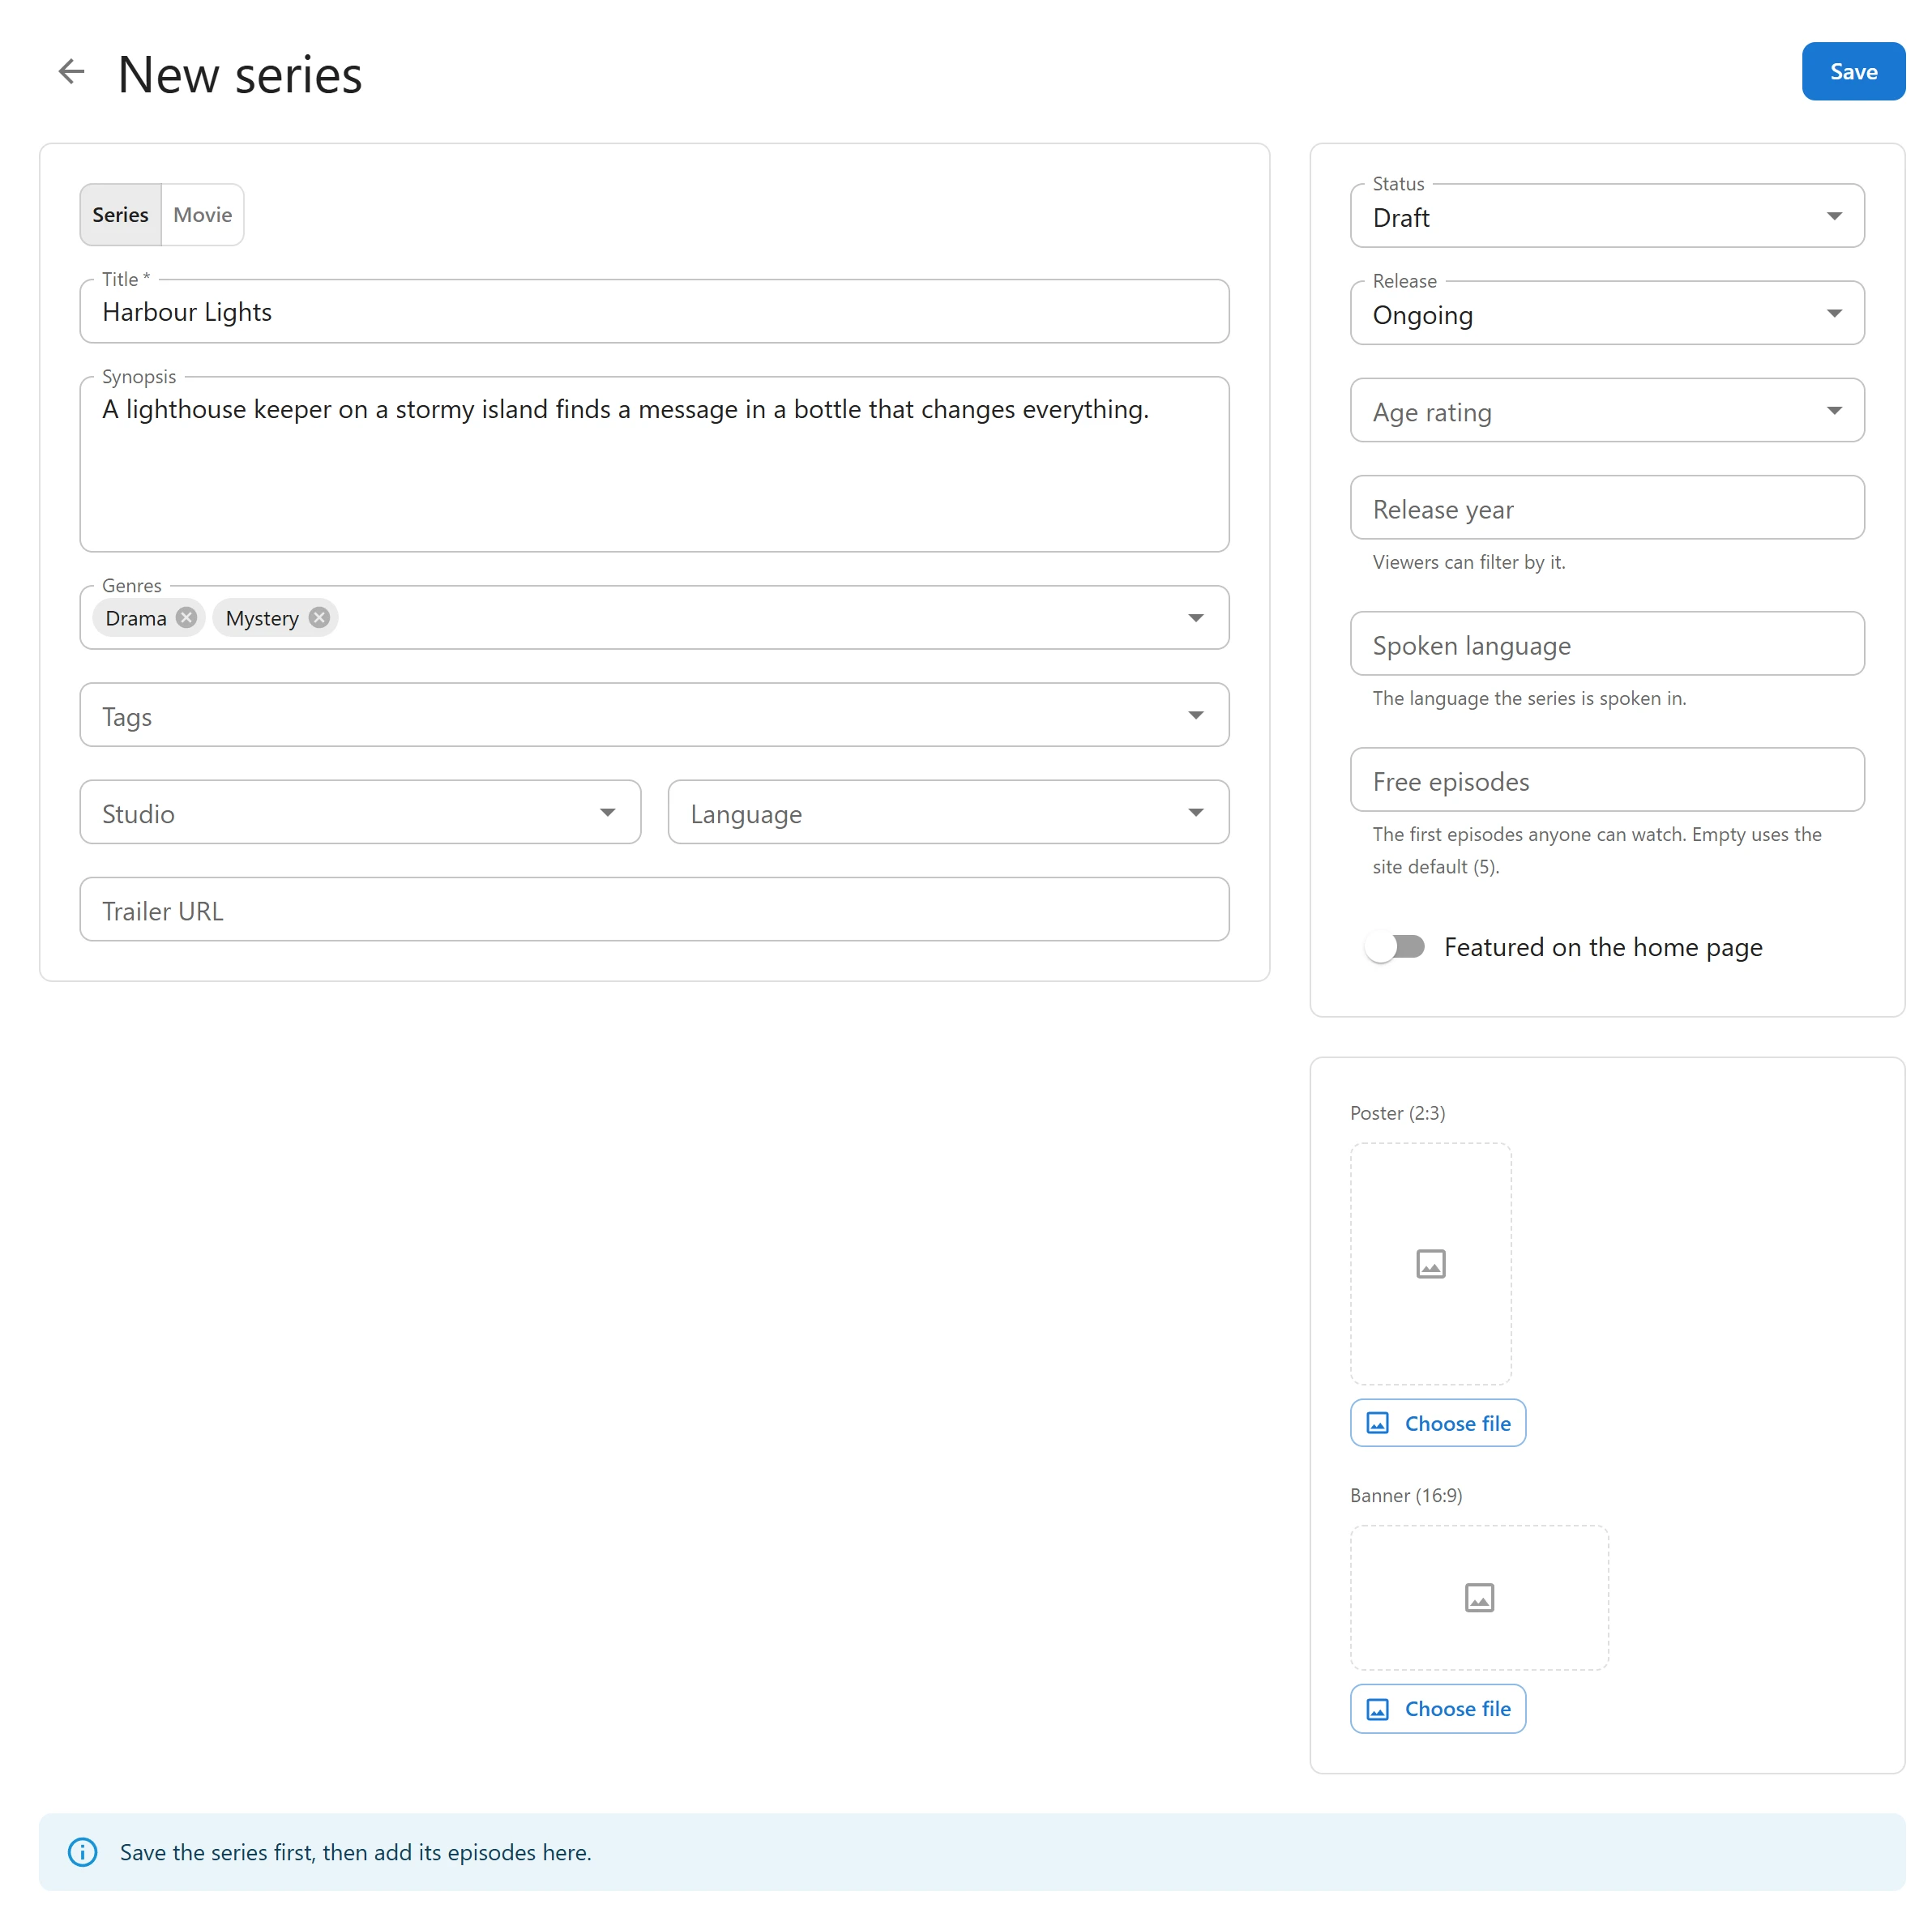
- Open Plugixa Stream > Series & movies and click New series. For a film, click New movie instead.
- Type a Title and a Synopsis.
- Pick Genres. To add a genre that does not exist yet, type its name and choose Add “…”.
- Under Poster (2:3), choose a portrait image. Under Banner (16:9), choose a wide one for the featured carousel.
- Set Status to Published.
- Leave Free episodes empty to use the site default (5), or type how many opening episodes anyone may watch.
- Click Save.
Every field is explained in Series and movies.
3. Add episodes
Once the series is saved, the Episodes panel appears under the form.
- One at a time: click Add episode, choose the video and click Save.
- A whole season: click Add from library, select every episode file in the Media Library and click Add episodes. One draft episode is created per file.
An episode plays only when both the episode and its series are Published. Episodes added from the library are drafts: open each one and set Status to Published, or publish them when you are ready. See Episodes and Video sources.
A movie has no Episodes panel. Its Video panel holds its one video: click Add the video.
4. Open the Watch page
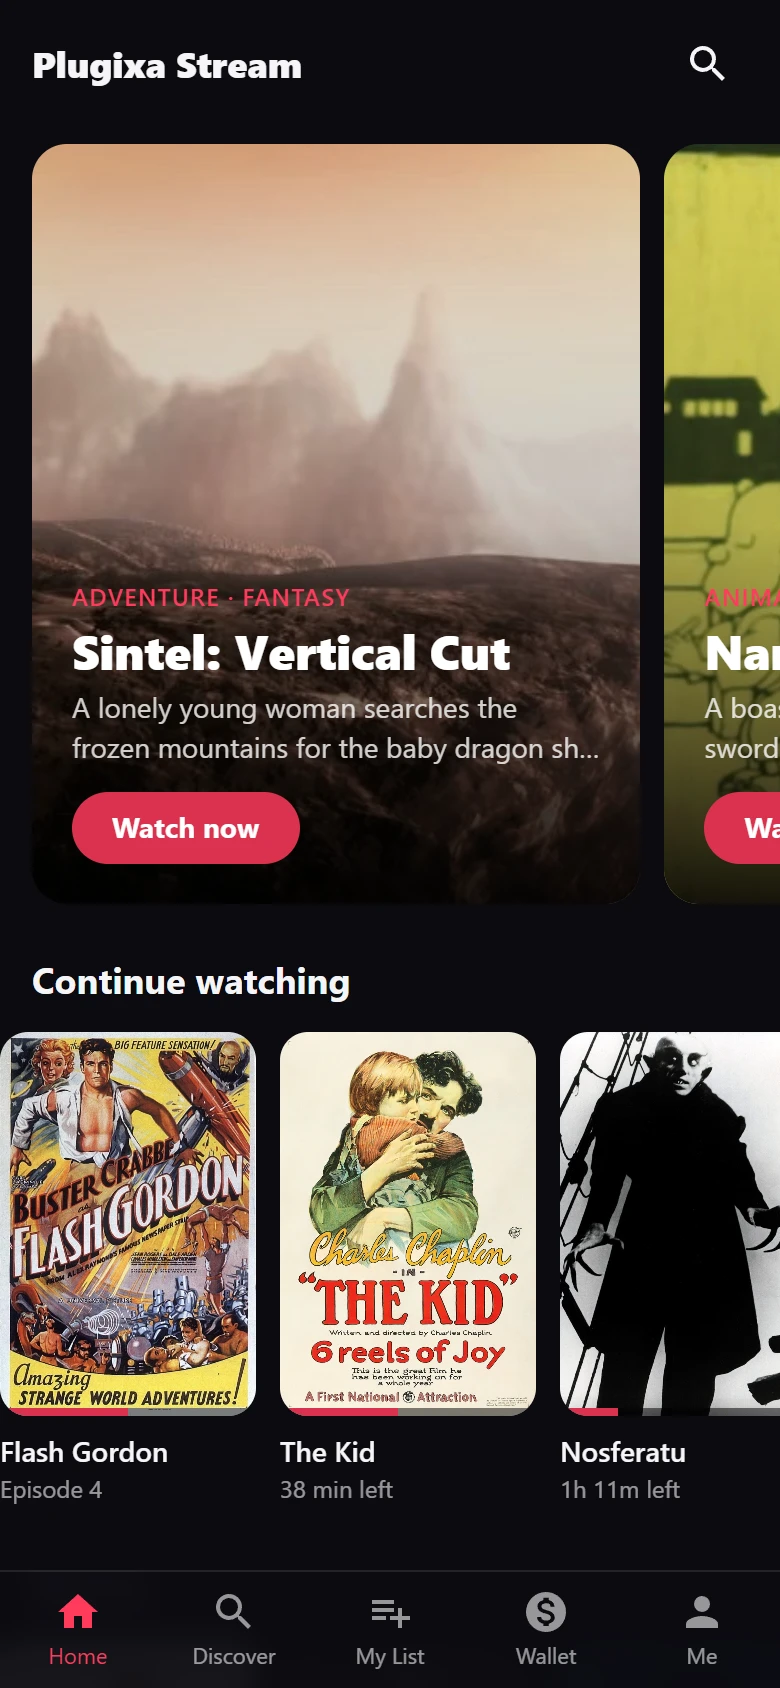
Open /watch/ on your site, or click Open the watch page at the top of the Dashboard.
Your series appears in the New releases row. Open it to see its episodes, then play the
first one. On a touch screen, swipe up for the next episode.
Each series also has its own page at /series/<slug>/, which search engines index. Click
View page at the top of the series form to open it. See
SEO.
What to do next
- Arrange the home screen in Home rows.
- Set your brand colours and logo in Appearance.
- Put rows and series cards on other pages with Shortcodes or Blocks.
- Move a catalogue in or out with Import and export.
- See what Pro adds: Free vs Pro.
Quick Links
Share