

Contents
Getting started - Plugixa Exam
This walks from a clean WordPress install to an exam a real person can sit. It takes about ten minutes, and nothing has to be configured first.
Install
From a ZIP
- In wp-admin, go to Plugins -> Add New -> Upload Plugin.
- Choose
plugixa-exam-free-1.0.0.zip(or the premium build) and install it. - Activate.
By hand
Unzip the plugin into /wp-content/plugins/ so the main file sits at
/wp-content/plugins/plugixa-exam/plugixa-exam.php, then activate it from
Plugins.
Free and premium are separate downloads, not a switch. The premium build is the free plugin plus a
pro/directory. Nothing in the free build is disabled, and it contains no premium code to unlock, so there is nothing to “upgrade” in place: you install the other ZIP over the top.
What activation does
- Creates the plugin’s own database tables, all prefixed
{wp_prefix}plugixa_exam_. They are removed on uninstall. - Seeds five roles (Exam Admin, Author, Grader, Proctor, Viewer). See Roles and Permissions.
- Seeds five email templates, which send as plain text until you switch one to HTML. See Notifications.
- Registers the front-end routes under
/exams/and the learner portal at/my-exams/.
If the front-end URLs 404 immediately after activating, visit Settings -> Permalinks once to flush the rewrite rules. That is a WordPress behaviour, not a plugin one.
The admin
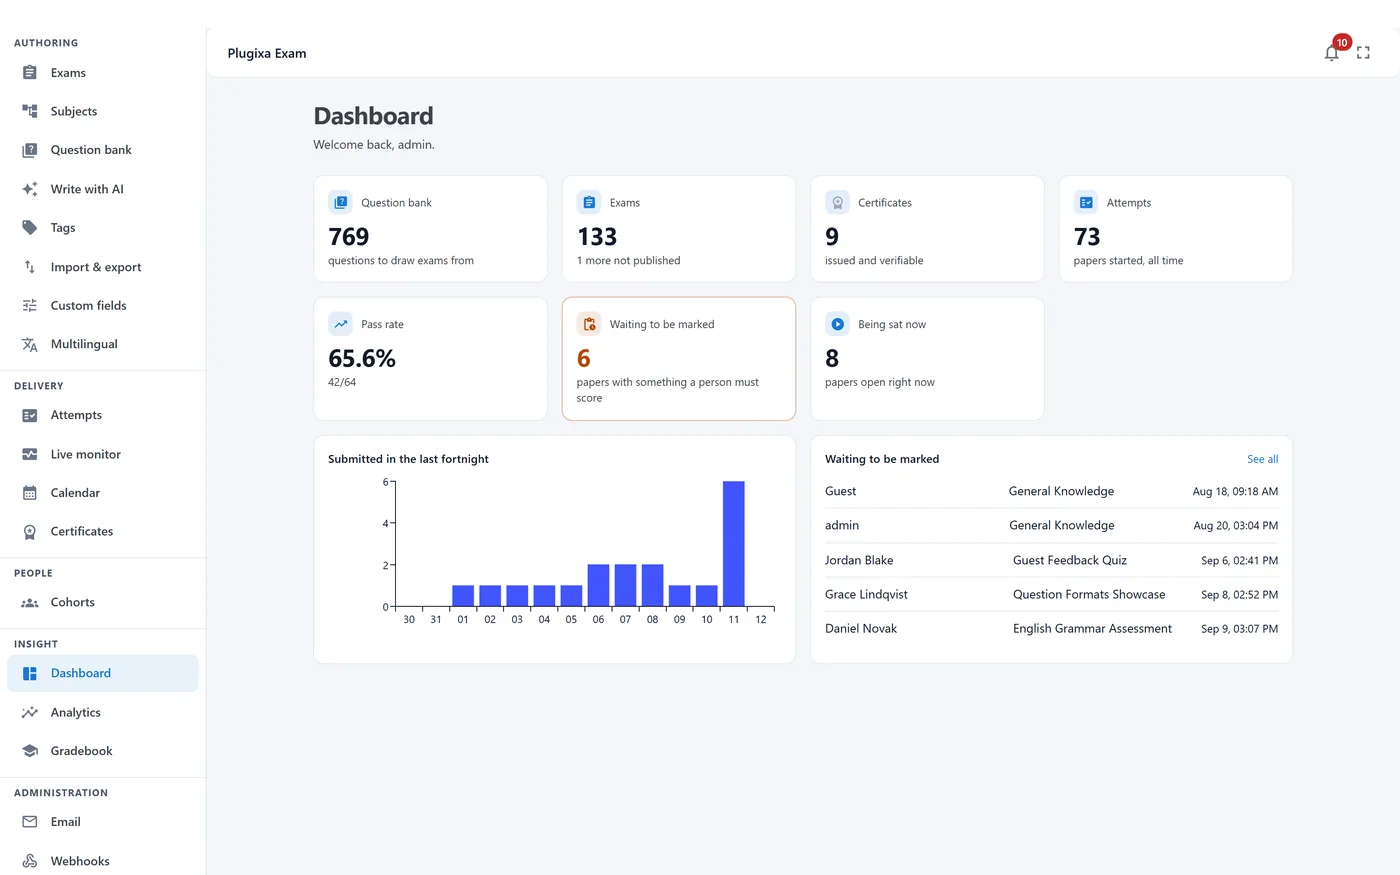
Everything lives under one menu item, Exams, as a single-page app with its own navigation rather than a long list of WordPress submenus.
| Screen | What it is for |
|---|---|
| Dashboard | Recent activity, attempts needing marking, what is open now |
| Question bank | Writing and organising questions |
| Subjects | The subject tree questions hang from |
| Tags | Free-form labels that pools can select on |
| Exams | Building exams out of sections |
| Attempts | Every sitting, and the marking queue |
| Calendar | What is open, opening or closing, by date |
| Import & export | Moving the question bank in and out |
| The notification templates and the sending queue | |
| Roles | Who can do what |
| Settings | General, Pages, and the App Manager |
Your first exam
1 - Create a subject
Go to Subjects and add one, for example Mathematics. Subjects nest, so you can add Algebra underneath it later.
A subject is not just filing. Results break down by subject, so a candidate’s report can say where they were weak, and a pool can say “two questions from Algebra”.
2 - Write a few questions
Go to Question bank -> Add question. Pick a type, write the stem, mark the correct answer, and save.
Two fields are worth filling in even on your first attempt:
- Explanation - shown after marking, if the exam reveals answers. This is where a question stops being a score and starts being teaching.
- Points - the question’s default. An exam can override it.
Write five or six before moving on, so the next step has something to work with.
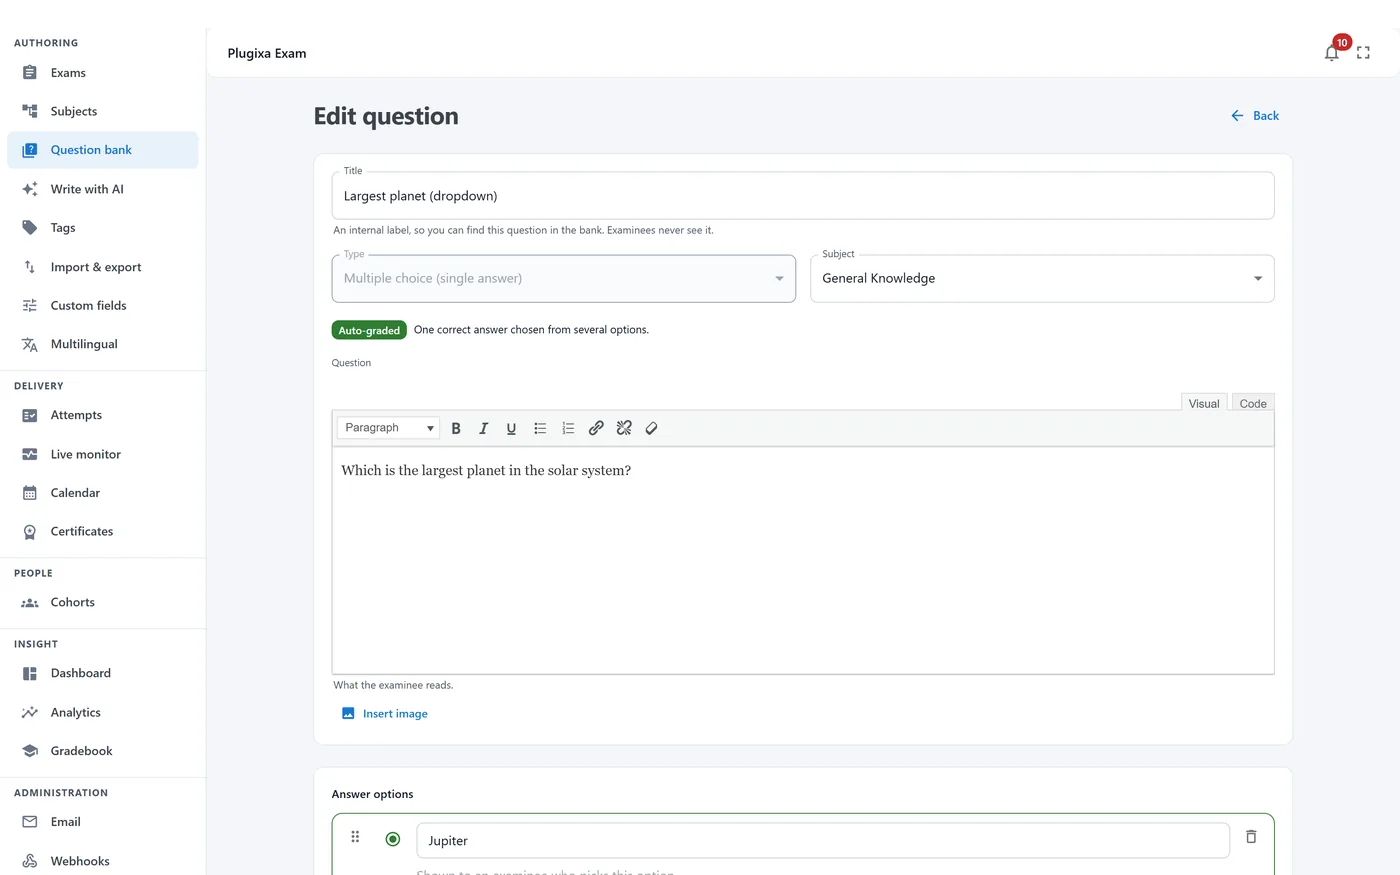
Mark a correct answer. A question saved with nothing marked correct renders perfectly and marks every candidate zero. The editor warns about it; the warning is worth reading.
3 - Build the exam
Go to Exams -> Add exam. Give it a title, then add a section.
A section is either:
- a fixed list - you pick the questions, everybody sees the same ones; or
- a pool - you give the rules (subject, tag, difficulty, type, how many) and each candidate draws their own.
For a first exam, one fixed section is fine. Then set:
| Setting | Suggested first value |
|---|---|
| Time limit | 0 for untimed while you are testing |
| Pass mark | 50% |
| Access | Open, so you can try it while signed out |
| Result release | Immediately |
| Max attempts | 0 for unlimited while testing |
Publish it.
4 - Sit it yourself
Open the exam’s page on the front end and press Start. Answer a couple of questions, submit, and look at the result.
Do this signed out, in a private window. It is the quickest way to catch the two things that surprise people most: an access mode that is stricter than you meant, and a result release policy that withholds the score you expected to see.
Where things are on the front end
| URL | What it shows |
|---|---|
/exams/ |
The catalogue of published exams |
/exams/<slug>/ |
One exam’s page, with the Start button |
/exams/<slug>/take/ |
The runner itself |
/result/<id>/ |
One result |
/my-exams/ |
The learner portal: assigned, scored, earned |
/verify/<token>/ |
Public certificate verification |
The base segment exams is filterable, and all six routes answer under a
language prefix on a multilingual site.
What to do next
- Understand what happens during an attempt in Exam Runner.
- Let each candidate draw a different paper with Sections and Pools.
- Decide who can sit it in Access and Enrollment.
- Put the catalogue on a page of your own with Shortcodes or Blocks.